YSM10_Mainte_E.pdf - 第64页
2-5 2 Daily maintenance items 1.2 Checking the nozzles visually T o visually check nozzles, remo ve each nozzle from the head or from the nozzle station. n NOTE As for a simple method, check the nozzle attached to the he…
2-4
2
Daily maintenance items
1.1.1 Vacuum level when nozzle is open
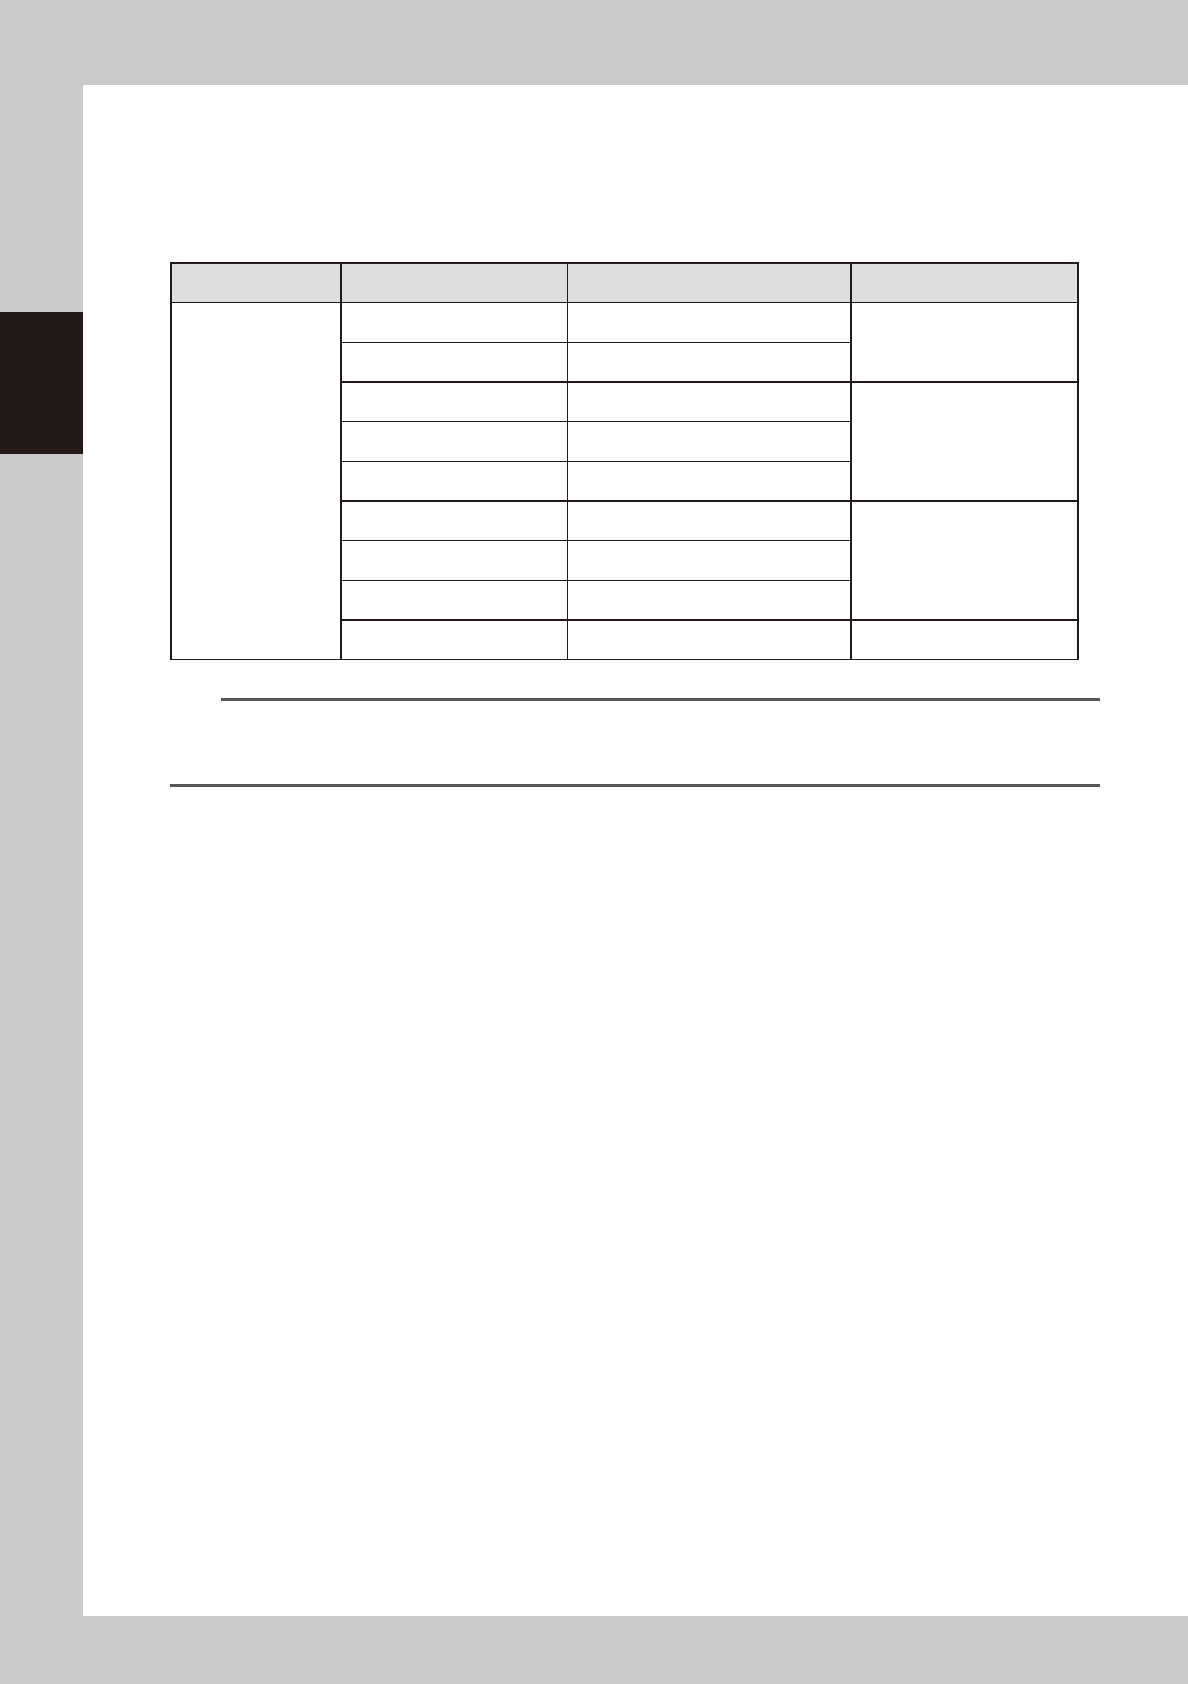
The table below shows the vacuum level measured when each nozzle is open.
The values might differ slightly depending on the air source and operating conditions. Use these values for
reference during maintenance.
n
Standard vacuum level when nozzle is open
Head Type Nozzle Standard value when nozzle is open Remarks
Common to HM /
HM5 head units
Type301A 150 to 190
Standard nozzle
Type302A 60 to 110
Type311A 150 to 190
Narrow-pitch nozzleType312A 130 to 180
Type313A 40 to 80
Type303A/Type314A* 40 to 80
Standard and Narrow-pitch
common nozzle
Type304A/Type315A* 30 to 60
Type307A/Type318A* 30 to 60
No nozzle 30 to 60
n
NOTE
The nozzle holes of the nozzles marked with an asterisk are larger than those of other nozzles. If a nozzle marked with
an asterisk exceeds its standard value shown above, the air path in the head (spline shaft, etc.) may be
contaminated.
2-5
2
Daily maintenance items
1.2 Checking the nozzles visually
To visually check nozzles, remove each nozzle from the head or from the nozzle station.
n
NOTE
As for a simple method, check the nozzle attached to the head with a mirror or similar tool.
n
Points to check the removed nozzles
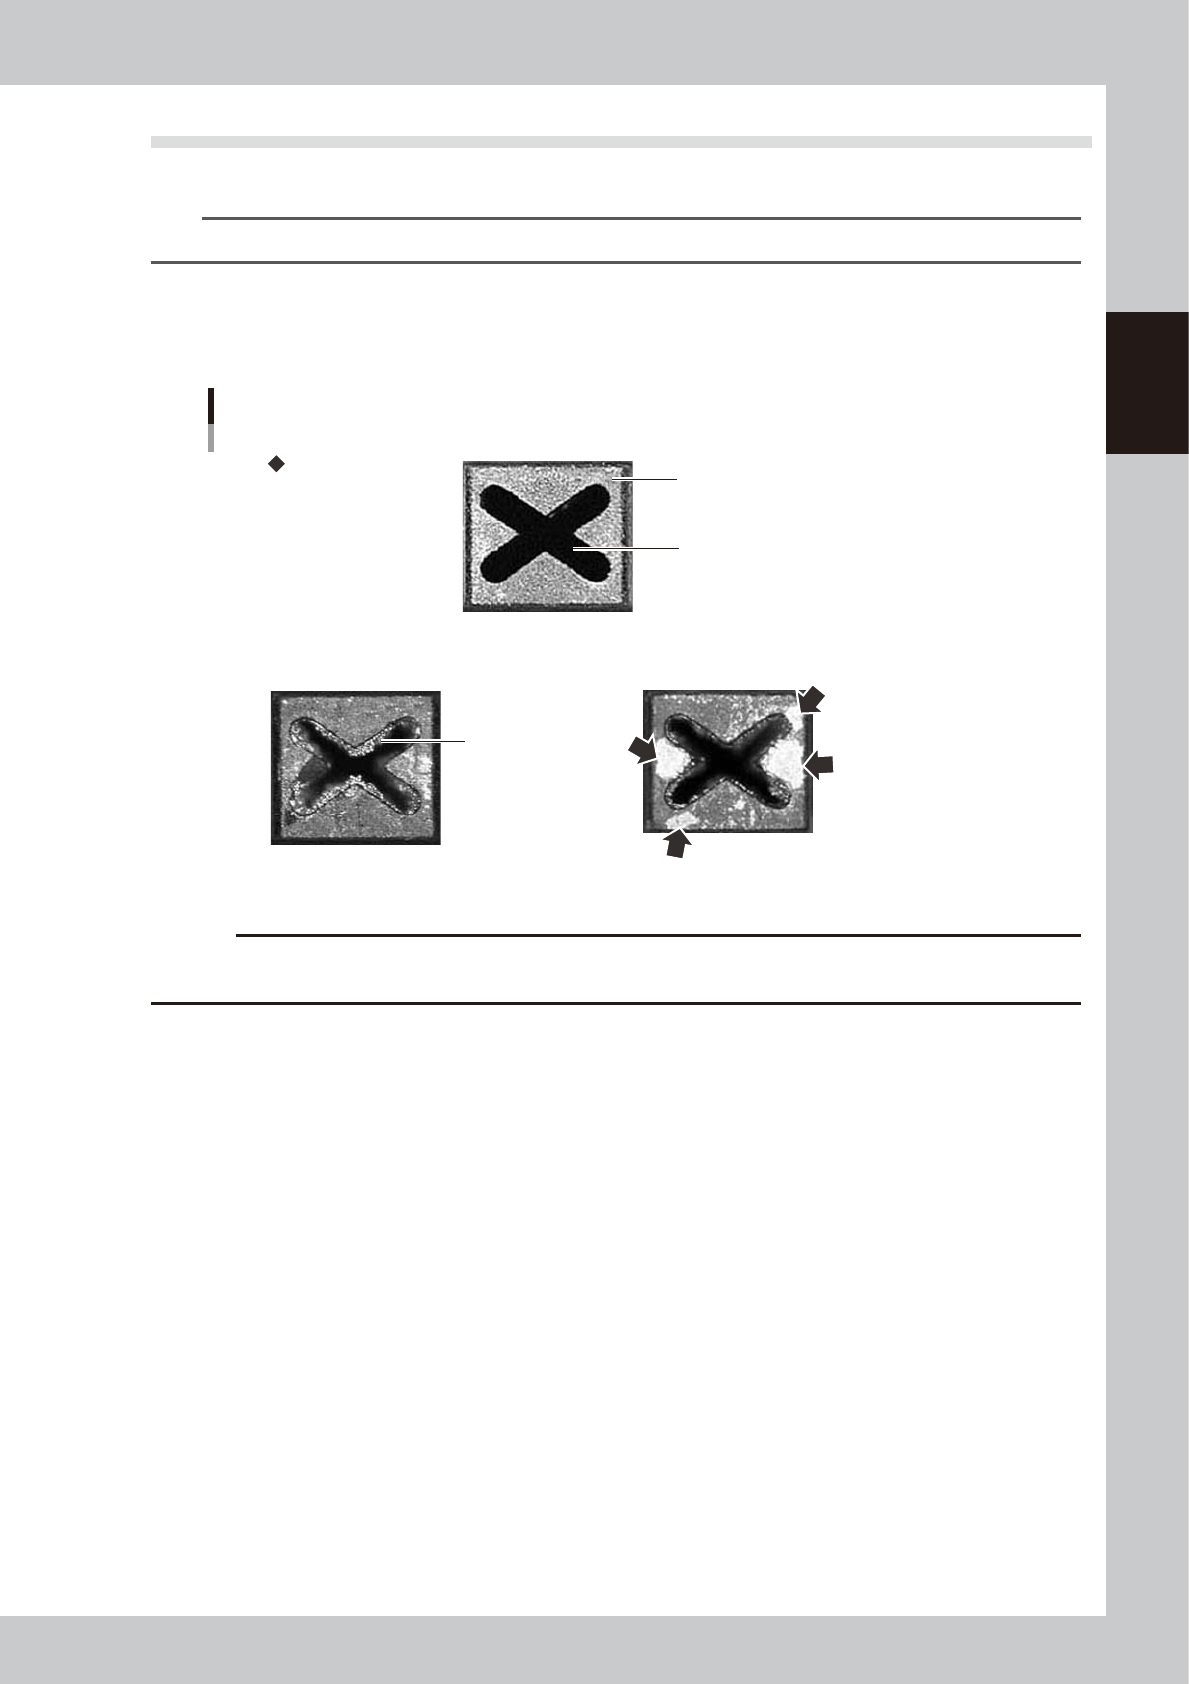
Check the removed nozzles with a magnifying glass or similar tool.
If any solder or contaminant sticks to the nozzle tip or nozzle hole, clean the nozzle.
Nozzle tip
Solder is adhering to
nozzle hole.
Solder is adhering to
nozzle tip (flat surface).
Nozzle hole
Checking the nozzle condition
Fail: Nozzle is clogged. Fail: Shiny material is on tip.
Normal condition
53200-KMG-00
c
CAUTION
If the above check reveals a clogged or dirty nozzle, clean the nozzle hole or nozzle tip by referring to section "1.2
Nozzle cleaning" in Chapter 3.
n
Checking nozzles by removing them from the head
1. Move the head to a position where the nozzles can be easily removed, then remove each nozzle by hand.
2. After checking and cleaning the nozzle, reattach the nozzle to the head while making sure the head position and the
nozzle's orientation are correct.
n
Checking nozzles by removing them from the nozzle station
1. Return all nozzles in the nozzle station.
2. On the [Unit] - [Head] tab screen, press the [Nozzle Stn Shutter] button to allow the nozzles to be removed from the
nozzle station, then remove each nozzle by hand.
3. Check and clean the nozzle.
4. Return the nozzle back at the nozzle station and press the [Nozzle Stn Shutter] button again.
2-6
2
Daily maintenance items
2. Cleaning the feeder plate
If any chip or foreign object falls onto the feeder plate, it may be caught in when setting the feeder, causing
the pickup position to deviate. Therefore it is recommended to inspect and clean portions around the feeder
plate periodically.
n
Cleaning with vacuum cleaner
Suck up fine particle dust with a household vacuum cleaner.
n
Cleaning with vacuum assembly
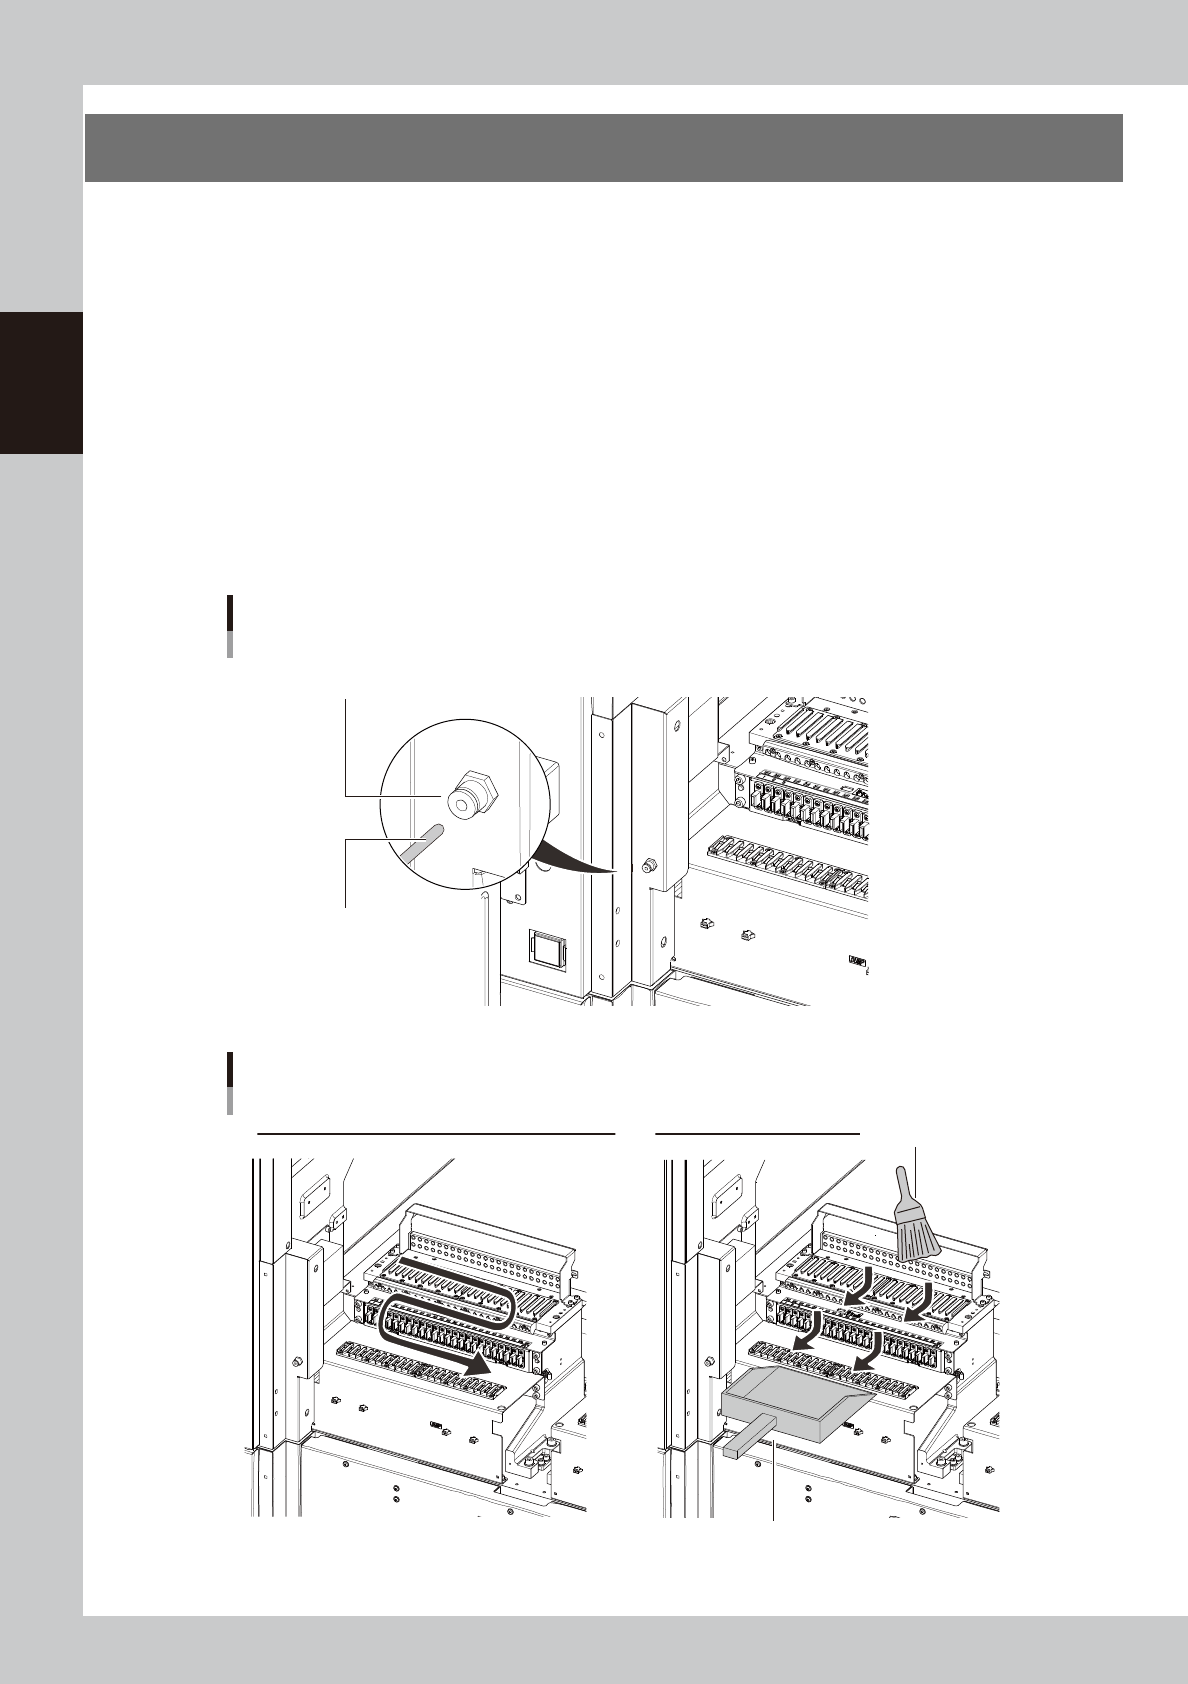
1. Connect the hose of the optional vacuum assembly (KHY-M88V0-A0X) and the air connectors on the left and right of
the feeder bank.
2. Suck up fine particle dust with the vacuum assembly.
n
Cleaning with feeder plate cleaning brush
Sweep out the dust with the feeder plate cleaning brush supplied with the machine in the arrow directions shown in the
figure below. Sweep the dust into a dustpan etc and dispose of it.
Connecting the vacuum assembly
Hose of vacuum assembly
Air connector
53201-KMG-00
Cleaning the feeder plate
Cleaning with vacuum cleaner (Vacuum assembly) Cleaning with cleaning brush
Sweep the dust into a dustpan etc.
Cleaning brush
53202-KMG-00