Nordson_EFD_Automated_Dispensing_Systems_Maintenance_Guide.pdf - 第5页
5 www.nordsonefd.com info@nordsonefd.com +1-401-431-7000 Sales and service of Nordson EFD dispensing systems are available worldwide. Automated Dispensing Systems Maintenance & Parts Guide Linear Guideway Cleaning: X…
Automated Dispensing Systems Maintenance & Parts Guide
4 www.nordsonefd.com info@nordsonefd.com +1-401-431-7000 Sales and service of Nordson EFD dispensing systems are available worldwide.
Exterior Cleaning
CAUTION
Do not use an air gun to clean the exterior of the robot. Doing so can blow debris into the robot.
1. Switch OFF power to the robot and disconnect the power cord.
2. Use a clean, dry, nonwoven cloth to carefully clean the exterior surfaces of the robot and its components.
Linear Guideway Cleaning: XAxis
CAUTION
Risk of injury or equipment damage. Before performing any service procedure, complete the steps under
“Preparation for all Service Procedures” on page3.
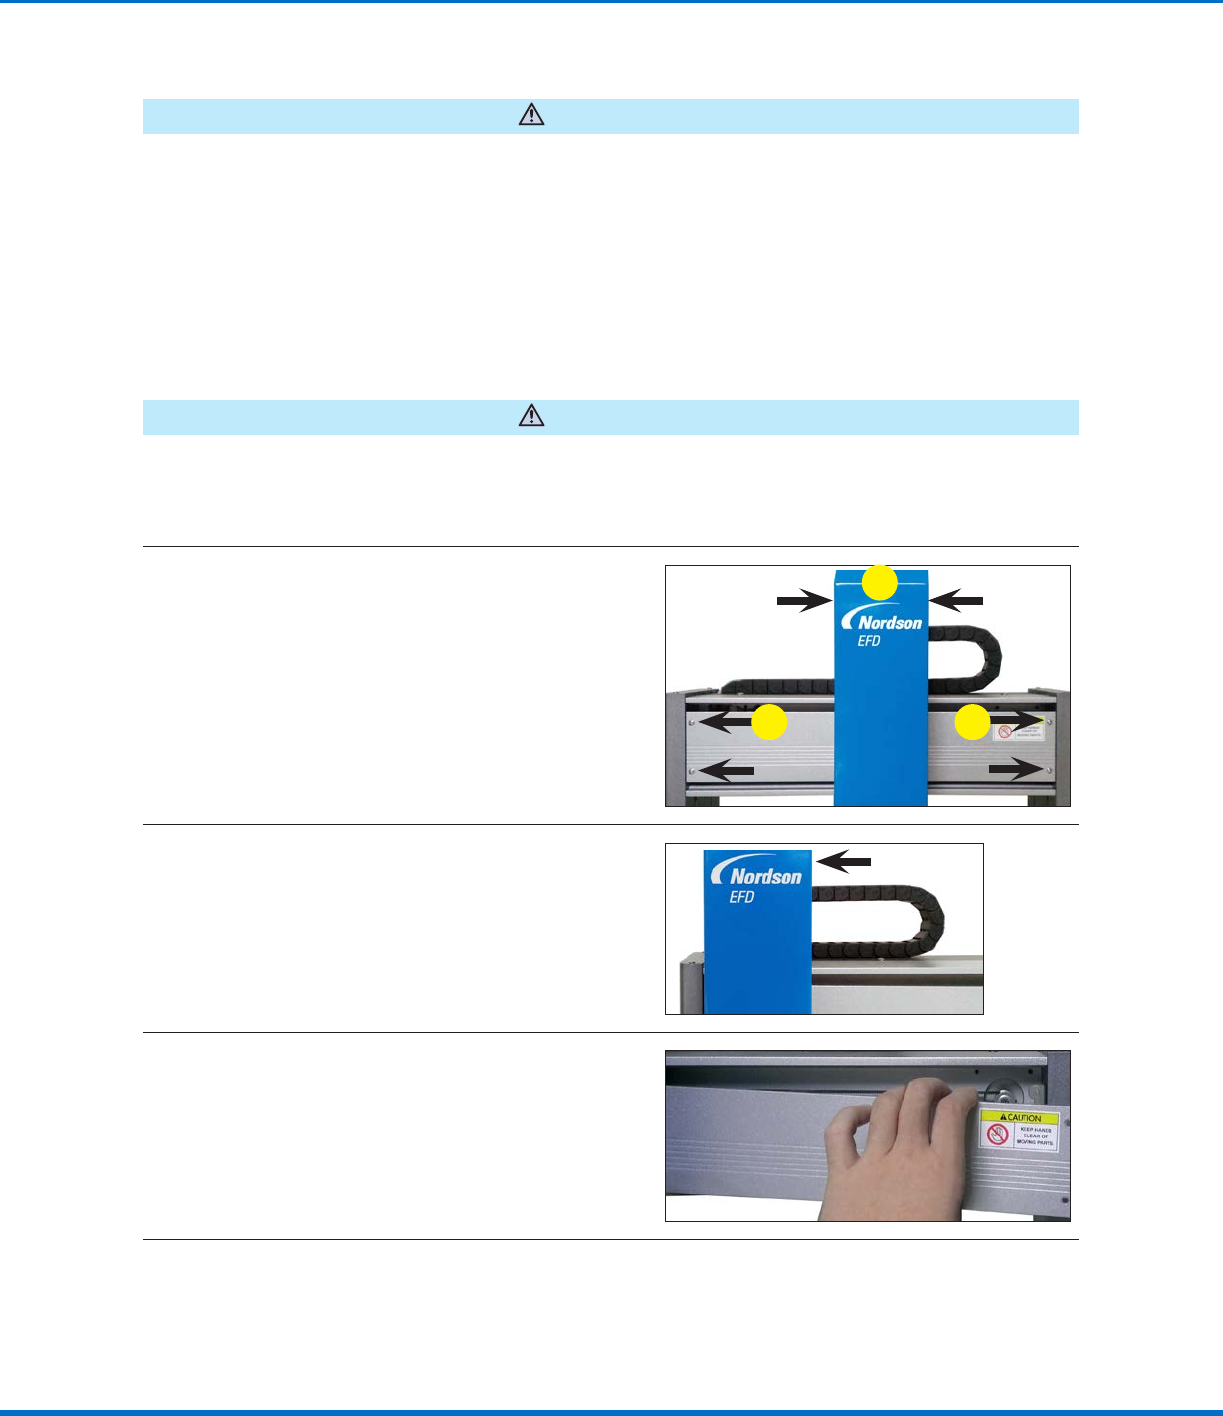
Remove the XAxis Front Cover
1
a. Move the Zaxis module to the center of the
Xaxis.
b. Remove the four (4) screws that secure the
Xaxis front cover.
a
bb
2
Move the Zaxis module to the left side of the
Xaxis.
3
Carefully pull the Xaxis front cover until it is
slightly open and then pull it away from the
Xaxis. Avoid contact between the Xaxis front
cover and the Zaxis module.
Continued on next page
5www.nordsonefd.com info@nordsonefd.com +1-401-431-7000 Sales and service of Nordson EFD dispensing systems are available worldwide.
Automated Dispensing Systems Maintenance & Parts Guide
Linear Guideway Cleaning: XAxis (continued)
Clean and Grease the XAxis Linear Guideway
CAUTION
PROPlus / PRO Series units have magnetic strips.
Use only a clean nonwoven cloth for cleaning. Do
not use any oil or chemical liquid on magnetic strips.
Also, do not position any magnetic component near
the strips.
4
• Use a clean nonwoven cloth to clean any
dust and grease from the Xaxis linear
guideway.
• Move the Zaxis module right and left to clean
previously inaccessible areas of the Xaxis
linear guideway.
NOTE: Some units have two linear
guideways.
Unit with one X axis linear
guideway (typical)
PROPlus X axis
linear guideways
Unit with two X axis linear
guideways (typical)
5
• Use the brush and grease from the
maintenance grease kit to liberally apply
grease to the Xaxis linear guideway. Move
the Zaxis back and forth to spread the
grease evenly and to ensure the slide travels
smoothly on the Xaxis linear guideway.
• If the Zaxis module does not travel easily,
add grease to the grease fitting on the Xaxis
linear guideway. Refer to “Applying Grease
to the Grease Fittings” on page12 for
instructions. Return here to continue.
NOTE: Some units have two linear guideways; see the
pictures above for examples.
6
Use a clean nonwoven cloth to remove excess grease.
Reinstall the XAxis Front Cover
7
Move the Zaxis module to the left side of the
Xaxis and reinstall the Xaxis front cover.
a
b
8
Move the Zaxis module to the center of the
frame and secure the Xaxis front cover with the
four (4) screws removed previously.
a
b
b
Automated Dispensing Systems Maintenance & Parts Guide
6 www.nordsonefd.com info@nordsonefd.com +1-401-431-7000 Sales and service of Nordson EFD dispensing systems are available worldwide.
Linear Guideway Cleaning: YAxis
CAUTION
Risk of injury or equipment damage. Before performing any service procedure, complete the steps under
“Preparation for all Service Procedures” on page3.
Remove the YAxis Cover
1
a. Move the fixture plate to the center of the
Yaxis cover.
b. Remove the four (4) screws that secure the
Yaxis cover.
b
a
b
2
Move the fixture plate to the very back of the
robot.
3
Carefully pull the Yaxis cover away from the
robot.
Continued on next page