00194310-02_UM_Sleeve_Verification_de_en.pdf - 第24页
User manual verification of sleeves Testing the initial spring tension 24 Sleeve Verification Verifizierung von Pinolen 1.4 Testing the initial spring tension ▪ Compress the nozzle m anually sev eral times (a t least thr…
User manual verification of sleeves
Adjusting the sensing lever gauge
Sleeve Verification Verifizierung von Pinolen 23
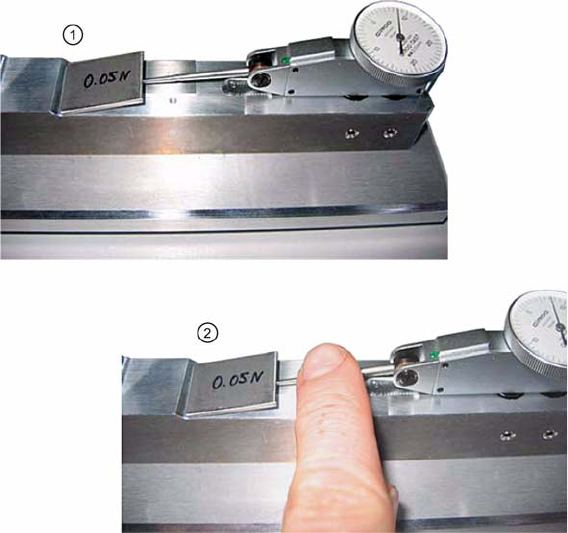
Checking that the sensing lever moves freely
►Set the sensing lever gauge to “0”.
►Place the calibrating weight (0.05 N) on the sensing lever (1).
►Press the sensing lever down gently once with your hand (2).
The display must not decline to"0" any more.
Checking the sensing lever for smooth operation
User manual verification of sleeves
Testing the initial spring tension
24 Sleeve Verification Verifizierung von Pinolen
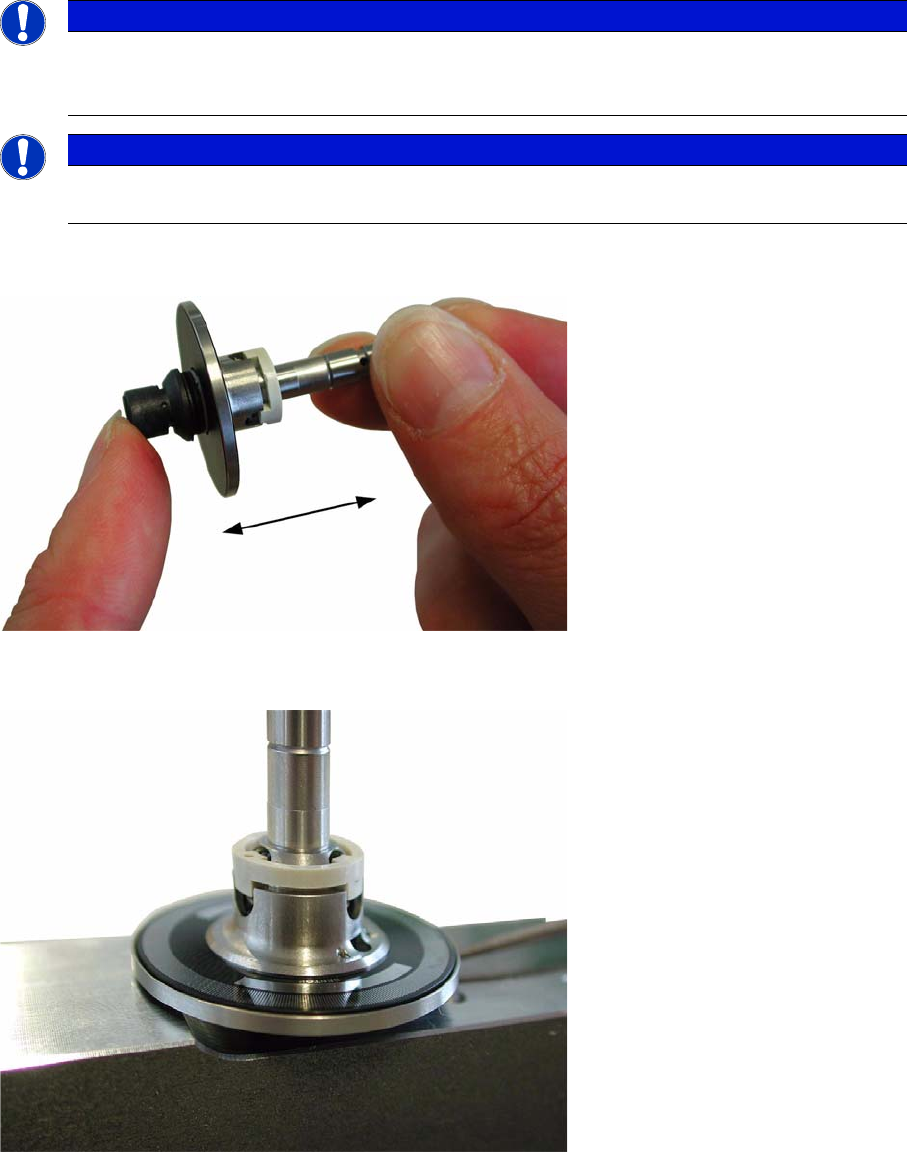
1.4 Testing the initial spring tension
▪ Compress the nozzle manually several times (at least three times) to check if it moves smoothly,
without sticking. If this is not the case, stop the test and replace the sleeve.
Checking the sleeve spring tension
▪ Insert the sleeve with the nozzle pointing down into the checking device.
Sleeve in checking unit
NOTICE
Sleeves which get identified as faulty must to be separated to ensure high placement quality of
the head. Under normal circumstances these sleeves can be repaired. Please collect all
sleeves separated and inform yourself about ongoing service offers for sleeve repair.
NOTICE
There must always be a size 720 / 920 nozzle in the sleeve in order to test the initial spring ten-
sion.
User manual verification of sleeves
Testing the initial spring tension
Sleeve Verification Verifizierung von Pinolen 25
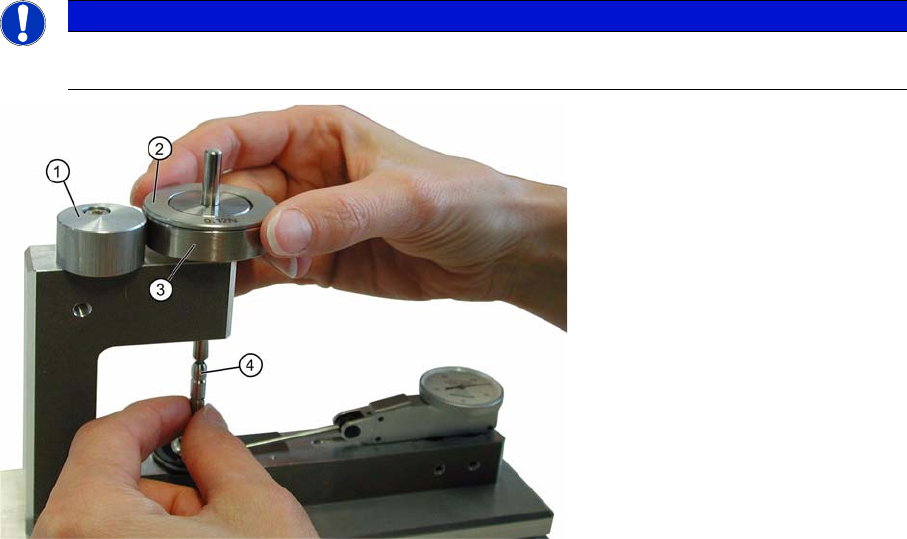
▪ Twist the eccentric and insert the base weight (1.4 N) into the sleeve shaft with the pointed end
downward.
Checking setup for sleeve verification
1. Eccentric
2. Balance weight (C&P12 only)
3. Basic weight
4. Sleeve
NOTICE
Place the compensation weight (see photograph) on the base weight in order to check the CP
12 sleeve.