00194310-02_UM_Sleeve_Verification_de_en.pdf - 第26页
User manual verification of sleeves Testing the initial spring tension 26 Sleeve Verification Verifizierung von Pinolen ▪ Use the base weight to gently compress the sleeve two or t hree t i m e s . I f a g a p ( 1 ) a p …
User manual verification of sleeves
Testing the initial spring tension
Sleeve Verification Verifizierung von Pinolen 25
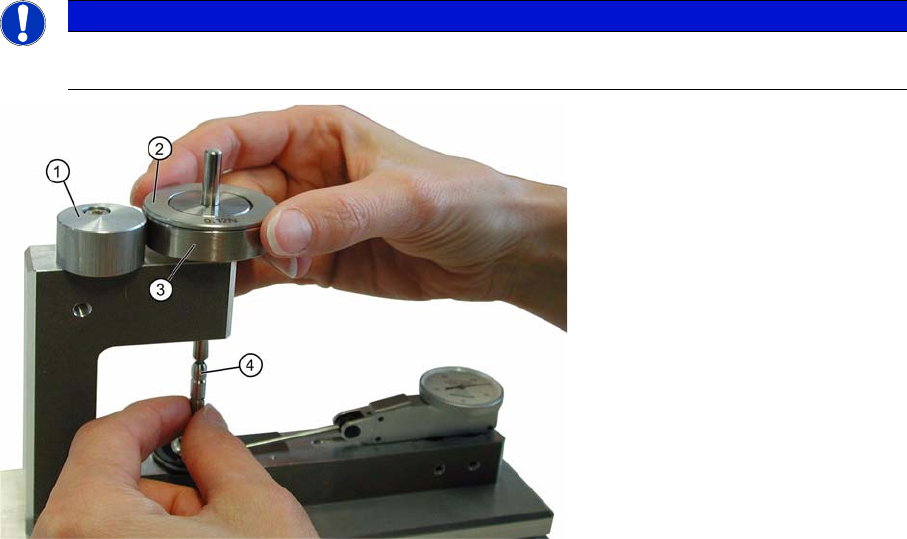
▪ Twist the eccentric and insert the base weight (1.4 N) into the sleeve shaft with the pointed end
downward.
Checking setup for sleeve verification
1. Eccentric
2. Balance weight (C&P12 only)
3. Basic weight
4. Sleeve
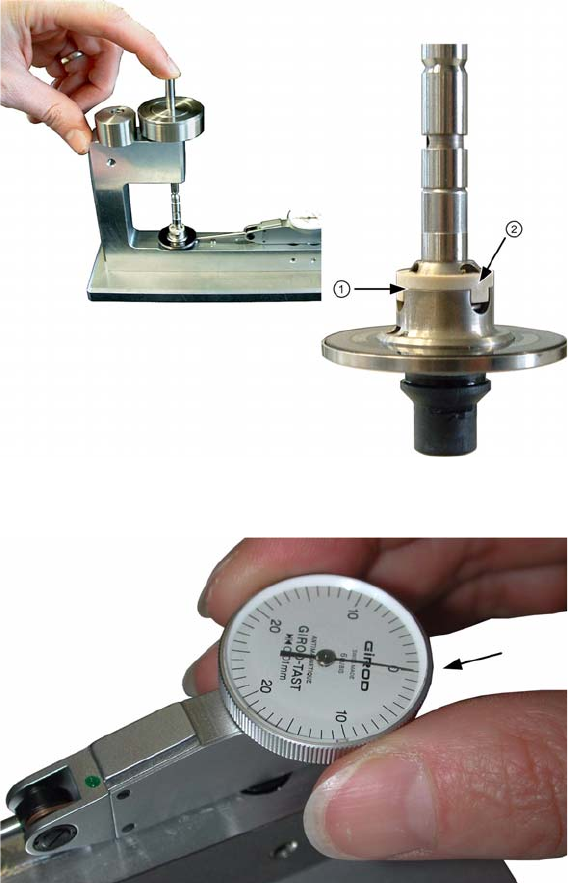
NOTICE
Place the compensation weight (see photograph) on the base weight in order to check the CP
12 sleeve.
User manual verification of sleeves
Testing the initial spring tension
26 Sleeve Verification Verifizierung von Pinolen
▪ Use the base weight to gently compress the sleeve two or three times. If a gap (1) appears between
sleeve and switching ring (2) using the basic weight of 1.4 N, stop the test and replace the sleeve.
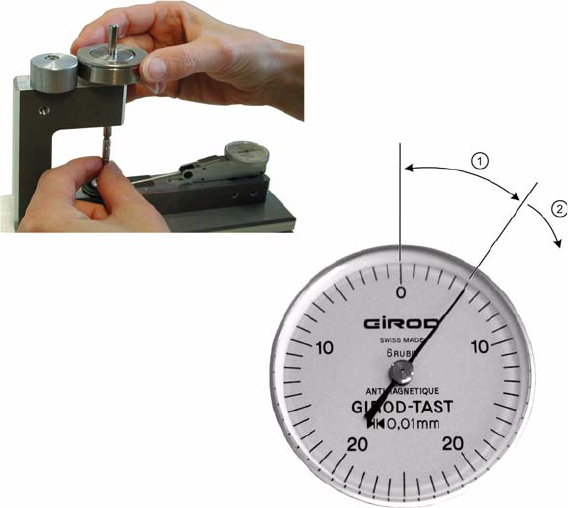
Verification with basic weight
▪ If no gap is visible, continue the test and set the sensor lever gauge to "0".
Adjusting the sensing lever gauge
User manual verification of sleeves
Testing the initial spring tension
Sleeve Verification Verifizierung von Pinolen 27
Checking the minimum initial spring tension of 1.6 N 1
▪ Put on the add-on weight of 0.2 N (total weight 1.6 N).
With a "good" sleeve (1.6 N), the gauge should not show any measurement or not more than five
digits.
– If the gauge indicates more than 5 digits, the sleeve spring tension is below 1.6 N and can thus
no longer be used.
Minimum spring tension
1. 0 - 5 digits -> sleeve good
2. More than 5 digits -> sleeve bad