00194310-02_UM_Sleeve_Verification_de_en.pdf - 第27页
User manual verification of sleeves Testing the initial spring tension Sleeve Verification Ve rifizierung von Pinolen 27 Checking the minimum initial spring tension of 1.6 N 1 ▪ Put on the add-o n weight of 0.2 N (to tal…
User manual verification of sleeves
Testing the initial spring tension
26 Sleeve Verification Verifizierung von Pinolen
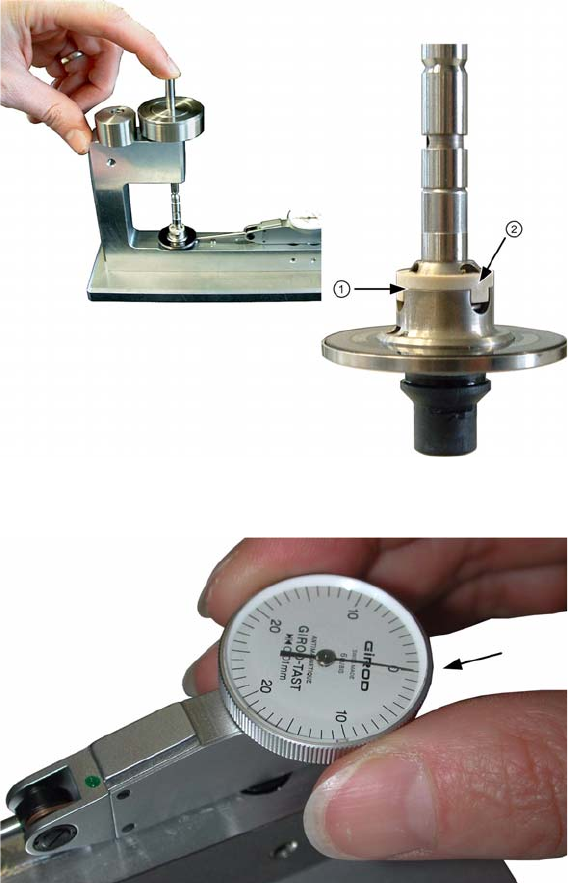
▪ Use the base weight to gently compress the sleeve two or three times. If a gap (1) appears between
sleeve and switching ring (2) using the basic weight of 1.4 N, stop the test and replace the sleeve.
Verification with basic weight
▪ If no gap is visible, continue the test and set the sensor lever gauge to "0".
Adjusting the sensing lever gauge
User manual verification of sleeves
Testing the initial spring tension
Sleeve Verification Verifizierung von Pinolen 27
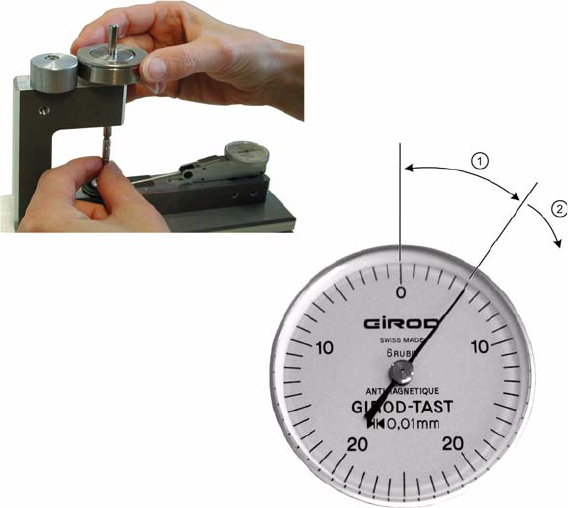
Checking the minimum initial spring tension of 1.6 N 1
▪ Put on the add-on weight of 0.2 N (total weight 1.6 N).
With a "good" sleeve (1.6 N), the gauge should not show any measurement or not more than five
digits.
– If the gauge indicates more than 5 digits, the sleeve spring tension is below 1.6 N and can thus
no longer be used.
Minimum spring tension
1. 0 - 5 digits -> sleeve good
2. More than 5 digits -> sleeve bad
User manual verification of sleeves
Testing the initial spring tension
28 Sleeve Verification Verifizierung von Pinolen
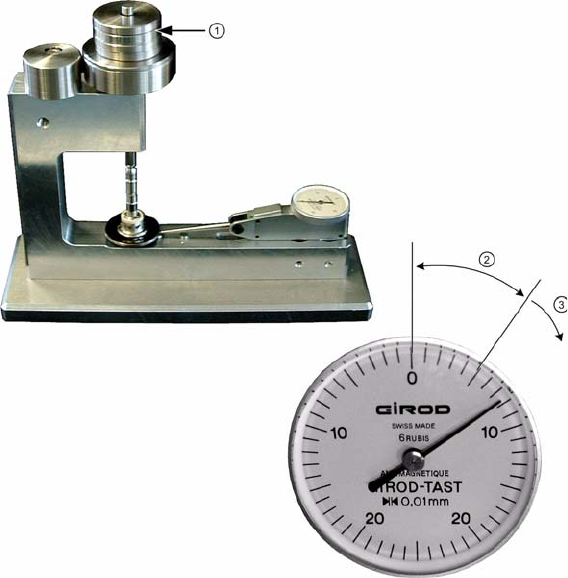
Checking the minimum initial spring tension of 1.6 N 1
▪ Put on three more add-on weights each of 0.2 N (total weight 2.2 N).
If the gauge indicates more than 5 digits while you are putting on the weights, the sleeve has an initial
spring tension of 2.2 N and is thus a "good" sleeve.
– If the gauge does not exceed 5 digits, the spring tension is too high and the sleeve must be re-
placed.
Maximum spring tension
1. Additional weights (3x 0.2 N)
2. 0 - 5 digits -> sleeve bad
3. More than 5 digits -> sleeve good