2.VGOS V30 application software installation_upgrade manual.pdf - 第16页
For Users Serv i ce Information SI090100 2E- 003=VGOS V3 0 applicatio n software installatio n /upgrade manua l 16/24 Step 5 Select a language for setup procedure. Step 6 Installation w izard starts. W hen installation s…
For Users
Service Information
SI0901002E-003=VGOS V30 application software installation/upgrade manual
15/24
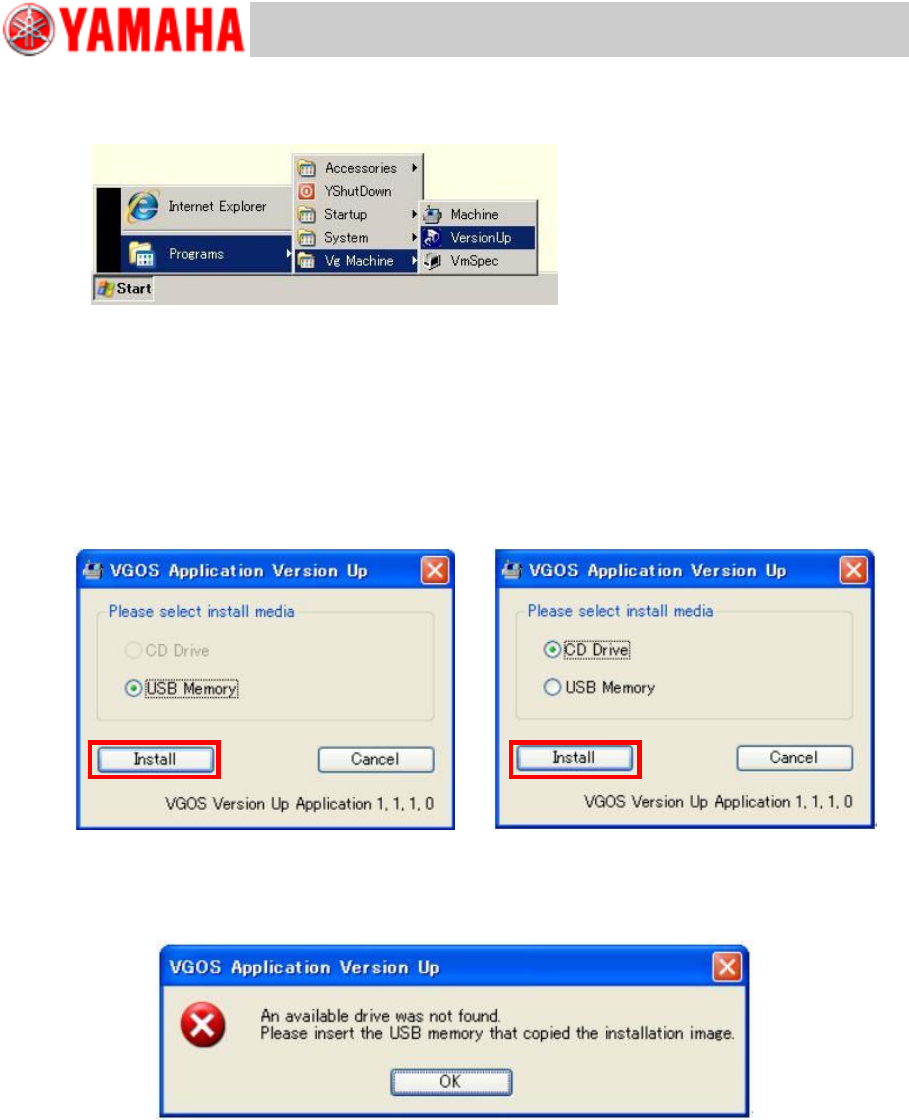
Step 3 Start the VGOS Application Version Up program.
From Windows start menu, select [Programs], [Vg Machine] then [VersionUp] to run the
program.
Note
When the system version is V3.00, or when other USB flash drive than the designated one
is used for application installation/upgrading, the VGOS Application Version Up program is
not selectable via the above menu selection. In this case, start the explorer and double click
“Setup.exe” in the installation image instead.
Step 4 Select an install media (source drive) and click the [Install] button.
If the machine is equipped with the CD drive, the “CD Drive” radio button is selectable.
Note
If the specified drive cannot be found, the following warning message appears. Check if the
source USB flash drive or CD is inserted properly, and click the [Install] button again.
n Machine Not equipped with CD drive
(YG12, YS series)
n Machine equipped with CD drive
(YG300)
For Users
Service Information
SI0901002E-003=VGOS V30 application software installation/upgrade manual
16/24
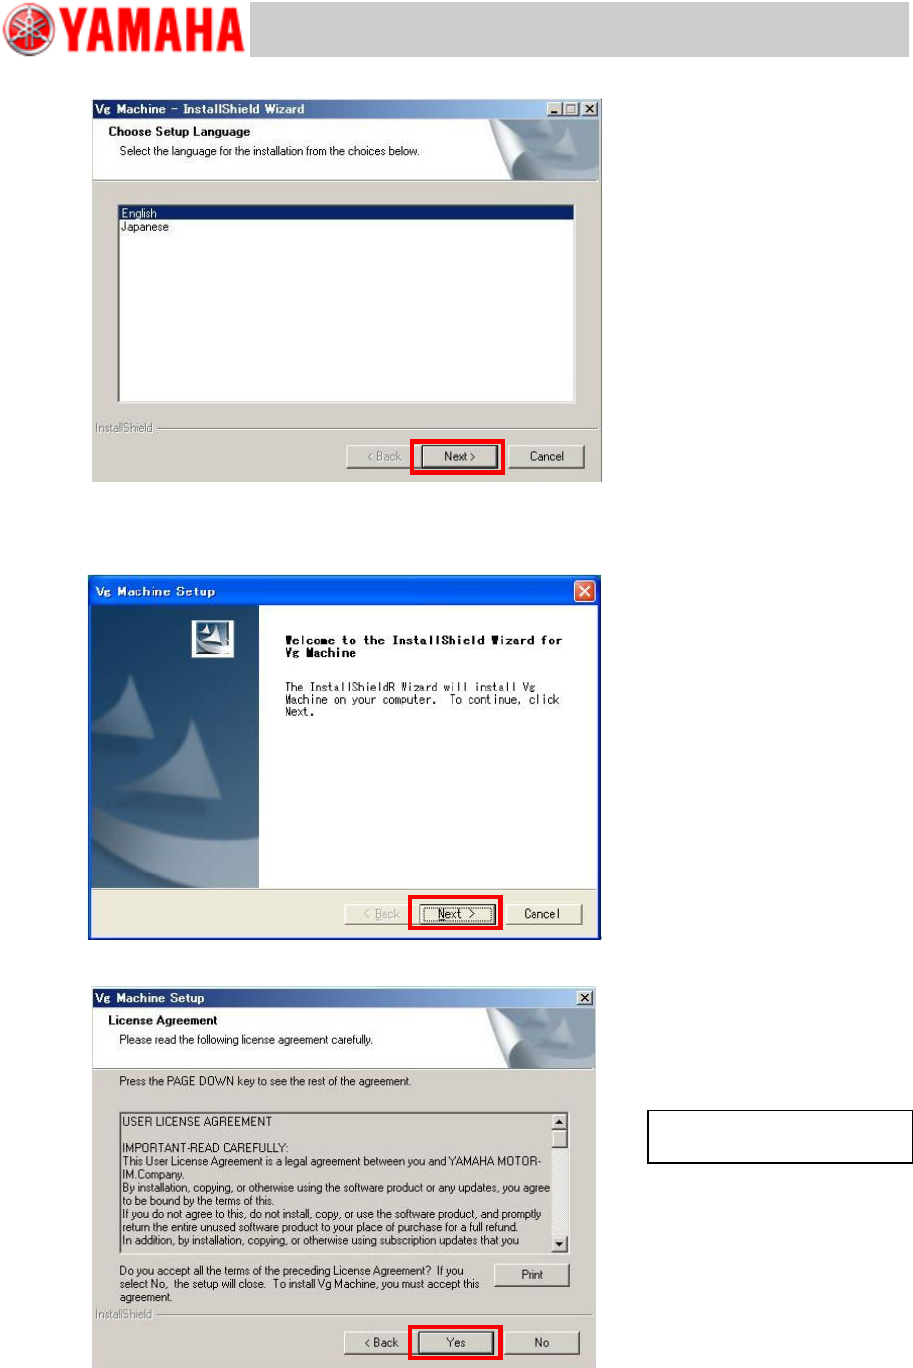
Step 5 Select a language for setup procedure.
Step 6 Installation wizard starts.
When installation starts properly, the following dialog appears asking you to continue the
process. Click the [Next] button.
Step 7 Check the contents of the dialog and click the [Yes] button.
Confirm USER LICENSE
AGREEMENT and select [Yes].
For Users
Service Information
SI0901002E-003=VGOS V30 application software installation/upgrade manual
17/24
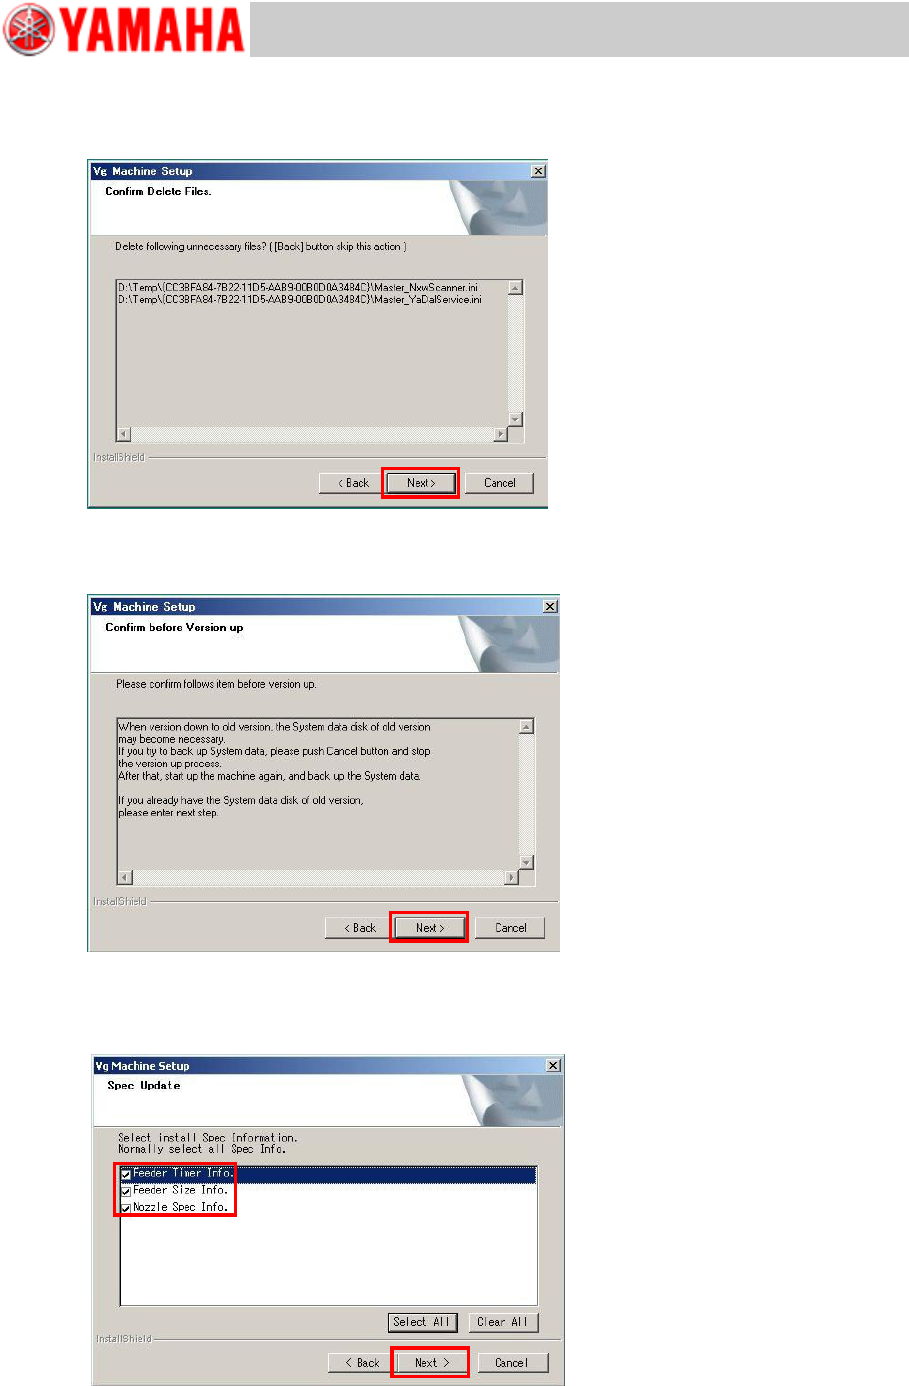
Step 8 Confirm deletion of unnecessary files.
If unnecessary files are found in the “TEMP” folder in the D drive, the Confirm Delete Files
window appears asking you whether to delete the files. If it is OK to delete, click the [Next]
button.
Step 9 Confirm if the system data has been backed up.
The window appears asking you whether you have your system data backed up. If you have
as shown in “1.2 Save “system data backup”” on page 3, click the [Next] button.
Step 10 Confirm whether to update the Spec Info.
To update the standard feeder timer info., feeder size info. and nozzle spec info., tick their
boxes and click the [Next] button. To retain existing information in such case as the
information has been customized, clear the boxes and click the [Next] button.