CP14 Head Part Exchange - Replacing the DP Drive en.pdf - 第18页
E-by SIPLACE CP14 Returning the Apertur e Ring Part Exchange 2/2 CAUTION! Refer to safety inst ructions in user manual before working on the machine. ESD guidelines are to be followed Tool: Wear Part: Consum ables: 7. Re…
E-by SIPLACE CP14 Returning Aperture Ring
Part Exchange
1/2
CAUTION! Refer to safety instructions in user manual before working on the machine.
ESD guidelines are to be followed
Tool: Wear Part: Consumables:
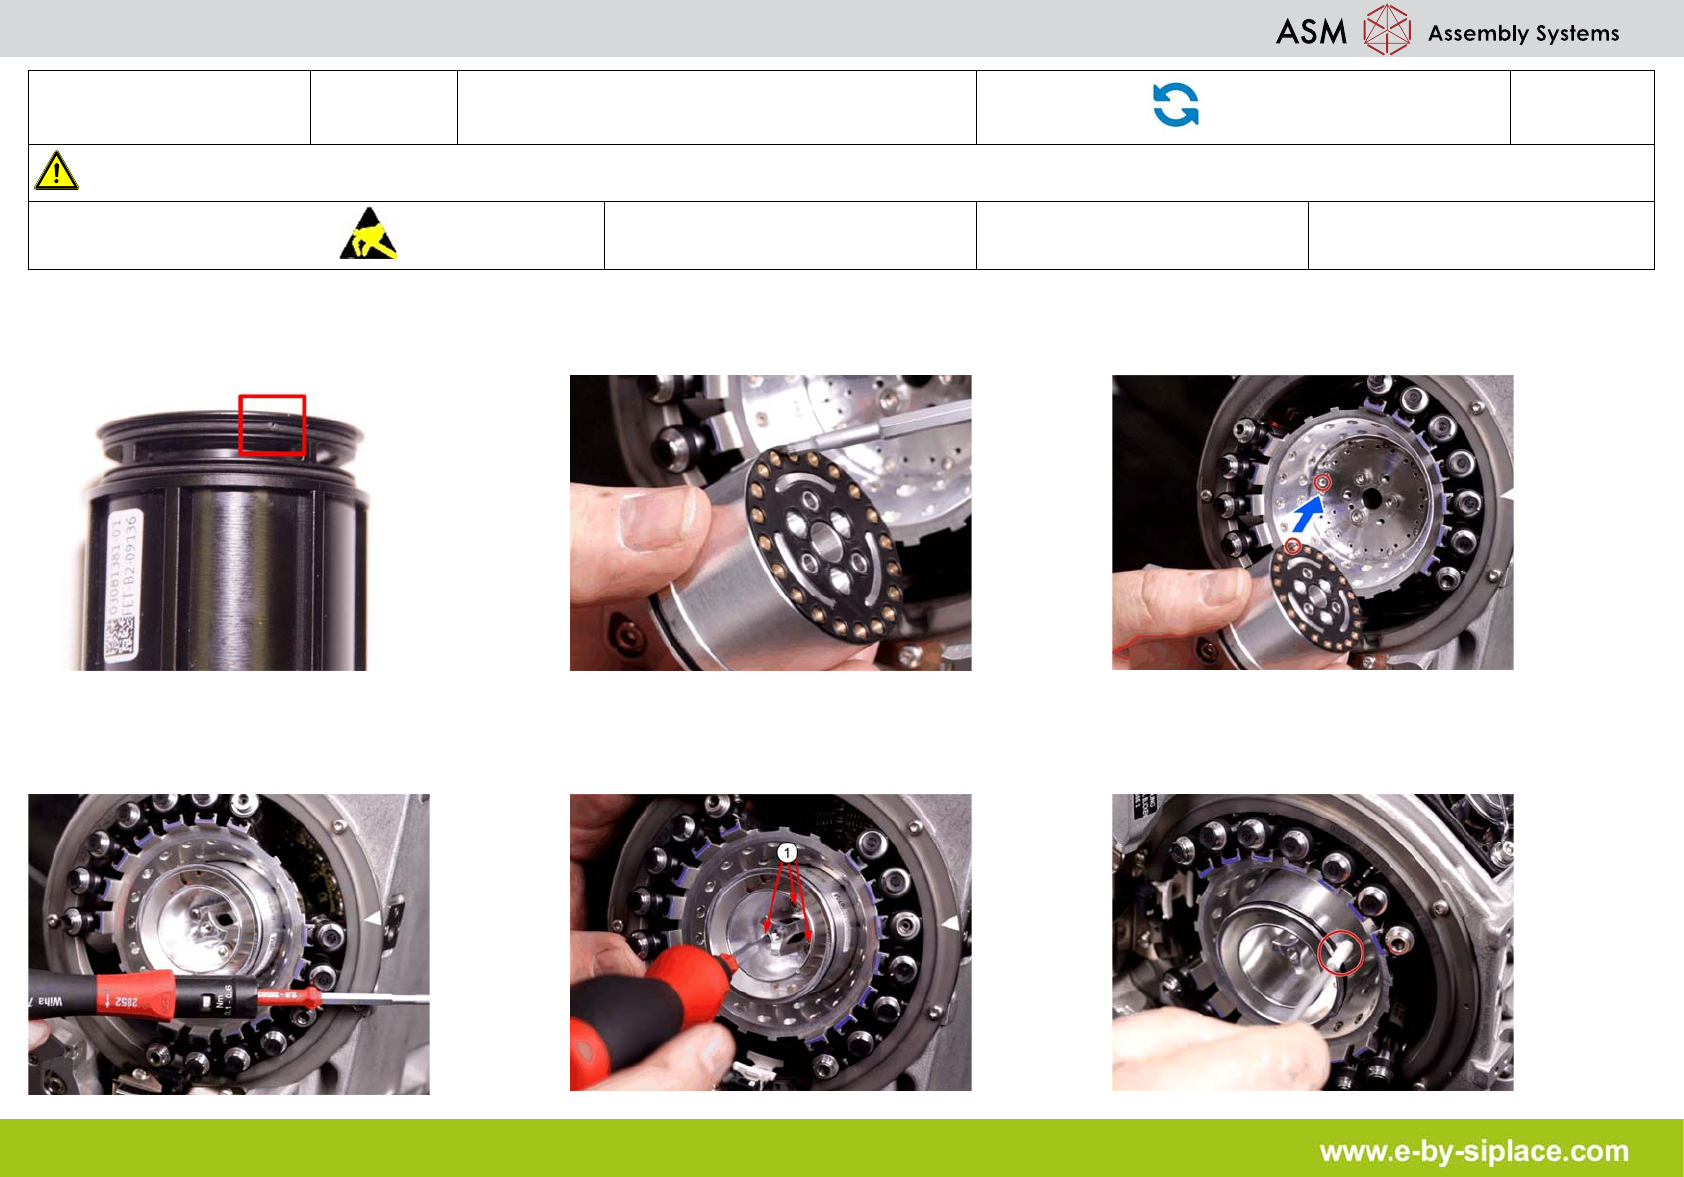
1. If the O-ring is damaged, replace it with a
new one.
2. Correctly position the seal disk on the aper-
ture ring. Make sure all openings are aligned.
3. Position the aperture ring (with seal disk)
correctly onto locating pins in the star carrier.
4. Tighten the screws to a torque of 0.25+0.05
Nm.
5. Aperture ring only: Fix the aperture ring with
three fastening screws. Hand-tighten the
screws.
6. Grease the O-ring. To do this, use a clean-
ing stick coated with "Isoflex Topas 5051 50
ml (green)".
E-by SIPLACE CP14 Returning the Aperture Ring
Part Exchange
2/2
CAUTION! Refer to safety instructions in user manual before working on the machine.
ESD guidelines are to be followed
Tool: Wear Part: Consumables:
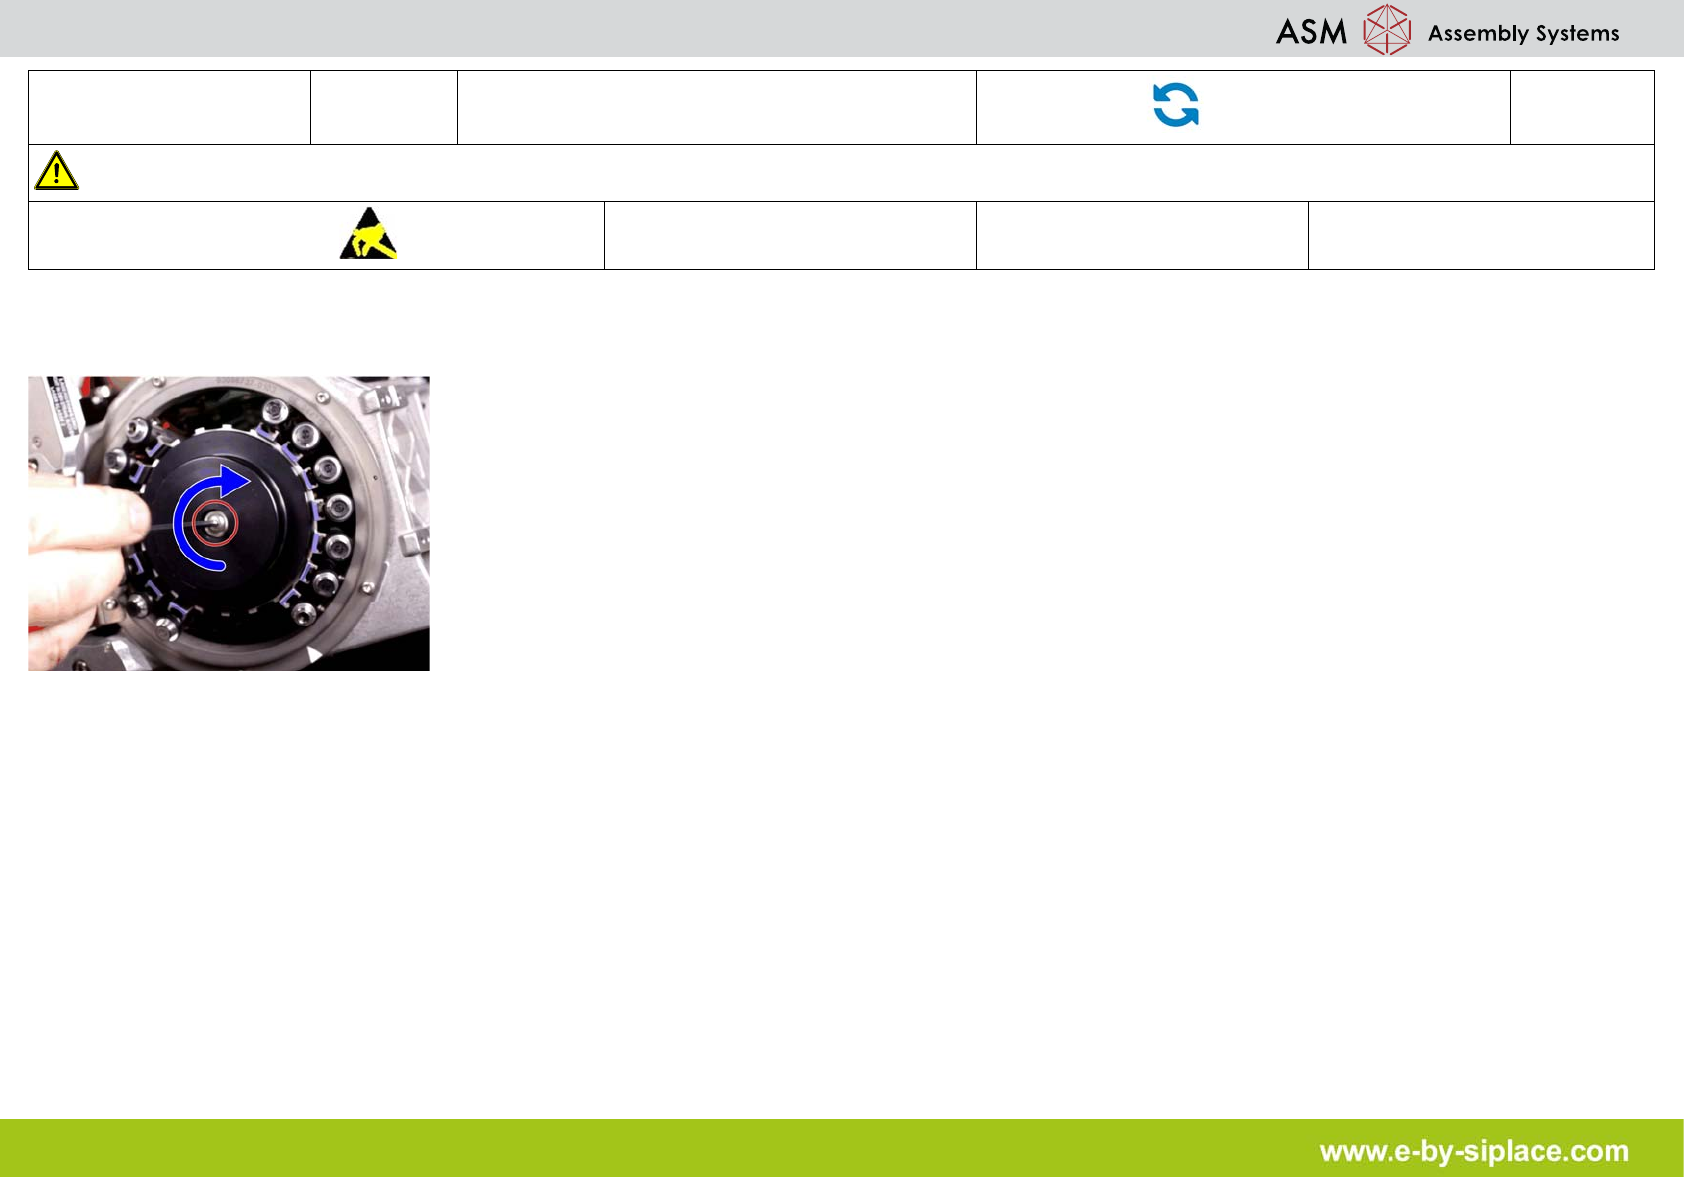
7. Refit the cover. Hand-tighten the screw fas-
tening the cover.
E-by SIPLACE CP14 Returning the CP14 Head
Part Exchange
1/1
CAUTION! Refer to safety instructions in user manual before working on the machine.
ESD guidelines are to be followed
Tool: Wear Part: Consumables:
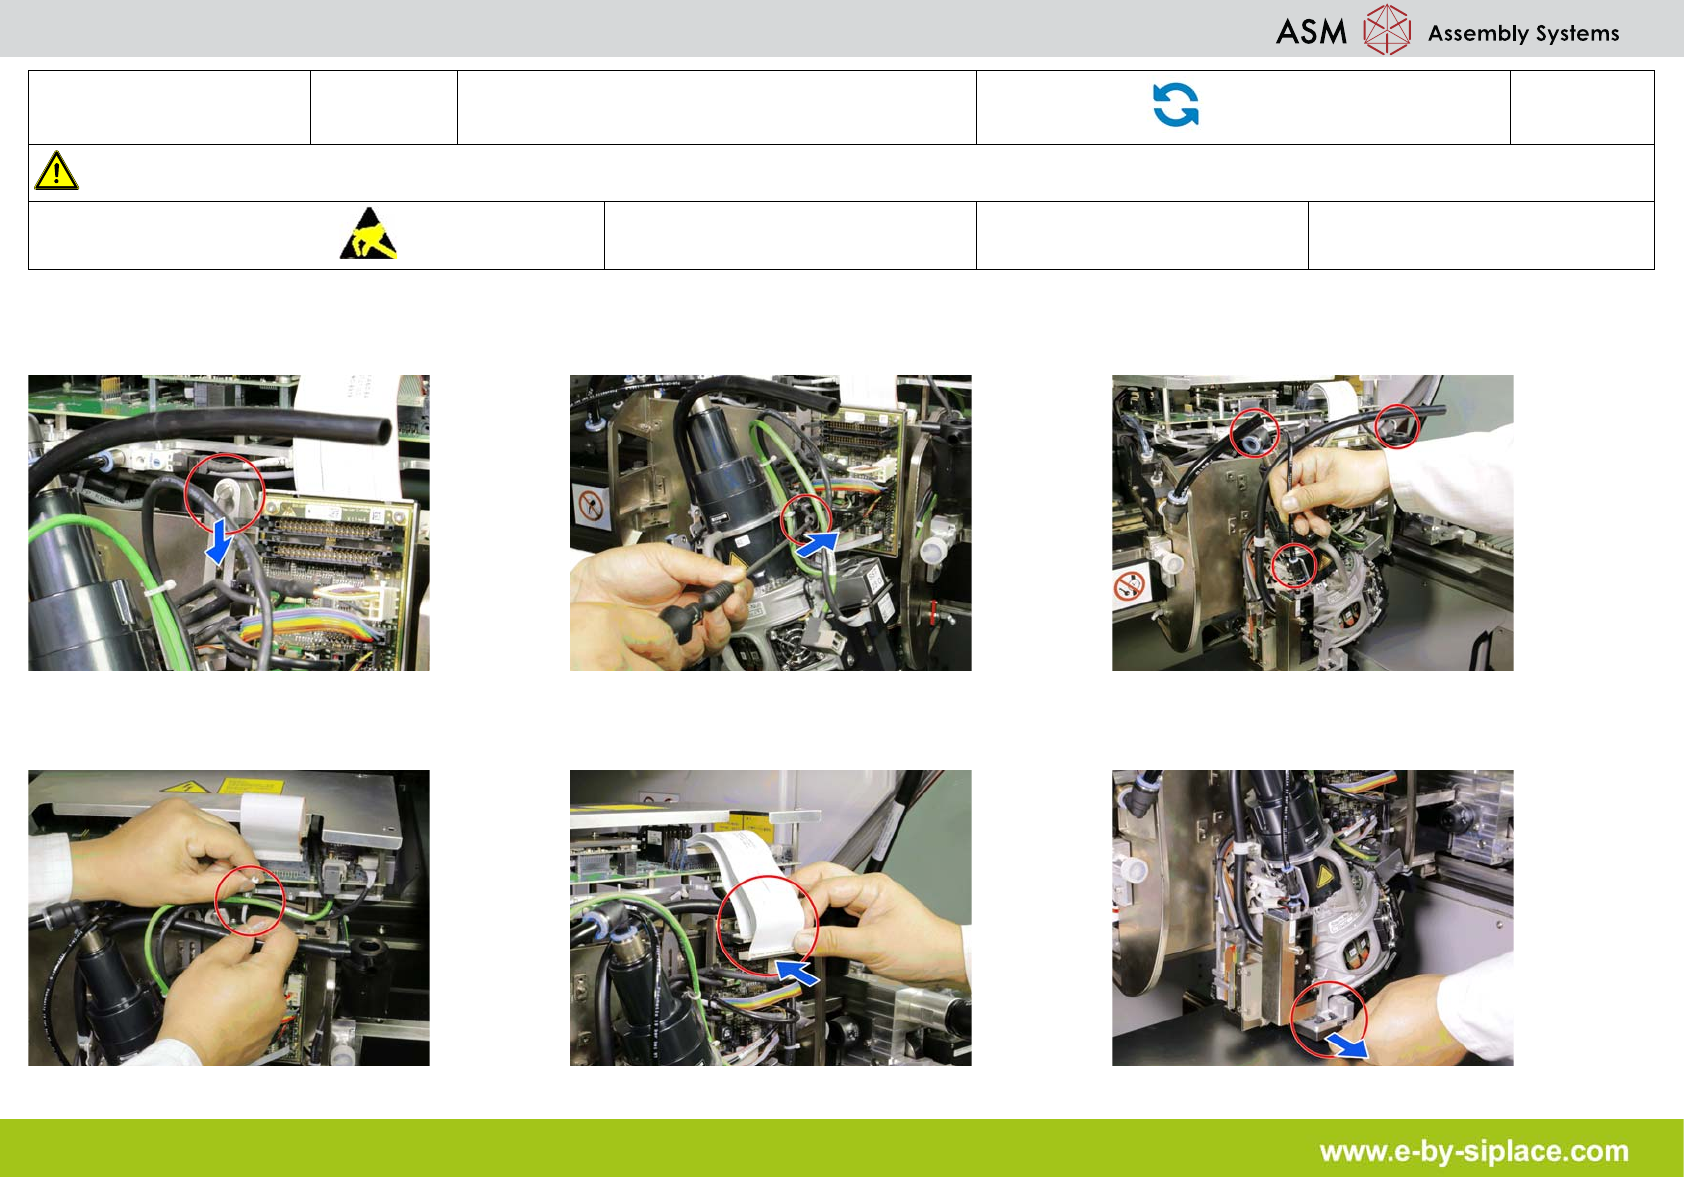
1. Carefully lift the head into of the locating
pins on the head plate.
2. Tighten all four M4 fastening screws with a
long torx key.
3. Connect the pneumatic connections from
the placement head.
4. Carefully plug in the camera cable and fix
back the cable tie.
5. Connect the flat ribbon cable from the
placement head or head adapter.
6. Remove protective cap from the compo-
nent sensor of the placement head.