00198015-01_IM_SQL_Server_2014_Express_EN.pdf - 第19页
SQL Server 2014 Ex press / Installation Manual 11/2015 Edition 19 The window should n ow look like this : Figure 4-15: Se rver Configuration – completed ► Check that the St artup Type of all services is set to Automatic …
SQL Server 2014 Express / Installation Manual 11/2015 Edition
18
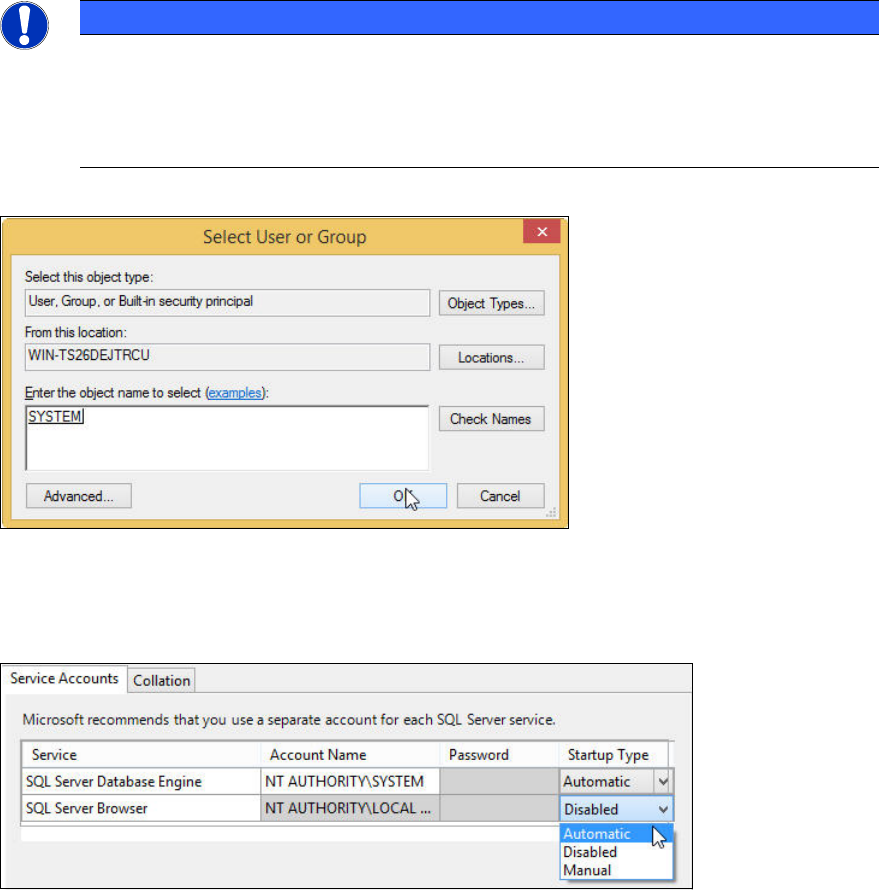
The word SYSTEM should then be underlined and written in uppercase letters.
NOTICE
Naming of local system account depends on OS language
The name of the local system account may vary if you have an operating system with
another language than English.
► In this case, ensure to enter the proper name of the system account.
Figure 4-13: Configuring SYSTEM account
► Click the OK button to close the window.
You return to the previous window.
Figure 4-14: Configuring Startup Type of SQL Server Browser Service
► Click the dropdown arrow besides the Startup Type of SQL Server Browser and select
Automatic.
SQL Server 2014 Express / Installation Manual 11/2015 Edition
19
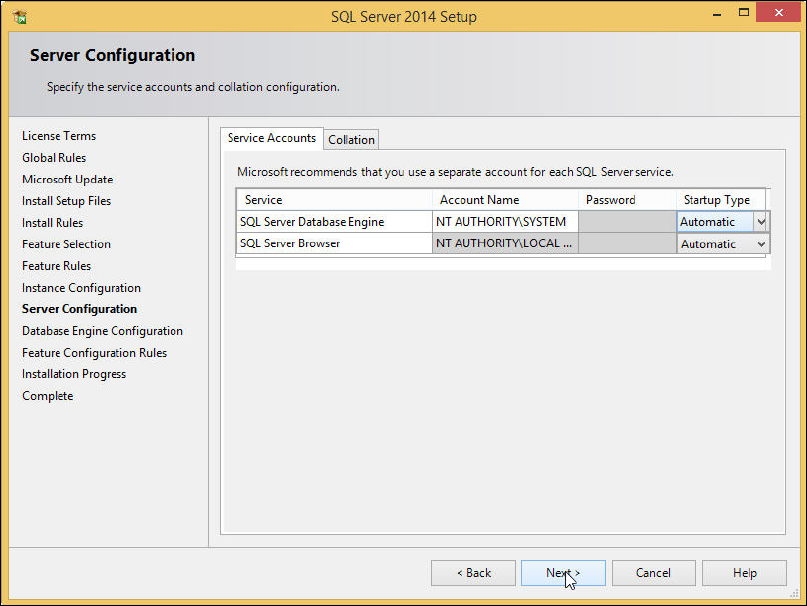
The window should now look like this:
Figure 4-15: Server Configuration – completed
► Check that the Startup Type of all services is set to Automatic and verify the Account Name of
SQL Server Database Engine and SQL Server Browser.
► Click the Next > button to continue.
SQL Server 2014 Express / Installation Manual 11/2015 Edition
20
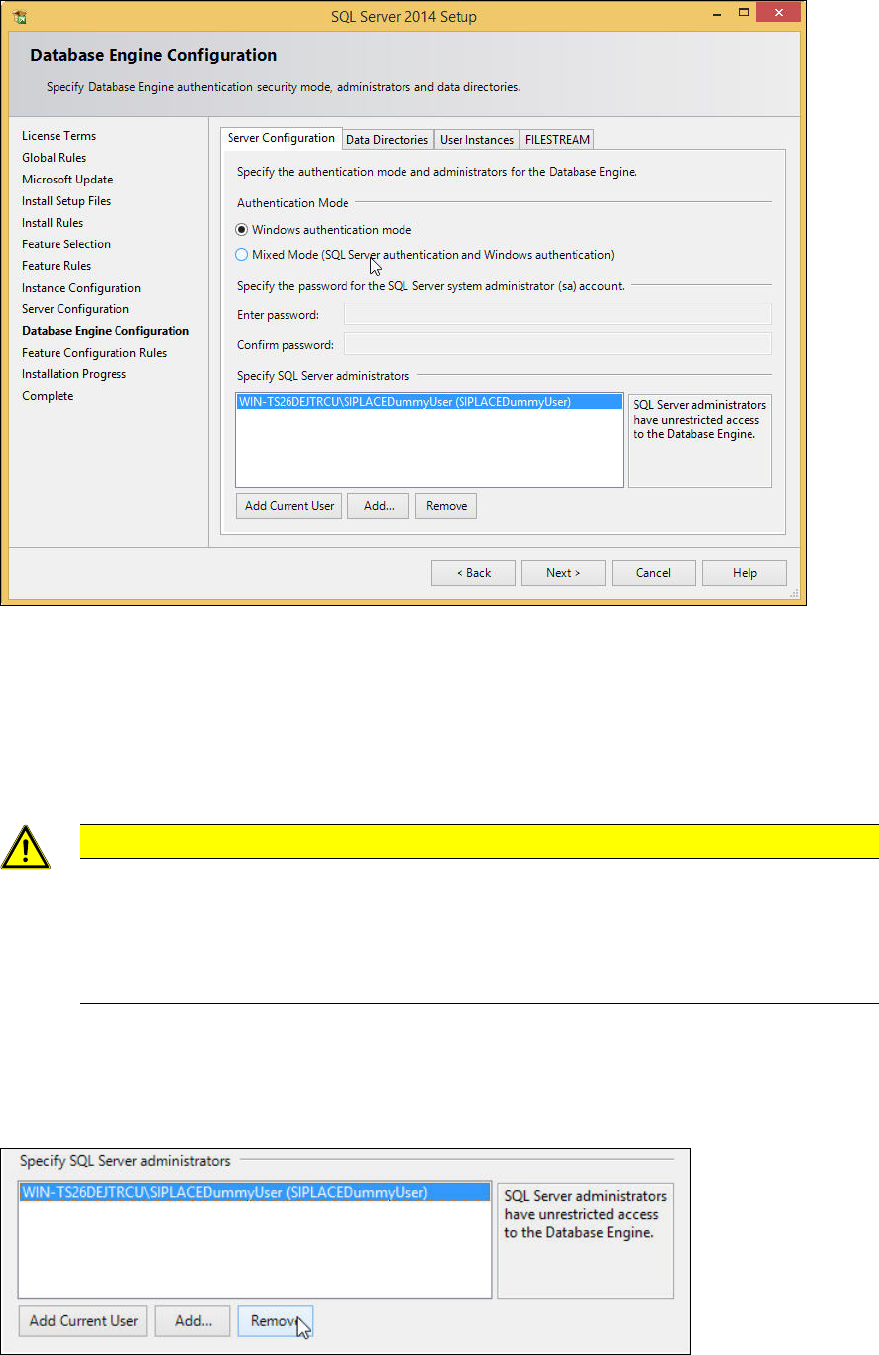
The Database Engine Configuration window is displayed.
Figure 4-16: Database Engine Configuration window with default settings
► Click the Mixed Mode (SQL Server authentication and Windows authentication button.
► Enter an appropriate password for the SQL sa (SysAdmin) account in the Enter password:
field.
► Repeat this password in the Confirm password: field.
CAUTION
Password must meet your security policies
Please keep in mind that the password you enter must meet the (Windows) password
policies. If your operating system / domain environment is configured only to allow
complex passwords, you will also have to use a complex password for your SQL sa
account.
► Under Specify SQL Server administrators, select the line which represents your currently
logged in account.
► Click the Remove button as displayed in the next figure.
Figure 4-17: Removing the currently added account from SQL Server administrators