00197184-01_IM_Celsius_W510_Windows7_EN.pdf - 第31页
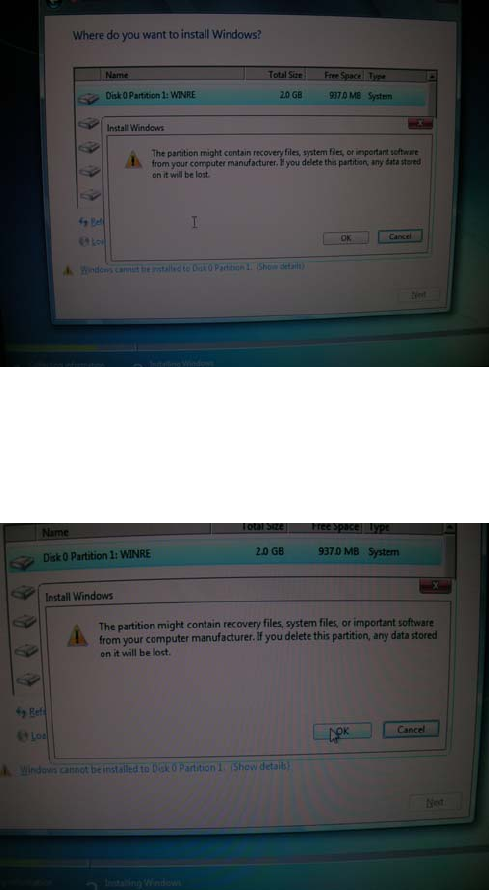
Celsius W510 with Win dows 7 10/2011 Edition Figure 4-15: Confirm delete message ► Verify you’ve selected the correct partition and the ap propriate disk ( Disk 0 ) and backed up all important data before proceeding. Fig…
Celsius W510 with Windows 7 10/2011 Edition
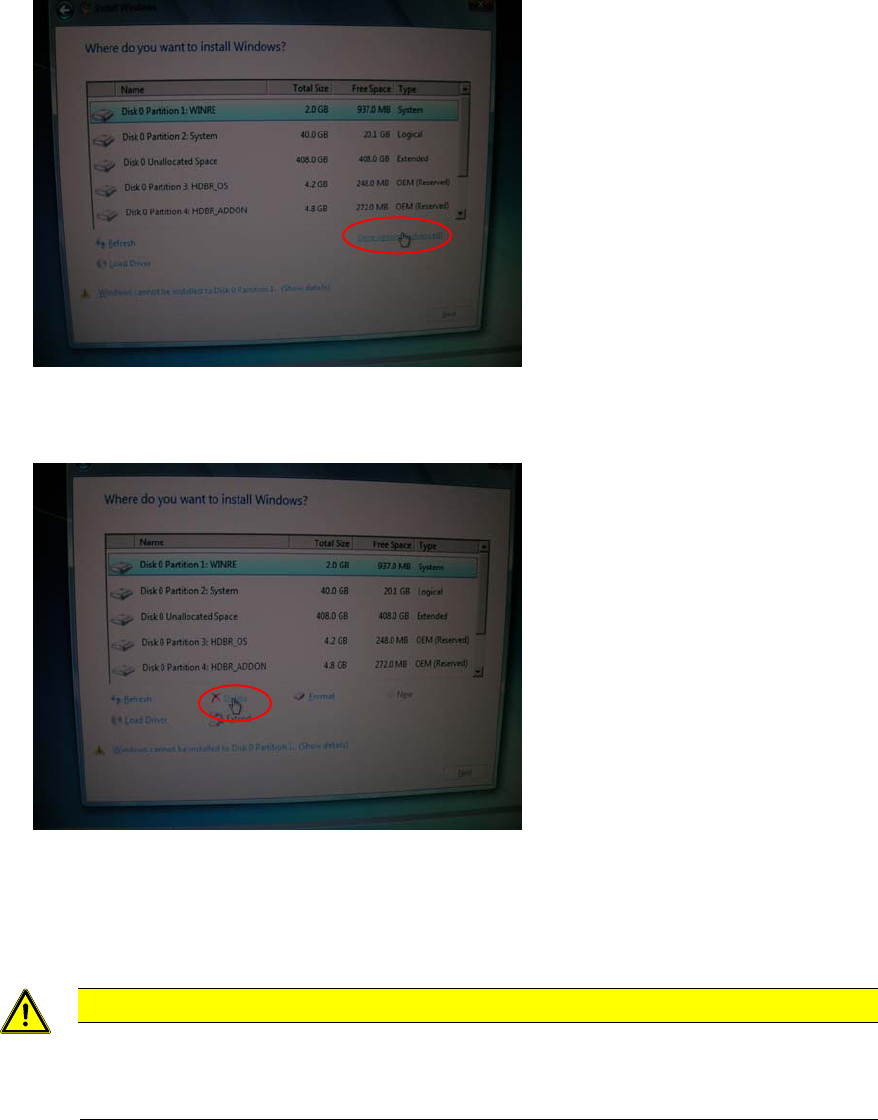
Figure 4-13: Clicking on Drive Options for the first partition
► Click on Drive options (advanced) as shown in the picture above.
Figure 4-14: Selecting “Delete” for the first partition
► Click on Delete as shown in the picture above.
A confirmation message will appear.
CAUTION
Data will be erased
Before confirming the appearing message, ensure you’ve selected the correct partition
from the appropriate disk (Disk 0) and you’ve backed up any important data.
30
Celsius W510 with Windows 7 10/2011 Edition
Figure 4-15: Confirm delete message
► Verify you’ve selected the correct partition and the appropriate disk (Disk 0) and backed up all
important data before proceeding.
Figure 4-16: Accepting partition deletion
► Click the OK button to confirm deletion.
► Repeat these steps for all partitions on the first hard disk (Disk 0)
31
Celsius W510 with Windows 7 10/2011 Edition
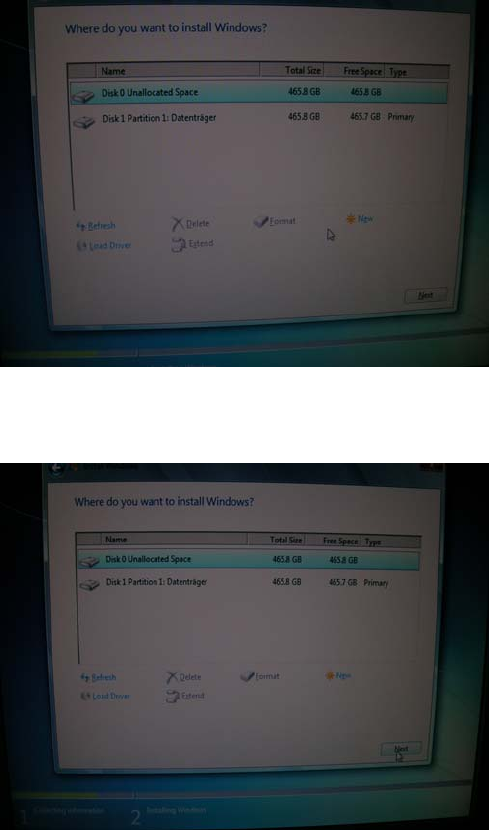
After you’ve deleted all partitions from the first hard disk, your window should look like this.
Figure 4-17: Empty Disk 0 selected
► Ensure you’ve selected the empty Disk 0 as shown in the screen above.
Figure 4-18: Clicking Next with empty Disk 0 selected
► Click the Next button to continue.
32