00198609-01_AI_Replacing_the_X_and_Y_Trailing_Cable_EbS_EN.pdf - 第15页
2 Replacing the X trailing cable vacuum 2.1 Removal / Installation Assembly Instructions E by SIPLACE Replacing the X and Y Trailing Cable 04/2018 15 Fig.5: Top clamp on the trailing cable ► Loosen and remove the nuts a…
2 Replacing the X trailing cable vacuum
2.1 Removal / Installation
14 Assembly Instructions E by SIPLACE Replacing the X and Y Trailing Cable 04/2018
2.1 Removal / Installation
NOTICE
Marking connections
Before you unplug electrical or pneumatic connections, mark their positions clearly. So that
re-assemble back will be much easier.
► Switch off the machine, disconnect it from the power supply and secure it to prevent unauthor-
ized reactivation.
► Unplug all electrical connections from the trailing cable to the X gantry interface.
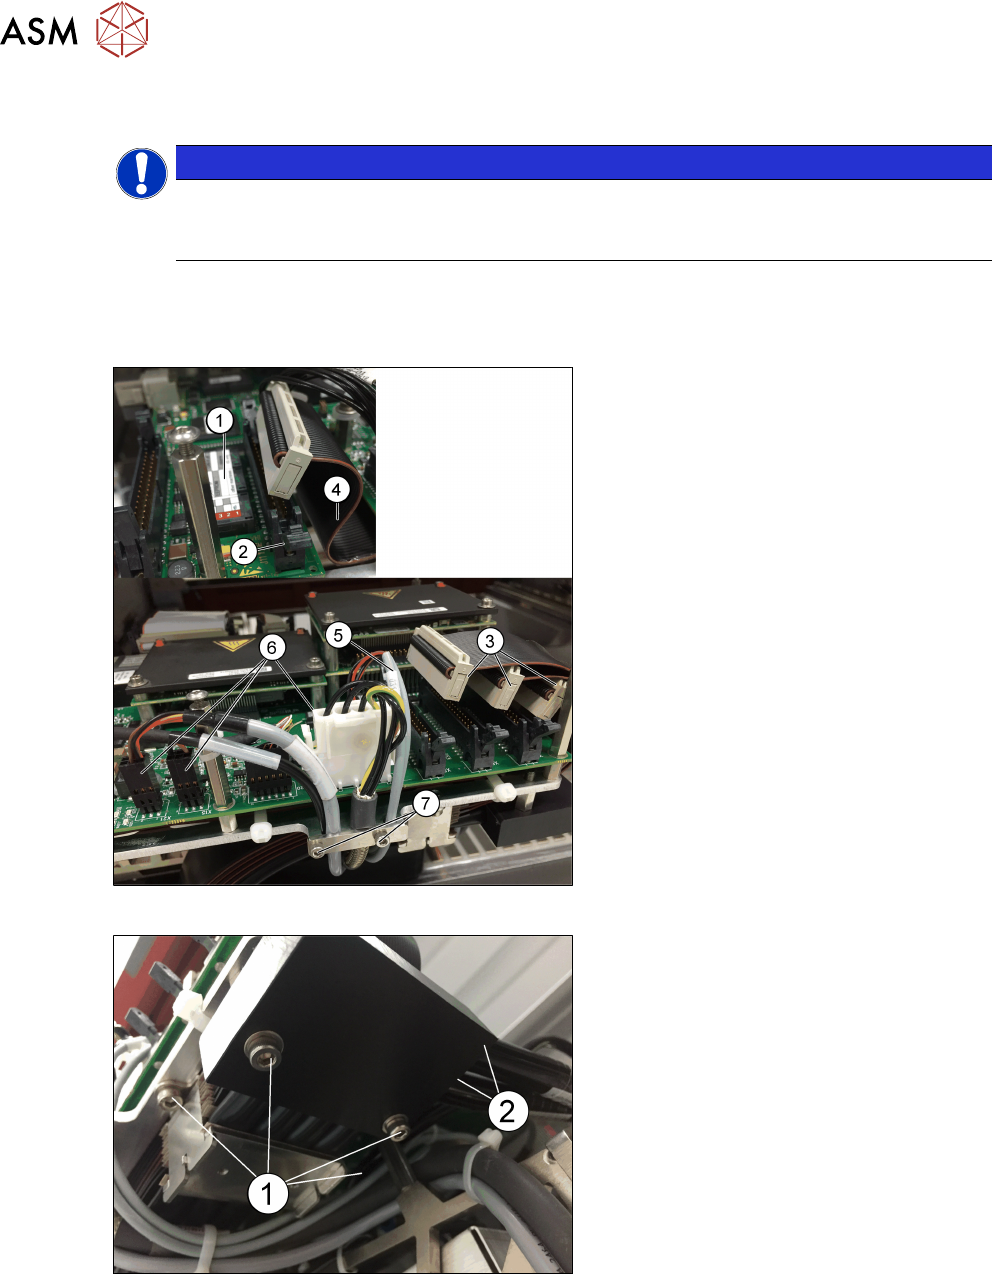
Fig.3: Unplugging electrical connections
► Unplug the electrical connections (3)
and (4) from the Vision board spread
spectrum (1) and from the head inter-
face (2).
► Unplug all electrical connections on the
head adapter to the solenoid (5) (one
plug) and to the X motor (6) (three
plugs).
► Loosen the fastening screws of the
cables (two screws M3x6 and one
hexagon bolt (7) to take out the cables
(Allen key size 2.5).
Fig.4: Vacuum block
► Carefully loosen the four screws (1)
(Allen key 3) fastening the vacuum
block and top trailing fixture.
► Disconnect the pneumatic hoses from
the vacuum block (2).
2 Replacing the X trailing cable vacuum
2.1 Removal / Installation
Assembly Instructions E by SIPLACE Replacing the X and Y Trailing Cable 04/2018 15
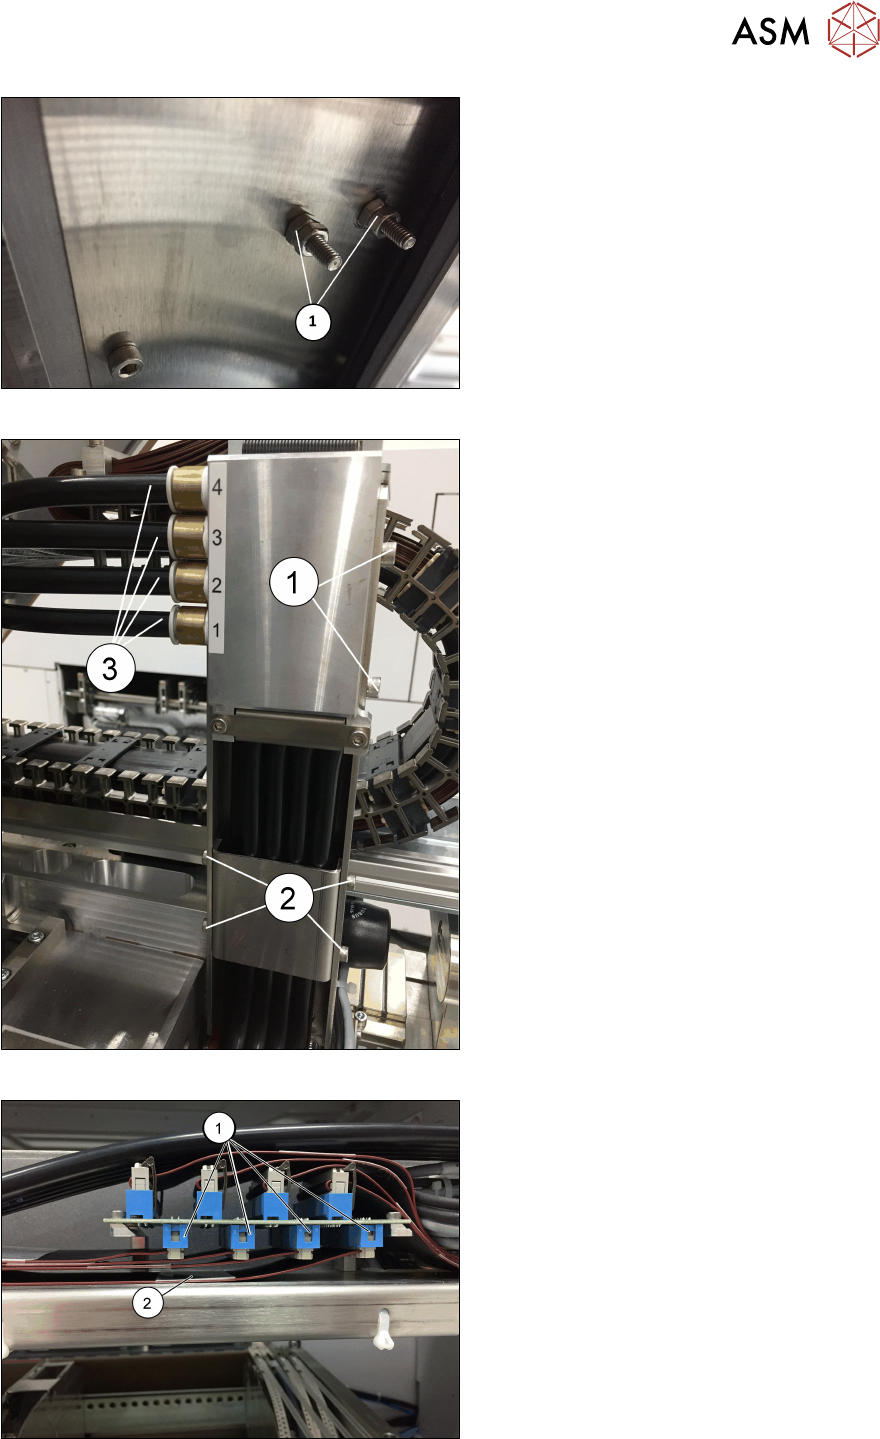
Fig.5: Top clamp on the trailing cable
► Loosen and remove the nuts and
hexagon bolts (1) (M4x10, size 7 mm)
for the top clamp on the trailing cable.
Fig.6: Disconnecting pneumatic hoses
► Carefully loosen the two screws (1)
(Allen key 4) and four screws (2) (Allen
key 3).
► Disconnect the four pneumatic
hoses(3).
Fig.7: Removing trailing cable and vacuum block
► Disconnect the four connectors(1).
► Remove the trailing cable(2) together
with metal vacuum block.
2 Replacing the X trailing cable vacuum
2.1 Removal / Installation
16 Assembly Instructions E by SIPLACE Replacing the X and Y Trailing Cable 04/2018
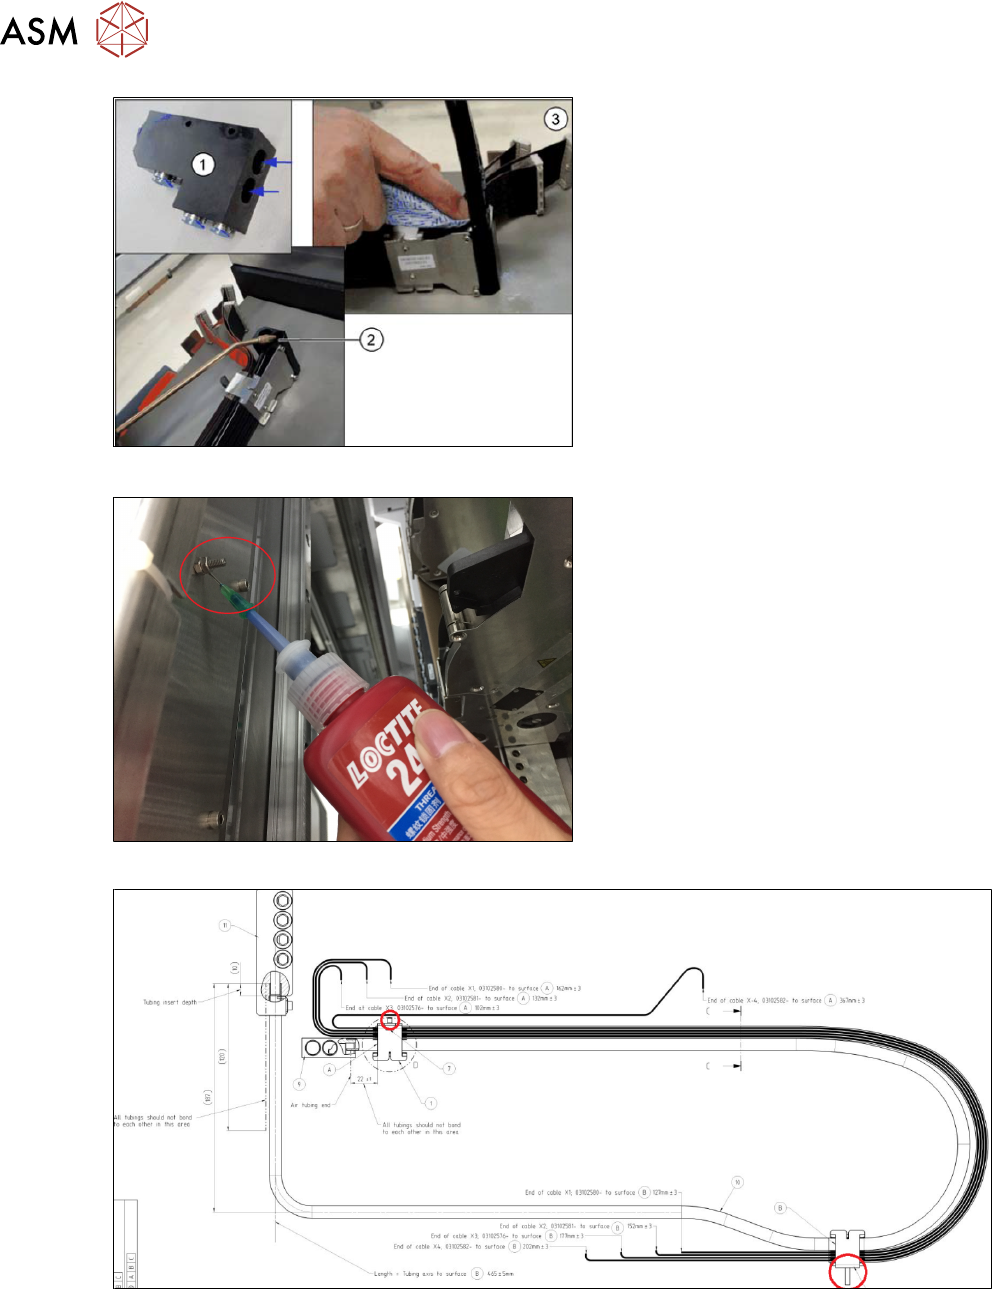
Fig.8: Cleaning the vaccum connection
► Before connecting the hoses, clean the
vacuum connection of the trailing
cable(2) with ethanol.
► Plug the new hoses into the vacuum
distributor(1) and the vacuum connec-
tion of the new trailing cable.
●
The top hose [03075884-xx] is 132 mm
long.
●
The bottom hose [03075885-xx] is 125
mm long.
These are not included in the spare parts set
for the trailing cable.
► Remove unnecessary ethanol (3).
Fig.9: Secure with Loctite 241
► Replace the new trailing cable and fix it
with the two screws.
► Carefully thread the flat ribbon cable
through the opening on the board
holder.
► Make sure not to damage the cables.
► Secure the screws of the vacuum dis-
tributor with Loctite 241.
Fig.10: Points to be secured with Loctite 241
► Having loosened the screws indicated in the graphic, apply some Loctite 241 to the M4
threads and retighten the screws.