00198609-01_AI_Replacing_the_X_and_Y_Trailing_Cable_EbS_EN.pdf - 第16页
2 Replacing the X trailing cable vacuum 2.1 Removal / Installation 16 Assembly Instructions E by SIPLACE Replacing the X and Y Trailing Cable 04/2018 Fig.8: Cleaning the vaccum connection ► Before connecting the hoses, …
2 Replacing the X trailing cable vacuum
2.1 Removal / Installation
Assembly Instructions E by SIPLACE Replacing the X and Y Trailing Cable 04/2018 15
Fig.5: Top clamp on the trailing cable
► Loosen and remove the nuts and
hexagon bolts (1) (M4x10, size 7 mm)
for the top clamp on the trailing cable.
Fig.6: Disconnecting pneumatic hoses
► Carefully loosen the two screws (1)
(Allen key 4) and four screws (2) (Allen
key 3).
► Disconnect the four pneumatic
hoses(3).
Fig.7: Removing trailing cable and vacuum block
► Disconnect the four connectors(1).
► Remove the trailing cable(2) together
with metal vacuum block.
2 Replacing the X trailing cable vacuum
2.1 Removal / Installation
16 Assembly Instructions E by SIPLACE Replacing the X and Y Trailing Cable 04/2018
Fig.8: Cleaning the vaccum connection
► Before connecting the hoses, clean the
vacuum connection of the trailing
cable(2) with ethanol.
► Plug the new hoses into the vacuum
distributor(1) and the vacuum connec-
tion of the new trailing cable.
●
The top hose [03075884-xx] is 132 mm
long.
●
The bottom hose [03075885-xx] is 125
mm long.
These are not included in the spare parts set
for the trailing cable.
► Remove unnecessary ethanol (3).
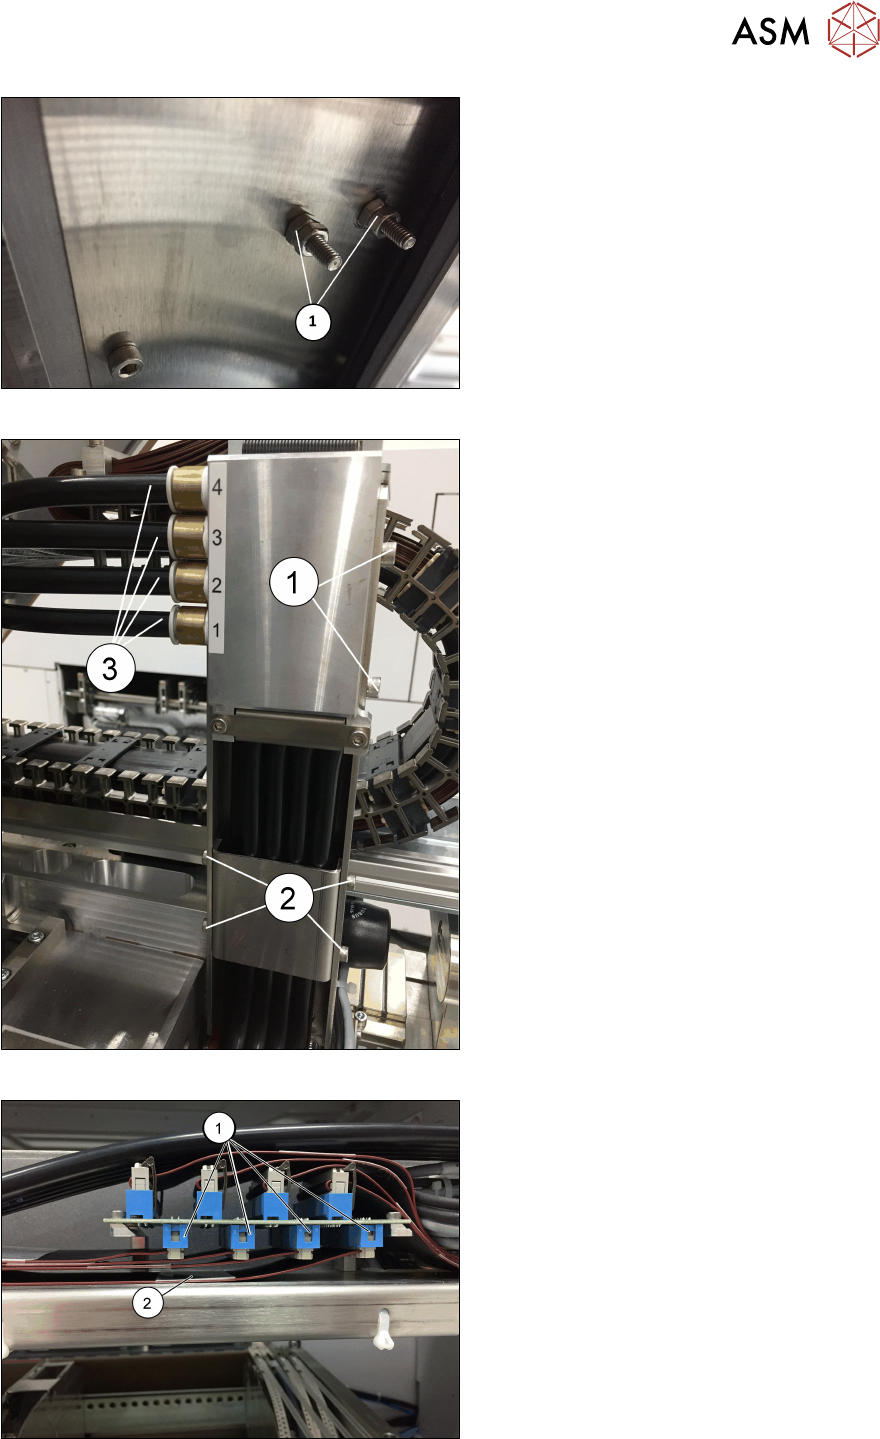
Fig.9: Secure with Loctite 241
► Replace the new trailing cable and fix it
with the two screws.
► Carefully thread the flat ribbon cable
through the opening on the board
holder.
► Make sure not to damage the cables.
► Secure the screws of the vacuum dis-
tributor with Loctite 241.
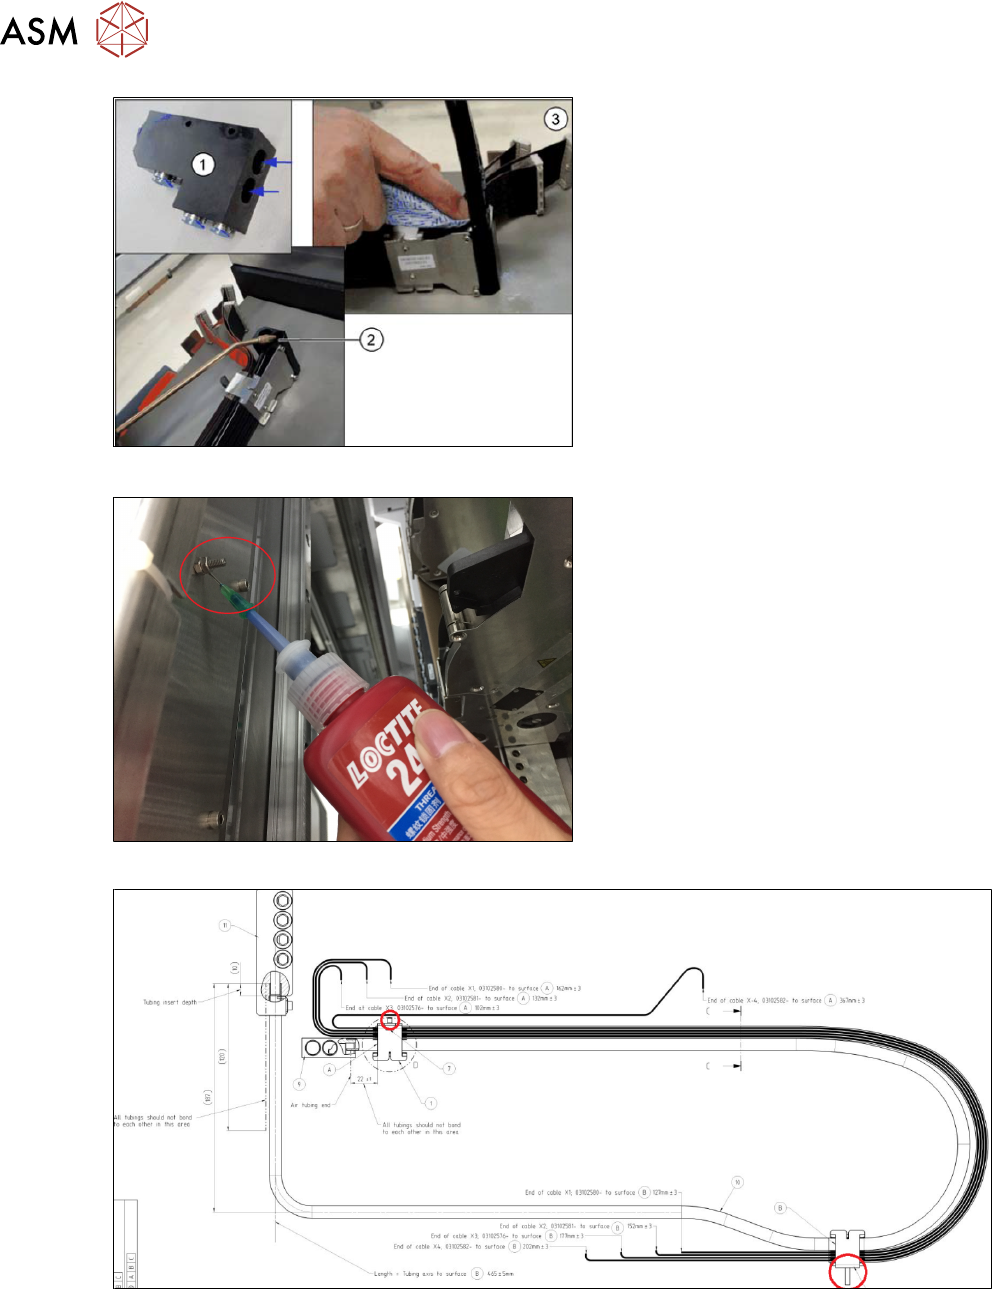
Fig.10: Points to be secured with Loctite 241
► Having loosened the screws indicated in the graphic, apply some Loctite 241 to the M4
threads and retighten the screws.

2 Replacing the X trailing cable vacuum
2.1 Removal / Installation
Assembly Instructions E by SIPLACE Replacing the X and Y Trailing Cable 04/2018 17
CAUTION
Leaky connection
The four-fold air supply hose cannot be glued in place until the trailing cable and the distrib-
utor on the board holder have been assembled. Otherwise the connection could be dam-
aged and become leaky. For this reason, never open the hexagon bolts and the screws of
the vacuum connection in the top trailing cable if this is not absolutely necessary.
Fig.11: Secure with Loctite 406
The hoses of the trailing cable must be se-
cured with the thin fluid Loctite 406 instant
adhesive in the distributors.
► Use the dosage tip supplied.
► Make sure that a thin adhesive film is
laying around the hose.
► Apply the adhesive directly on the inter-
face between distributor and hose.
The adhesive is drawn into the gap between
hose and distributor by means of capillary
attraction.