00192419-02.pdf - 第29页
29 g This numbe r indicate s how many tr acks are left to be checked . The procedure c an be fo llowed on the bar grap h. h ’ Tra c k ’ Activate If a track ha s been d eactivated, it can be re activated by clicking on th…
28
Supply refilled
If a track has been deactivated by a ‘Track empty’ error, it can be
reactivated by clicking on the ‘Supply refilled’ button or scanning the
RETURN barcode on the track barcode bar.
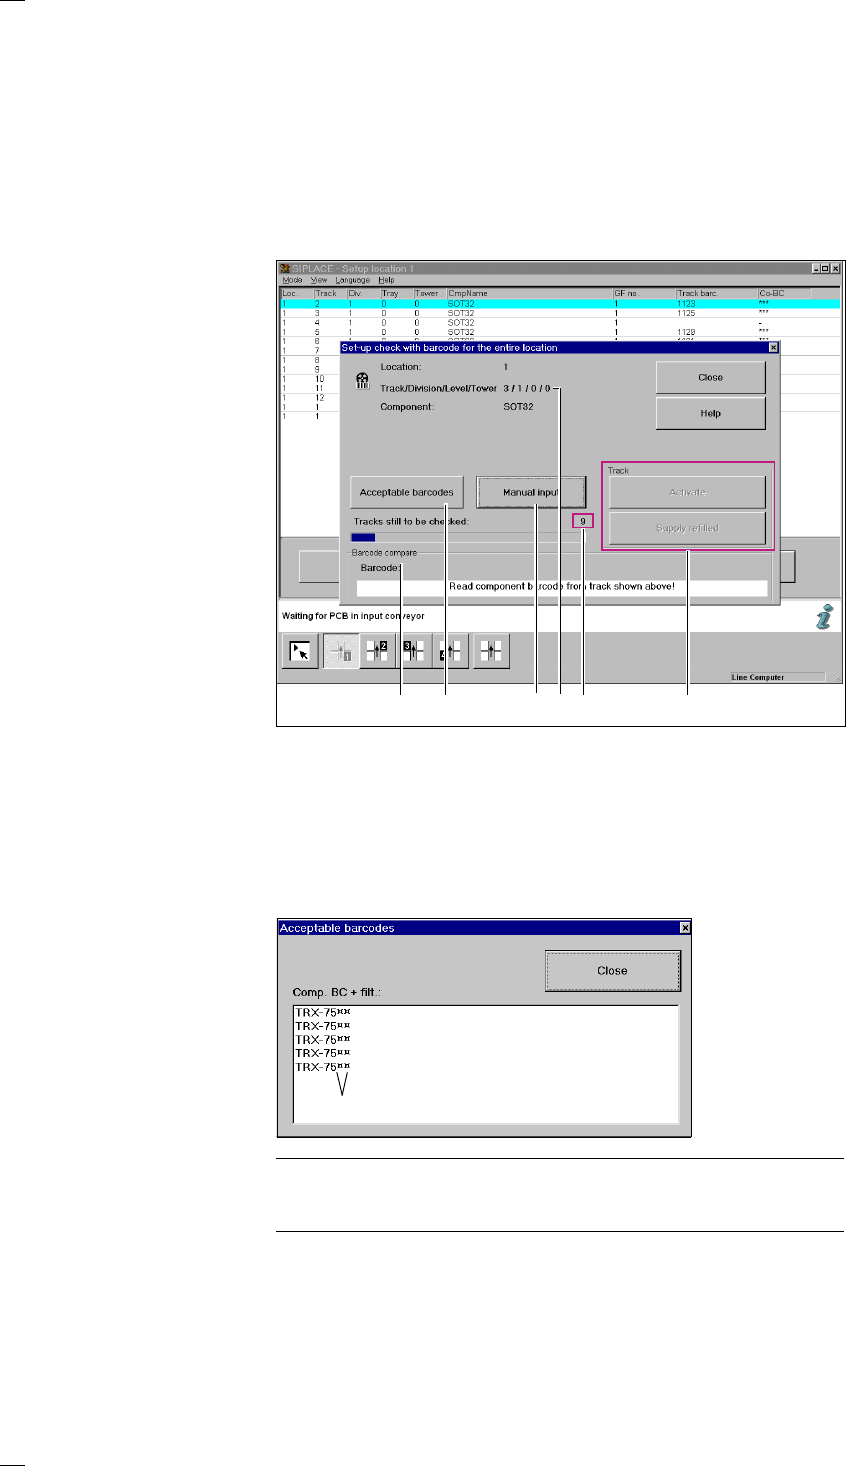
‘Set-up check for entire location’ menu
This menu is used to check the set-up of tracks that are monitored using
barcodes across the entire location. You are prompted to scan the
individual tracks one after another.
a Displays the data for the selected track.
s ’Manual entry’
This option is used to enter the barcode manually. The entered barcode is
compared against the configured data and the result is output in the
‘Barcode compare’ window. The result is ‘equal’ or ‘not equal’.
d ’Acceptable barcodes’
Click on this button to call up a display box containing a list of up to 6
barcodes that are currently acceptable.
PLEASE NOTE
If one of the barcode digits is assigned a star (*), this digit will not be
evaluated during the barcode comparison.
f ’Barcode compare’
This box displays the scanned barcode and the result of the barcode
comparison. You are prompted to scan or enter the barcode for each track
one after another. If the scanned barcode does not agree with the desired
barcode, a red bar labeled ‘Not equal’ appears. Once you have checked
all the tracks, a message box stating ‘Set-up check for entire location
complete’ appears.
adfsg h
Filter digit
29
g This number indicates how many tracks are left to be checked. The
procedure can be followed on the bar graph.
h ’Track’
Activate
If a track has been deactivated, it can be reactivated by clicking on the
‘Activate’ button or scanning the RETURN barcode on the track barcode
bar.
Supply refilled
If a track has been deactivated by a ‘Track empty’ error, it can be
reactivated by clicking on the ‘Supply refilled’ button or scanning the
RETURN barcode on the track barcode bar.
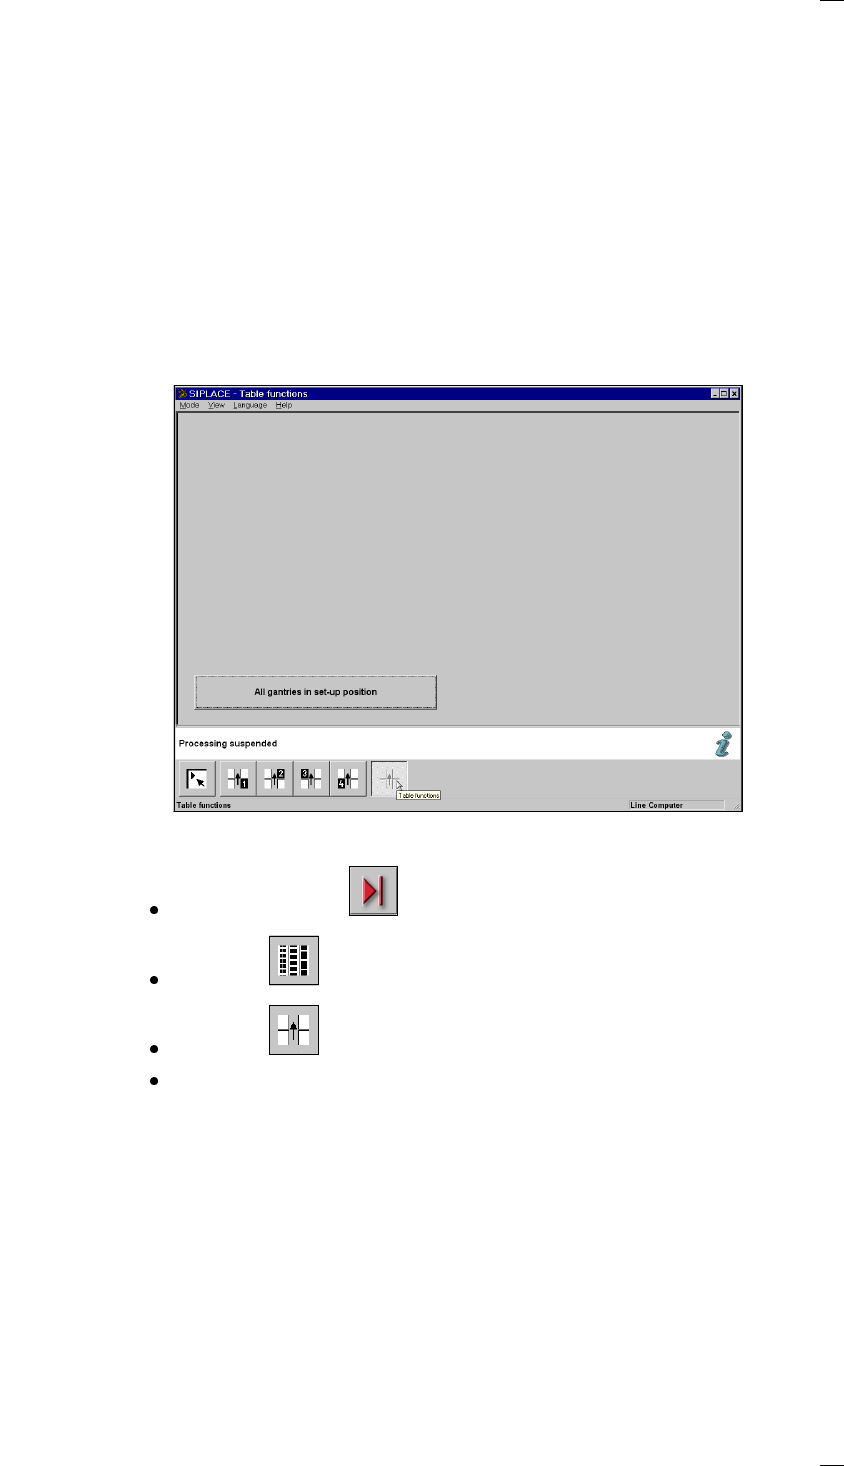
‘Table functions’ menu
This menu is used to move all the gantries out of the feeder areas in order
to change a feeder or the component feeder table without the risk of a
head crash, for example.
PCB processing must be stopped before this menu can be used.
To do this, click on the ‘Stop processing’ icon from the main view.
Click on the ‘Set-up’ icon from the main view.
Click on the ‘Table functions’ icon.
Click on the ‘All gantries to set-up position’ button.

30
’Display errors’ menu
From the Error handling menu you can access the lists corresponding to
the following error types:
– Track errors
– Machine errors
– Transport errors
– General errors
The top line will always show the last error to occur.
a Icon for accessing the track errors menu
s Icon for accessing the machine errors menu
d Icon for accessing the transport errors menu
f Icon for accessing the general errors menu
g List of errors with title bar
Key to the abbreviations in the title bar:
No.: Error number
CmpName: Name of the component
Loc.: Component location
Tr/D/T: Track / division / tray
Seg: Number of the segment which was used for placing the component
#E: Error counter - The error counter shows how often this error has already
occurred.
Text: Explanatory text
The following abbreviations may also be encountered with other
error types:
DEV.: The originator of the error message, e.g. gantry 1, etc.
Transp.: Conveyor belt affected:
1 = Standard conveyor
2 = 2nd conveyor when the twin conveyor option has been installed
Info 1 or 2: Information of relevance to Siemens only.
h Diagnostics (option)
Select one particular error line in the list and click on Diagnostics. The
diagnostics program will be started.
j Error information
Additional information concerning the marked errors is displayed by the
information and help system.
k Delete all
Click on this button to delete all the errors of the same type. If a track is
empty, it must be filled before deleting.
l Location X track errors’
g
hj
a s d f
k
l