00198051-02_IM_SetupCenter_8.1_EN.pdf - 第25页
Setup Center Application Installation 5.2.1 Setup Type – SIPLACE Setup Center Complete Individual Setu p Types and Next Steps Installation Manual SIPLACE Setup Center 8.1 25 ► Case-sensitive means that the upper and lowe…
Setup Center Application Installation
Individual Setup Types and Next Steps 5.2.1 Setup Type – SIPLACE Setup Center Complete
24 Installation Manual SIPLACE Setup Center 8.1
► Enter the Password for the SQL Server user "sa", i.e. the SQL server system administrator.
► Click Next.
Step 2a
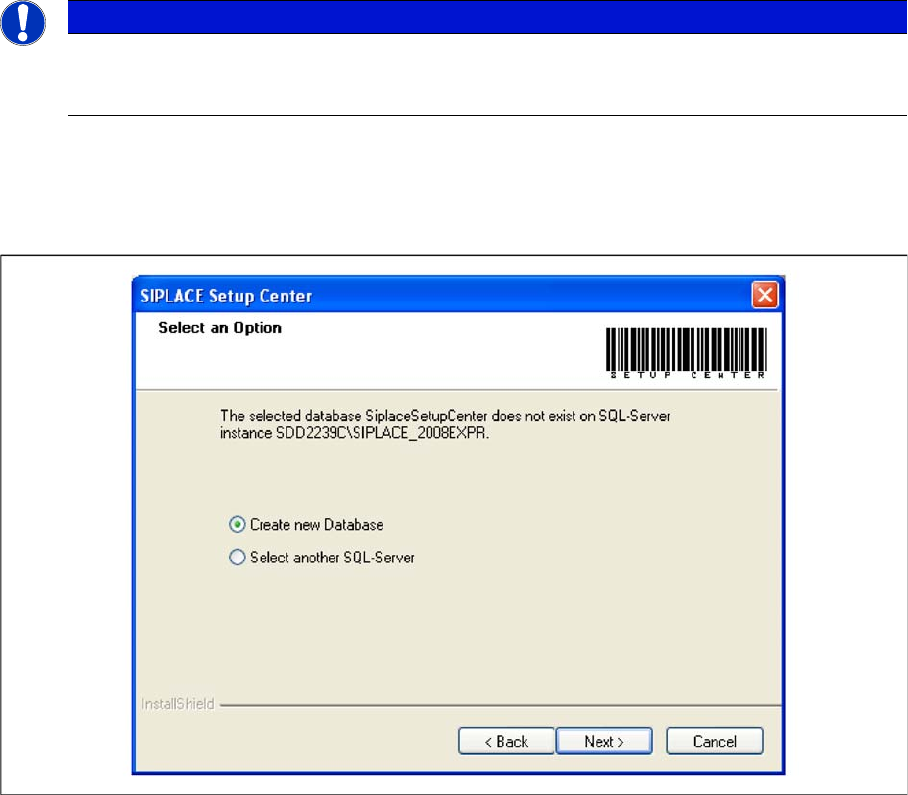
► The following dialog appears, in case no database with the name SiplaceSetupCenter exists::
► Choose Select another SQL Server, you return to the previous dialog.
► Click Next to create a new database.
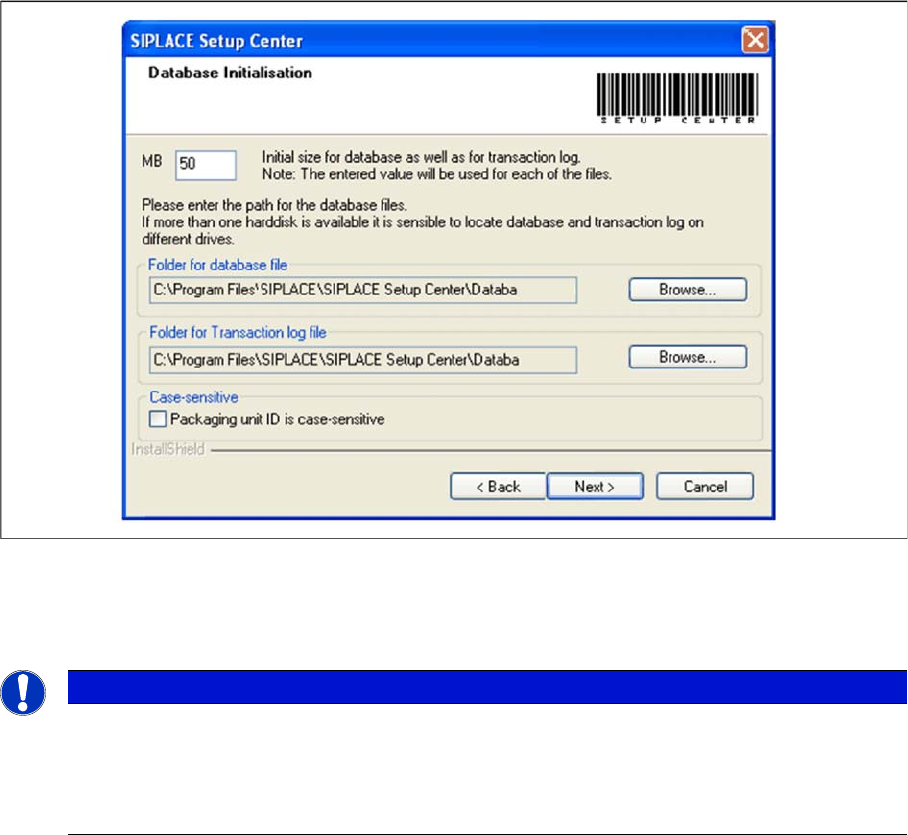
Step 3
► Enter the information required to be connected with the SQL Server and database in the DB Initiali
-
zation dialog box.
► The figure you enter in the MB text box defines the initial size of the SIPLACE Setup Center database
files (default: 50) which are to be created during the installation.
► Confirm the default value or enter the size you want in the MB text box.
NOTICE
This password is empty if MSDE has been freshly installed. In this case, erase the displayed
default password. Subsequently, a window will open, prompting you to change this password.
You may accept the SIPLACE Service default password or choose one of your own.
Setup Center Application Installation
5.2.1 Setup Type – SIPLACE Setup Center Complete Individual Setup Types and Next Steps
Installation Manual SIPLACE Setup Center 8.1 25
► Case-sensitive means that the upper and lower case for packaging unit identification (Packaging unit
ID) can be evaluated by Setup Center. Activate the checkbox Packaging unit ID is case-sensitive, if
it is necessary to distinguish between upper- case and lower-case in Packaging unit ID. This option
can only be changed during the installation.
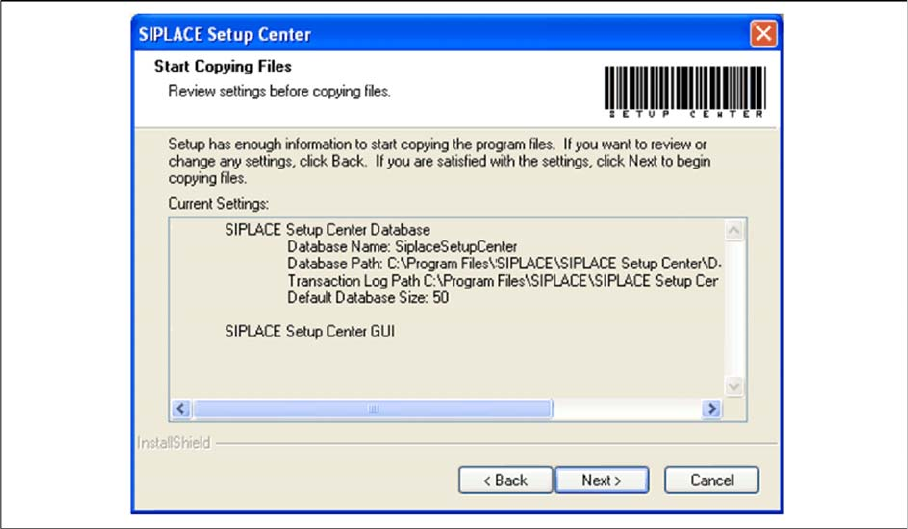
Step 4
► The Start Copying Files dialog box gives you a chance to check the information again, which you
have entered during the previous steps.
NOTICE
The specified size is only an initial value. The database will grow automatically as required.
However, only the database administrator is capable of freeing up unused disk space. In the
database files edit field, enter the directory in which the SIPLACESetupCenter.mdf file is to be
created. In the transaction log file edit field, enter the name of the directory in which the
SIPLACESetupCenter.mlf database file is to be created.
Setup Center Application Installation
Individual Setup Types and Next Steps 5.2.1 Setup Type – SIPLACE Setup Center Complete
26 Installation Manual SIPLACE Setup Center 8.1
► Click Next if you accept all the information entered.
► If you want to change any settings, click the Back button until you get back to the dialog box in ques
-
tion.
► There, enter your changes and click Next to continue as usual.
⇨ The installation routine starts.
Step 5 (Only when conflicts occur)
During the installation,settings are converted, some of which have been transferred from the local Appli
-
cationSettings.xml file to the database. This can lead to conflicts with existing settings. If conflicts were
detected, the Application Settings - Converter dialog appears.