00196743-01 - Install Guide SIPLACE Explorer 2.7_en.pdf - 第45页
In stal la tion an d Conf ig ura tion Gui de SIP LACE Ex pl orer 3 I ns talli ng SIP LACE Ex pl orer Edi tio n 03/201 0 E N 3. 4 M S SQL S erv er Conf igu rat ion 45 3 Fig. 3 - 24 MS S QL Se rver Pr oper tie s → Selec t …
3 Installing SIPLACE Explorer Installation and Configuration Guide SIPLACE Explorer
3.4 MS SQL Server Configuration Edition 03/2010 EN
44
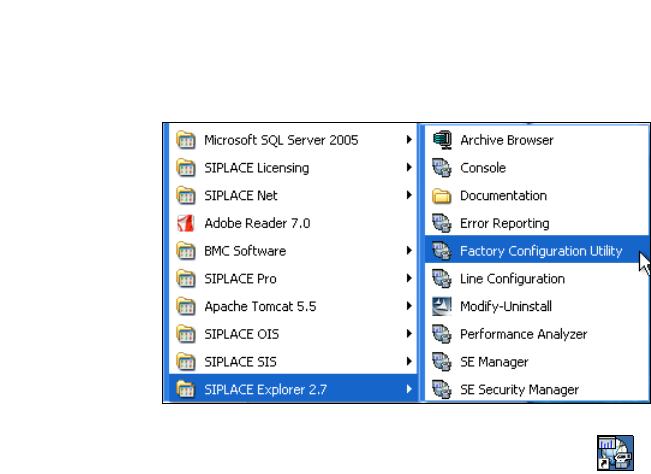
→ SIPLACE Explorer V.2.7 Factory Configuration Utility
Start the Factory Configuration Utility via the Programs → SIPLACE Explorer 2.7 → Factory
Configuration Utility menu in Windows. 3
3
Fig. 3 - 23 Factory Configuration Utility Windows Start menu
→ Or click on the Factory Configuration Utility icon on your desktop.
3.4 MS SQL Server Configuration
You can configure the system database with the Line Configuration. See “Step 5 - Configure
System Database” on page 59. 3
If you want to configure the maintenance of the system database it is required to configure the MS
SQL Server: 3
→ Start MS SQL Server Management Studio.
→ Open the Server Properties dialog box. Select the server instance which contains the
SIPLACE Explorer system database. Select Properties from the context menu. The Server
Properties dialog box will open:
Installation and Configuration Guide SIPLACE Explorer 3 Installing SIPLACE Explorer
Edition 03/2010 EN 3.4 MS SQL Server Configuration
45
3
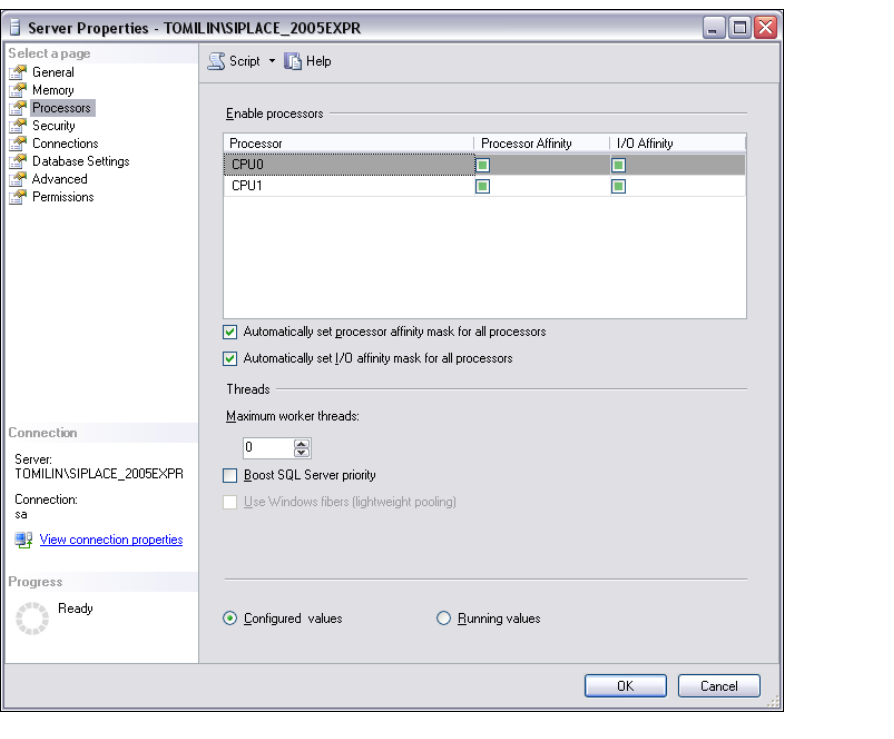
Fig. 3 - 24 MS SQL Server Properties
→ Select Processors.
→ Enable the following check boxes:
– Automatically set processor affinity mask for all processors
– Automatically set I/O affinity mask for all processors
→ Confirm with OK.
→ Start the MS SQL Server again.
3 Installing SIPLACE Explorer Installation and Configuration Guide SIPLACE Explorer
3.5 Tomcat Configuration Edition 03/2010 EN
46
3.5 Tomcat Configuration
3.5.1 Using Windows 2003 Server
If you have installed Windows 2003 Server as your operating system, you will need to reconfigure
the web server (Tomcat) before using SIPLACE Explorer V2.7. This configuration will be done via
Internet Explorer. 3
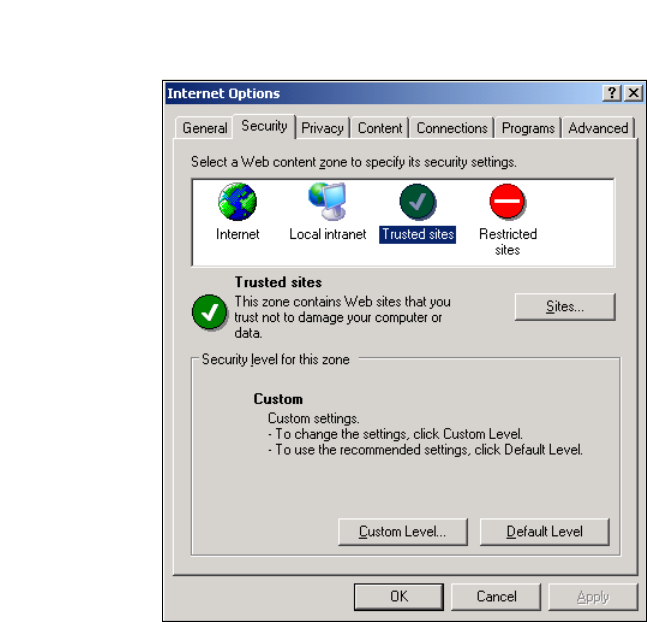
→ Select the menu Tools → Options.
→ The Internet Options dialog box will open:
3
Fig. 3 - 25 Internet Options
→ Select the Security tab.
→ Click on the Trusted Sites icon and click on Sites.
→ The Trusted Sites dialog box will open: