ts9800-user-guide-7511-0360_A.pdf - 第12页
12 4 .3 Nozzle Calibration The nozzle calibration process is to make sure that the nozzle insert is placed at the correct position with respect to th e ta ppet. Follow th e instructions belo w before starting the actual …
11
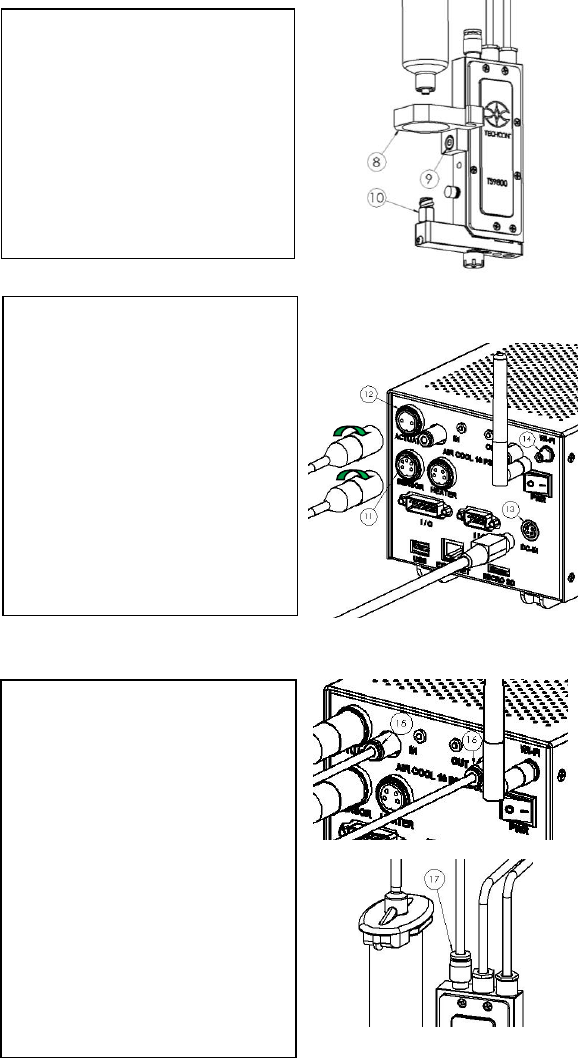
Step 7:
• Mount the syringe bracket (8)
by sliding it on the side of the
valve, then use the 3mm hex
wrench to install the provided
M4 screw (9) to secure the
bracket in place.
• Insert the syringe into the
bracket. Connect the syringe to
the valve inlet fitting (10).
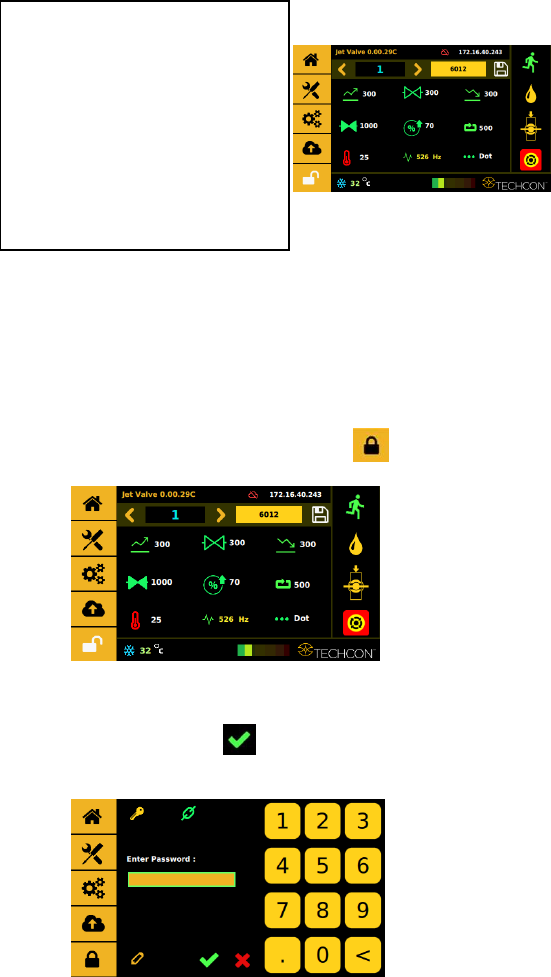
Step 8:
• Connect the valve cables to the
controller. Sensor cable (6-to-5
pins) to the ‘SENSOR’ port
(11); Actuator cable (3-to-2
pins) to the ‘ACTUATOR’
port (12). Caution: After
connecting, tighten the locking
sleeve to secure the
connection.
• Connect the power cord to the
‘DC-IN’ port (13).
• Wi-Fi antenna (Not available)
Step 9:
• Connect the first ø4mm OD air
tubing from the air pressure
source to the ‘IN’ port (15).
Warning: This Air source
must be regulated and filter
(dry) separated from the air
pressure source for the material
syringe or reservoir.
• Connect the second ø4mm OD
air tubing from the ‘OUT’ port
(16) to the air fitting on top of
the Jet Valve (17).
• Turn up the air pressure for
cooling to the maximum of 10
psi.
12
4.3 Nozzle Calibration
The nozzle calibration process is to make sure that the nozzle insert is
placed at the correct position with respect to the tappet. Follow the
instructions below before starting the actual dispense procedure.
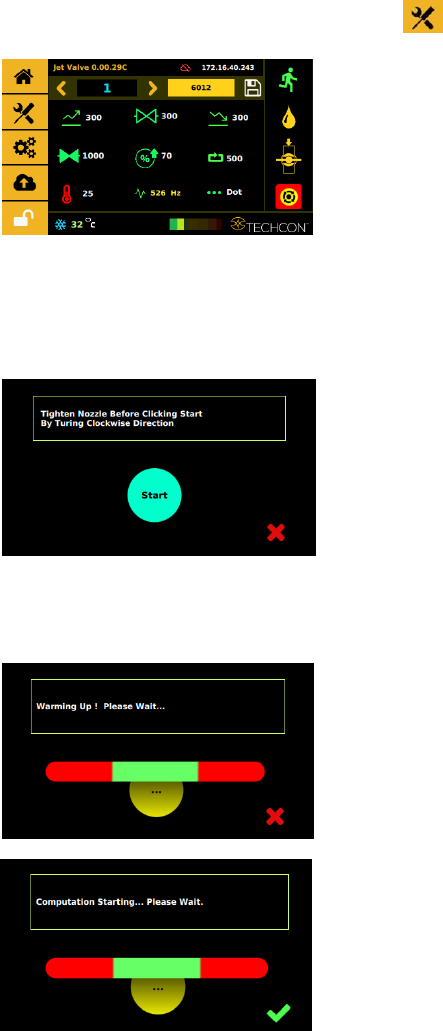
Step 1:
Touch the ‘Login’ icon to enter the login screen
Step 2:
Enter the default password ‘0000” in the password window. Then touch
‘Accept’ icon to save and exit . Attention: For changing the password,
refer to section 9.5.1.
Step 10:
• Turn on the controller by
pressing the On/Off switch.
Perform the calibration process;
this process is to make sure the
nozzle insert is placed at the correct
position with respect to the tappet.
(see next section 4.3 for
instructions).
13
Step 3:
Start the calibration procedure by touching the ‘Calibration’ icon
Step 4:
Use the nozzle adjustment tool to slowly and gently screw (clockwise) the
nozzle unit onto the fluid manifold until it stops against the tappet. Then
touch the ‘Start’ icon.
Step 3:
The system will warm up before starting the calibration computation.