ts9800-user-guide-7511-0360_A.pdf - 第26页
26 • Us e the nozzle installation too l with the sma ll pi n inserting into t he centre hole of the seal. Slowly push the seal into the centre hol e of t he f lu id manifold until the seal is fully engaged with a cli ck …
25
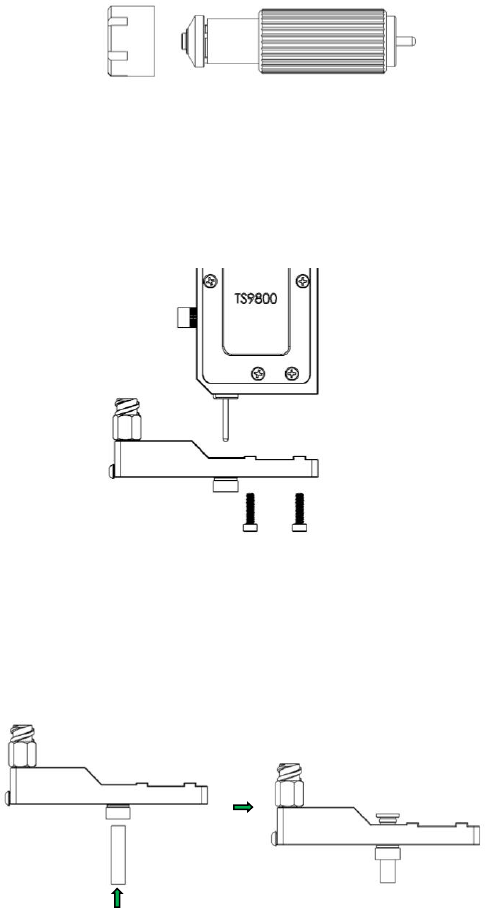
4. Remove the nozzle insert (7) from the nozzle bushing (6).
5. Use the provided 2mm hex key to remove the two mounting
screws (5) and pull the fluid manifold (4) from the valve body
(1). Caution: When remounting the fluid manifold, it’s highly
recommended to torque the two mounting screws to 2.5 – 3.0 lb-
in (0.28 - 0.33 N-m).
Note: Perform step 6 only if the tappet seal (3) must be replaced or a
thorough cleaning is required. If the manifold is removed for whatever
reasons on a regular basis the tappet seal should also be replaced on a
regular basis.
6. Remove the tappet seal (3) from the fluid manifold (4) by
inserting the provided tappet seal tool from the fluid manifold’s
outlet hole and slowly push upward on the seal.
• To install a new tappet seal, carefully place the seal in the
centre hole of the fluid manifold so that the small end of the
seal is facing inward. Make sure that the seal is positioned
evenly and centrally to the hole, then slightly push the seal
with your thumb to engage the seal to the hole. Caution: Do
not push the seal all way inside the hole with your thumb.
26
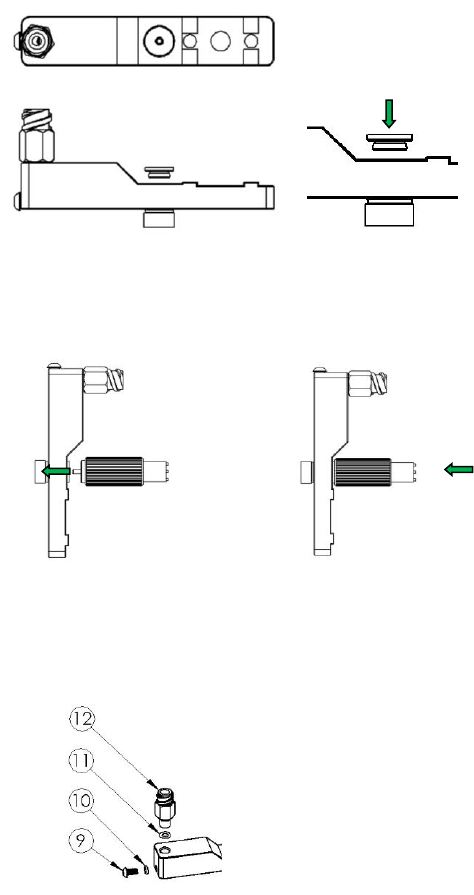
• Use the nozzle installation tool with the small pin inserting
into the centre hole of the seal. Slowly push the seal into the
centre hole of the fluid manifold until the seal is fully engaged
with a click noise.
7. Using the Phillips screwdriver to remove the plug screw (9) with
O-ring (10), items 9 & 10 come as one piece.
8. Remove the inlet Luer lock fitting (12) with O-ring (11).
Note: Examine O-rings for damage, replace them if necessary.
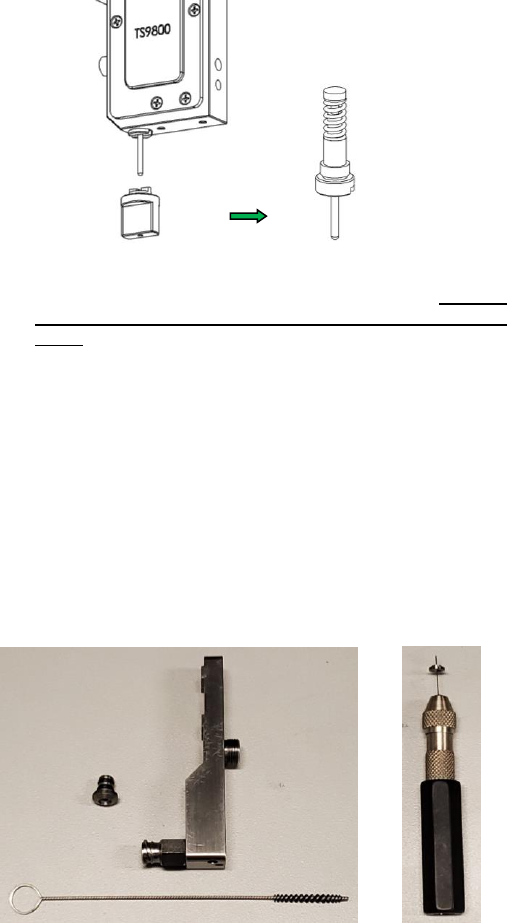
9. Using the tappet changing tool to remove tappet assembly (2).
27
10. Place all parts in a beaker with proper cleaning solution;
Isopropanol or Acetone can be used for cleaning. Caution:
Please refer to your facility regulation for proper solvent
usage.
11. Place the beaker with all parts in an Ultrasonic bath for about
15 – 30 minutes.
Caution: The nozzle insert can be cleaned and pierced through with
special nozzle insert wire using the Pin Vice. Pay attention to the
nozzle insert diameter and choose the correct nozzle insert wire.
Refer to the pictures below regarding which part to clean with which
cleaning tool.
Make sure to lubricate the tappet assembly and nozzle bushing’s
O-rings with the provided tappet grease prior to re-assembling.