ts9800-user-guide-7511-0360_A.pdf - 第42页
42 2. Touch th e clould icon t o prompt up the Rem ote sever 3. Enter i n the Remote sever IP and use the 4900 default for the Po rt . 4. If the conn ection is succe ssful a Green Clould should appear. 5. Use an y T CP/I…
41
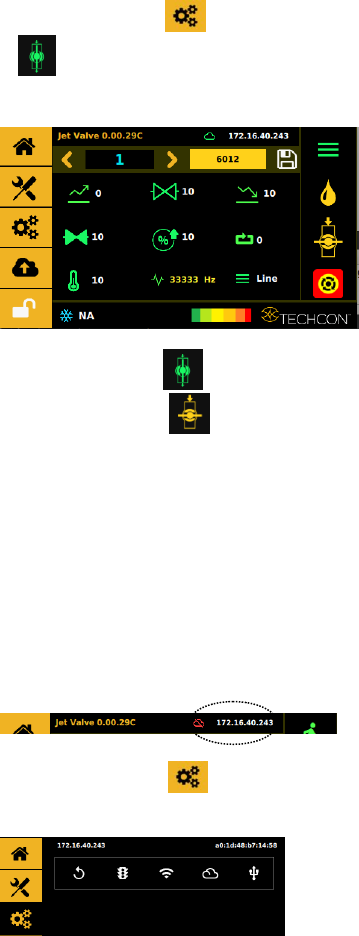
9.5.9 Service Mode
1. Touch the valve Close icon it will toggle to the valve Open
icon to open the valve for de-airing or purging (stay
open).
2. Touch the valve Open icon to close the valve and it will
toggle to a valve Close icon close position is a normal
operation mode.
Caution: The valve does not jet the material in this mode, the
material flows under regulated pressure only.
9.5.10 Connect to Wi-Fi Network (not available)
9.5.11 IOT (Remote Communication)
Note: Ethernet must be connected and it should already have
an IP address
1. Touch the Setting icon it will toggle to the menu
bellow.
42
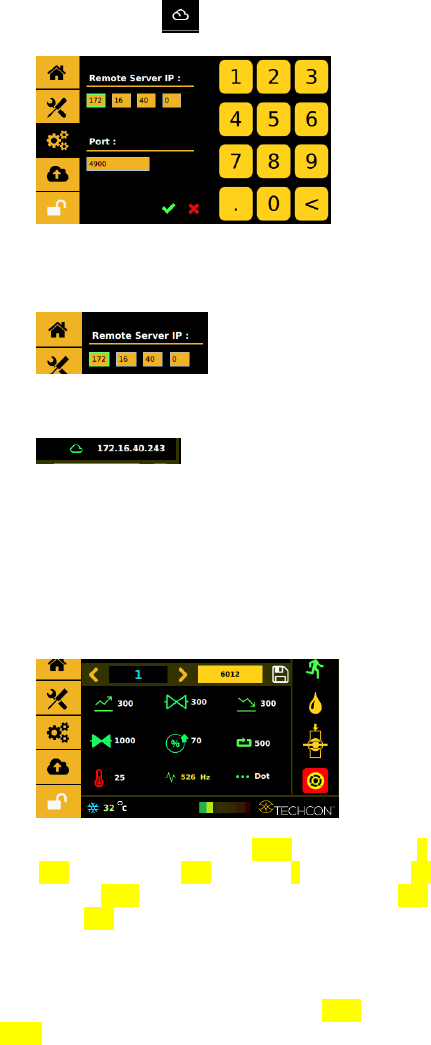
2. Touch the clould icon to prompt up the Remote sever
3. Enter in the Remote sever IP and use the 4900 default for the
Port.
4. If the connection is successful a Green Clould should appear.
5. Use any TCP/IP tool setup as a server to remotely retrived.
@<Program Number>
6. Use any TCP/IP tool setup as a server to remotely update.
#<Program Number>#<Profile Data>
Profile Data example:
#1#{"cycleCount":"6012","delay":"1000","dutyCycle":"7",
"dwell":"300","fallTime":"300","mode":0,"nozTemp":"25,
"nozTempState":false,"programValue":1,"riseTime":"300",
"totalCycles":"500"}
7. Change any of the highlighted value to the desired
setting and update the program. Note: Dot mode it is
0, and line mode it is 1. Heater Off is false On is
True and make sure the red value matches.

43
8. If update is a success this screen will appear
9.5.12 Software Update
1. Download the latest software version from Techcon website and
copy it to a blank USB thumb drive. Caution: The software file
must be placed in the root directory.
2. Insert the USB drive into the USB port located in the back of the
unit.
3. Touch the ‘Settings’ icon to enter the setup screen
4. Touch the ‘Application Update’ icon
5. Touch the ‘Accept’ icon to update the software
6. Wait until the update is completed.