ts9800-user-guide-7511-0360_A.pdf - 第16页
16 5. OPERATI ON 5.1 Start Dispensing Th e valve is now read y to disp ense. Dispensing fluid (v ia c ar tr id ge/syringe or reservoir) must be connect the supply pressure regulator. En te r the desired dispe nsing param…
15
WARNING:
Make sure the nozzle insert and nozzle bushing are properly installed in the
nozzle unit before starting the calibration process.
Never over-tighten the nozzle unit against the tappet since it can break the
tappet or cause pre-matured wear on both tappet and nozzle insert.
If the yellow circle can’t be moved to or stay inside the green zone, touch
the ‘Accept’ icon to exit and repeat the calibration procedure starting from
Step 1.
Remarks:
• You can leave the calibration procedure by touching the ‘Accept’
icon.
• The calibration can only be confirmed by touch the ‘Accept’
icon when the yellow circle is inside the green zone.
• If you shut down the system and alter nothing mechanically,
you don’t have to perform the calibration procedure again when
switching the system on.
• The calibration procedure should be done in cleaned dry system
to avoid any influences of the material between nozzle insert
and tappet and to get a consistent dispense result.
• If the fluid contains particles (fillers), the calibration procedure
performed with fluid is not possible. It must be performed
without fluid.
16
5. OPERATION
5.1 Start Dispensing
The valve is now ready to dispense. Dispensing fluid (via cartridge/syringe
or reservoir) must be connect the supply pressure regulator.
Enter the desired dispensing parameters refer to section 7.5.5 (Rising, Open
Time, Falling, Delay, Needle Lift and Number of Pulses), then touch ‘Save’
icon. Information to the values can be found in the table for ‘essential
parameters’ on the page below.
To start the dispensing, touch the ‘Run’ icon or use external start
signal for both or dot mode. When in line mode start
can only be activate or trigger by an external devised.
Attention: To de-air (removal of air in the system) after going through a
calibration procedure in section 4.3. (e. g. after the change of
cartridge/syringe and/or after the remove of nozzle) use the Purge feature to
de-air. To purge touch and hold the ‘Purge’ icon it will run the
parameter in the current program, and it will run until the purge icon is let
go.
5.2 Parameter Settings for the dispensing process
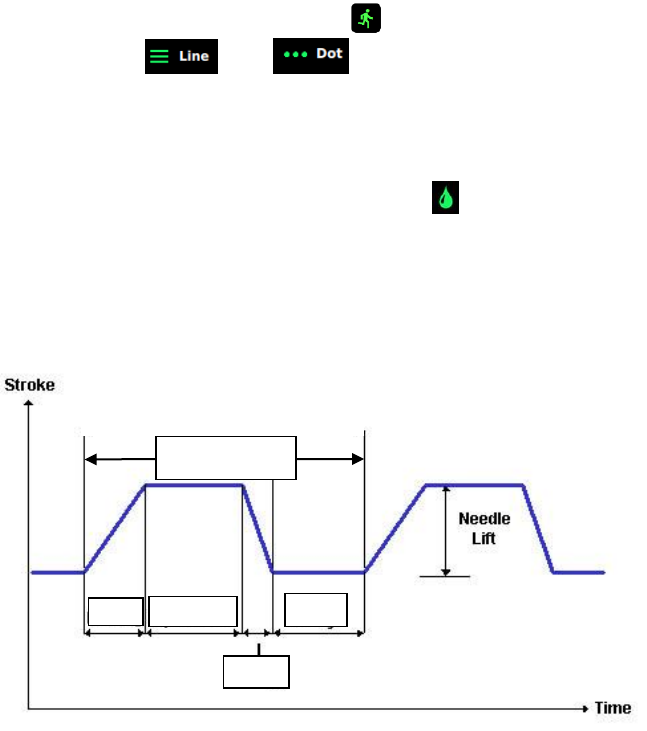
The TS9800 Jet Valve System works according to the control profile shown
below:
both
Figure 4: Control Curve
Delay
Open time
Rise
Fall
One Full Cycle
(Frequency)
17
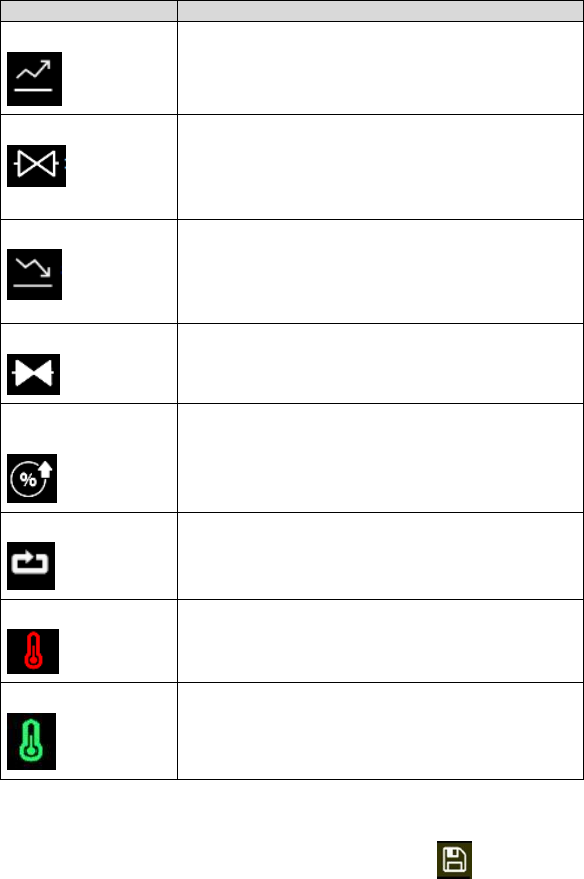
The essential parameters are:
Parameter
Description
Rise Time
This is the time interval in which the valve is open.
The time increment is in 1 µs starting at 80 µs. The
maximum rising time is 1999 µs.
Open Time
This value defines the time in which the valve is
completely open. The value can be varied in steps of
1 µs. The minimum open time is 1 µs and the
maximum open time is 999999 µs.
Fall Time
During this time, the valve is closing and compressing
the media in the nozzle chamber. The time increment
is in 1 µs starting at 80 µs. The maximum falling
time is 1999 µs.
Delay Time
This is the time between two dispense pulses. It is
adjustable in 1 µs.
Percentage Lift (Lift
of Tappet)
This value corresponds to the stroke of the tappet. It is
entered in percent of the maximum stroke (100%).
Pulses
This value corresponds to the number of tappet stroke
per dispensing cycle in dot mode
Heater OFF
This indicate the heater manifold is Off
Heater ON
This indicate the heater manifold is ON (temperature
range is from 0-90 degree C, click on value next to
icon to adjust setting)
After entering the dispensing parameters, touch ‘Save’ icon to save all the
parameters to the current program location. You can then start your dispensing
process. Note: For more detail on how to enter the dispensing parameters,
refer to section 9.5.3.
Table 1 – Essential parameters