Stopper ASE HS60.pdf - 第25页
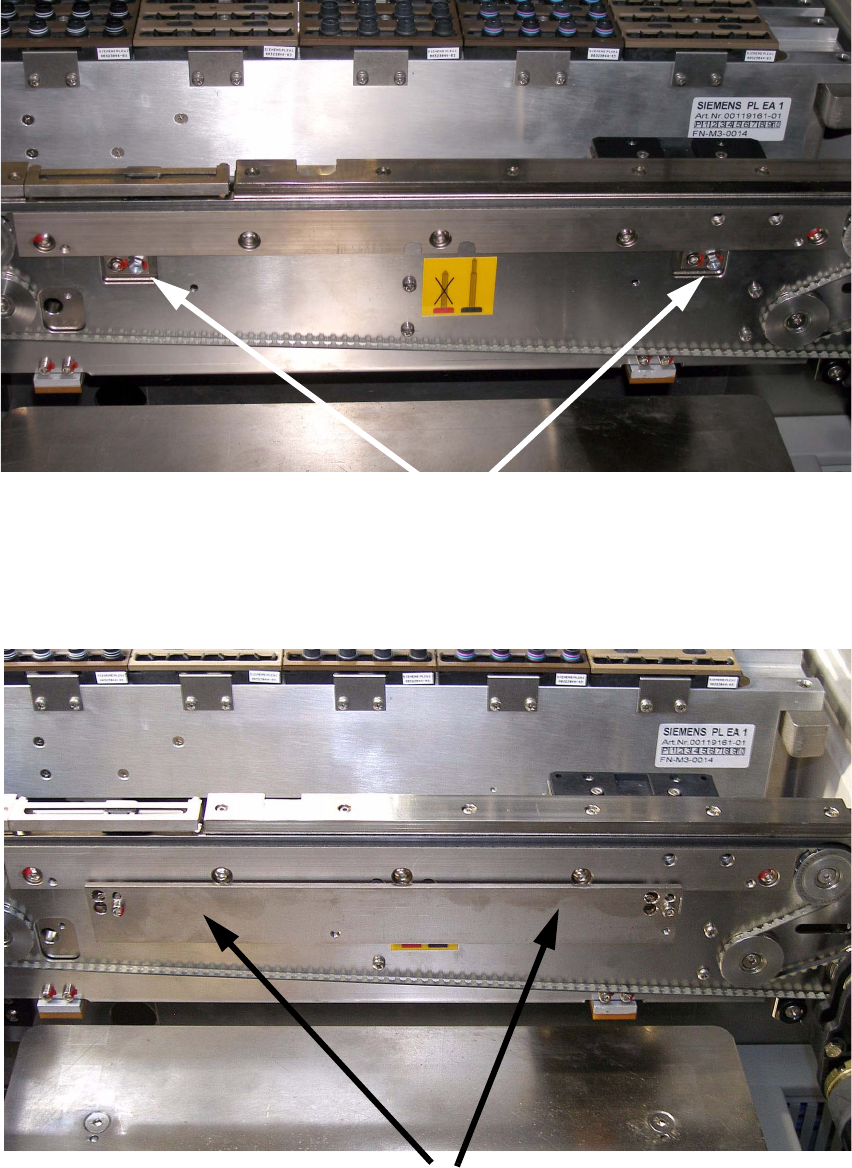
Retrofit Instructions: Stopper for ASE SIPLACE HS-60 (special design) 11/2005 Edition 25 : Screw the spacer into the holes that are now exposed. 2 2 : Fit the adapter plate onto the spacers. 2 Sp a c e r s Adapter plate
Retrofit Instructions: Stopper for ASE SIPLACE HS-60 (special design)
11/2005 Edition
24
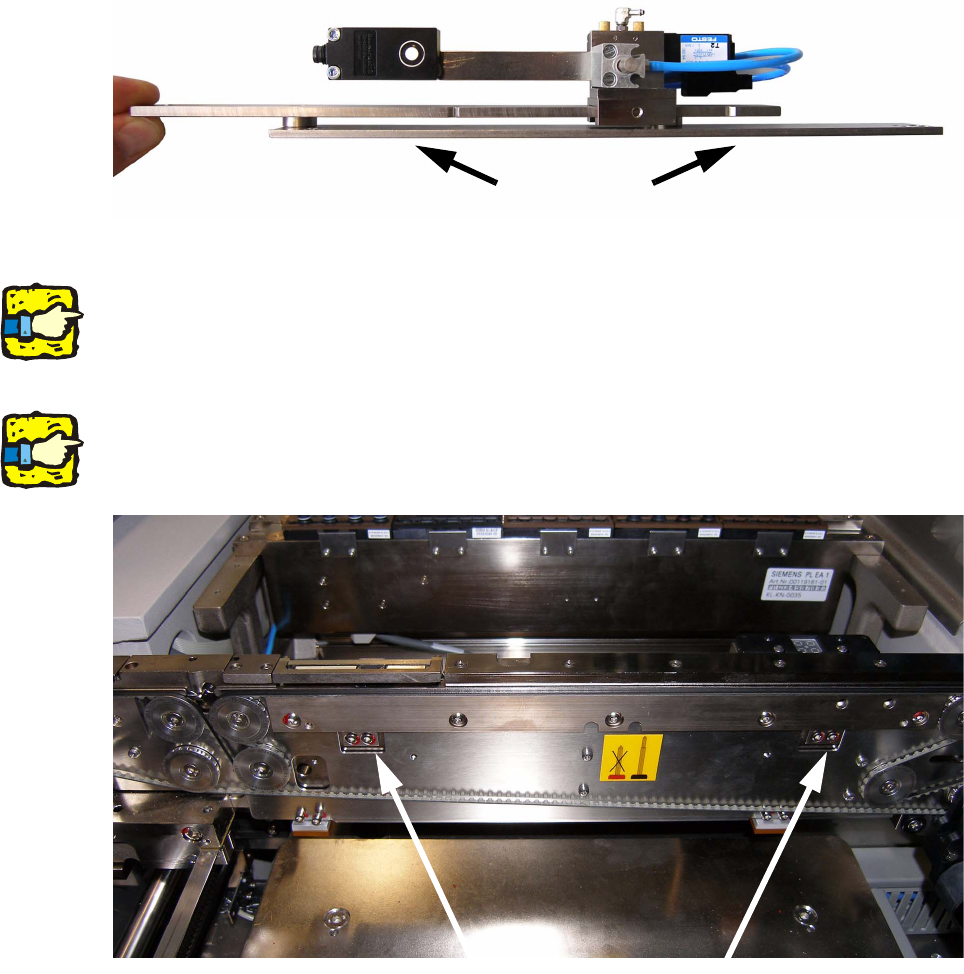
2.7 Installing the stopper
2.7.1 HS-60 with pressure sensor on the conveyor
The adapter plate must be fitted in order to install the stopper module on the conveyor in an HS-
60 with pressure sensor. 2
2
2
2
Note the restrictions!! 2
2
: To fit, unscrew the two painted screws indicated on the inside of the machine.
2
Never loosen both pairs of screws at the same time. 2
2
2
Adapter plate
Loosen the painted screws on the inside of the machine
Retrofit Instructions: Stopper for ASE SIPLACE HS-60 (special design)
11/2005 Edition
25
: Screw the spacer into the holes that are now exposed.
2
2
: Fit the adapter plate onto the spacers.
2
Spacers
Adapter plate
Retrofit Instructions: Stopper for ASE SIPLACE HS-60 (special design)
11/2005 Edition
26
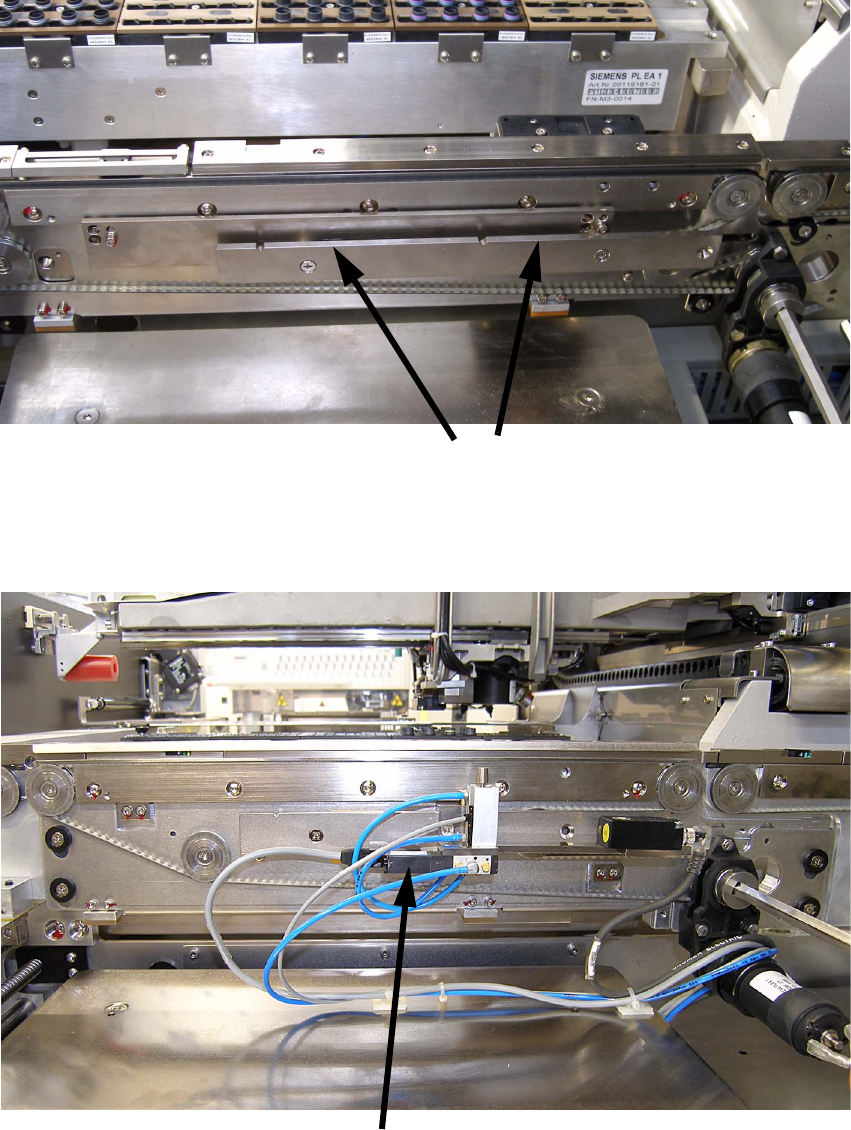
: Fit the assembly rail onto the adapter plate. Use the M4 x 10 mm countersunk head screws.
2
: Push the stopper module onto the assembly rail and set it to the appropriate PCB length in one
of the two notches.
2
Assembly rail
Stopper module can be engaged in two positions