SM431说明书.pdf - 第281页
X-Y Frame 6-9 6.3.3. X-Axis Motor & Ball Screw 6.3.3.1. 电动机替换次序 1. 按 ‘Feeder Change’ 把 ‘Front/Rear X Frame 如下图所示进行移 动。 2. 正常关闭 PC 后,关闭设备正面的总开关 3. 分离 T ower Lamp Connector 。 X-Axis Motor
Samsung Component Placer SM431 Service Manual
6-8
6.2. X-Y Frame
No
不良内容 可能原因 措施方法 参照
1) Sensor 工作检点 / Sensor 位置检点
Home Sensor 位置/工
作不良
2) Axis Sensor Board (J9060162A检点)
- CN1 : Y1 Home / Y1+Limit /Y1-Limit
- CN3 : X Home / X+Limit / X-Limit
Rack
Ass’y,
Cableway
Coupling连接状态不良 Coupling 连接状态确认
1
无法
X/YHoming
Motor / Motor Driver 不
良
Motor Driver 检点及替换
(与其他设备交替检点)
Motor
&Driver
1) Sensor 工作检点 / Sensor 位置检点
Home Sensor 位置/工
作不良
2) Axis Sensor Board (J9060162A检点)
- CN1 : Y1 Home / Y1+Limit /Y1-Limit
- CN3 : X Home / X+Limit / X-Limit
Rack
Ass’y,
Cableway
Coupling连接状态不良 Coupling 连接状态确认
Motor / Motor Driver 不
良
Motor Driver 检点及替换
(与其他设备交替检点)
Motor
&Driver
2
无法感知
X/YHoming
Coupling连接状态不良 Coupling 再连接及 X-Y Limit 执行
Motor Driver內
Parameter 不同
标准 Parameter 再 Loading
Motor
&Driver
Motor Driver 不良 替换
Motor
&Driver
3 发生噪音
Ball Screw 不良 替换
4
Motor Alarm
发生
Motor Driver 不良 替换
Motor
&Driver
6.3. X-Axis Frame
6.3.1. X-Axis Motor & Ball Screw 代表替换事例
电动机工作不良
滚珠丝杠磨损
6.3.2. 必要工具
Dial Gage
Torque Wrench
T Wrench (其他提供工具) or Hex Wrench
弹性挡圈 手钳
十字形(+)螺丝刀
1mm 厚度的铁板(铁尺)
X-Y Frame
6-9
6.3.3. X-Axis Motor & Ball Screw
6.3.3.1. 电动机替换次序
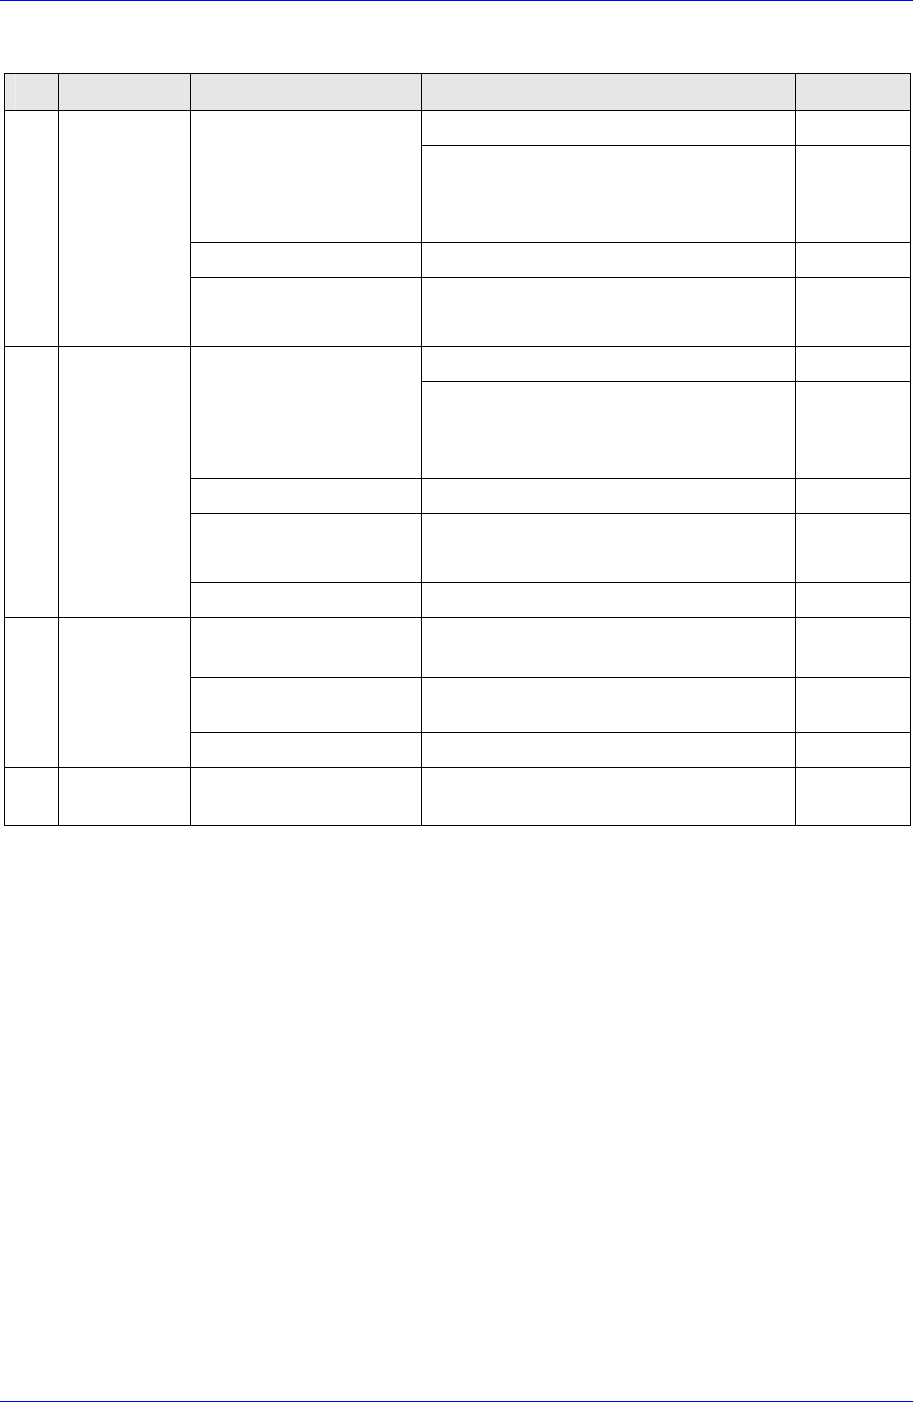
1. 按‘Feeder Change’把‘Front/Rear X Frame如下图所示进行移动。
2. 正常关闭PC后,关闭设备正面的总开关
3. 分离Tower Lamp Connector。
X-Axis Motor
Samsung Component Placer SM431 Service Manual
6-10
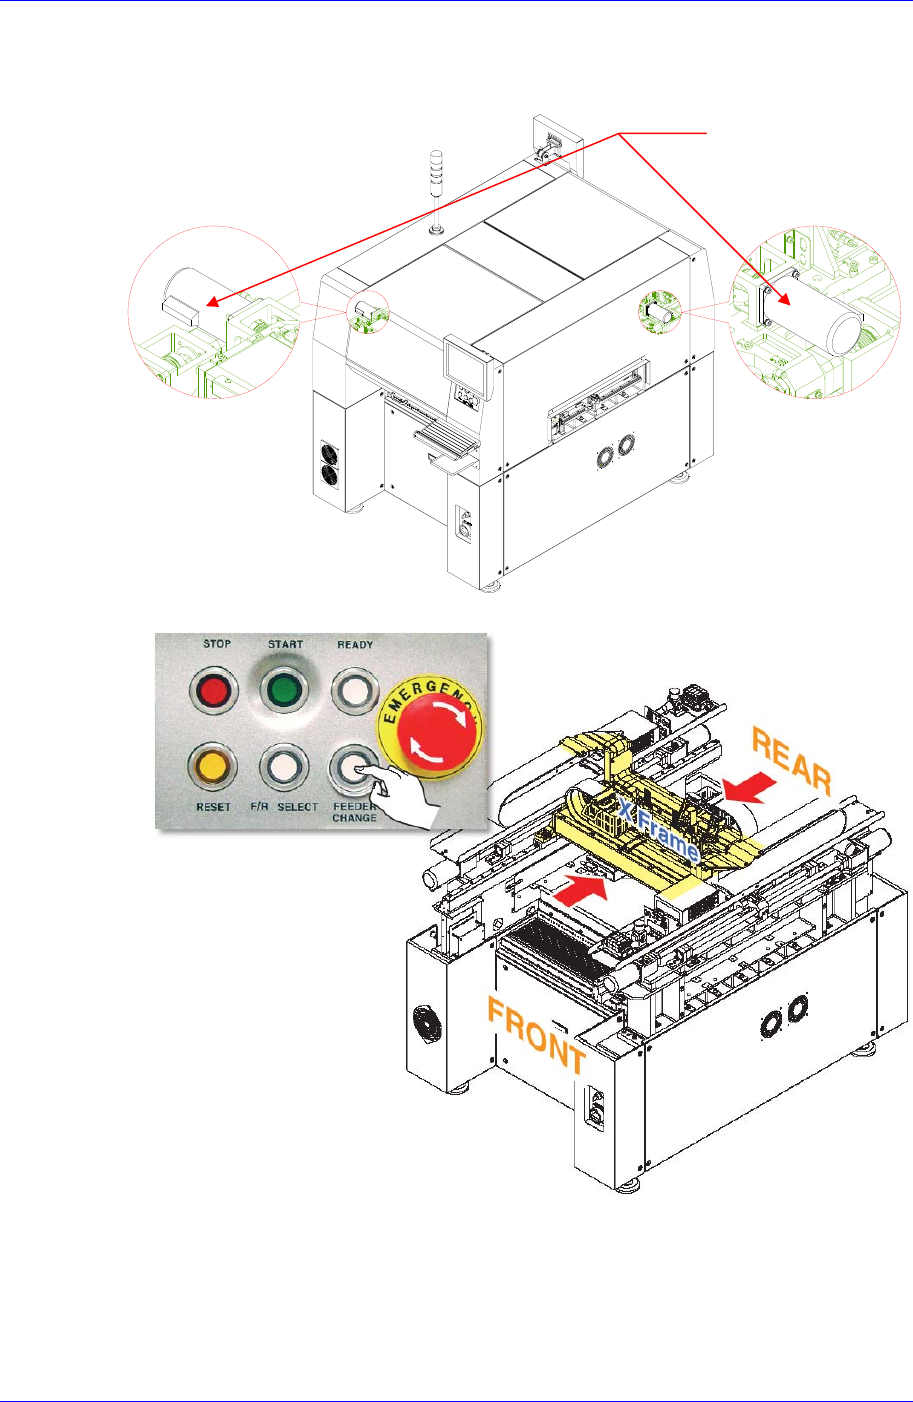
4. 为了拆卸X轴马达利用十字形(+)螺丝刀拧开固定设备正面基准左/右侧顶盖
的外部2个、内部10个螺丝后拆卸盖。
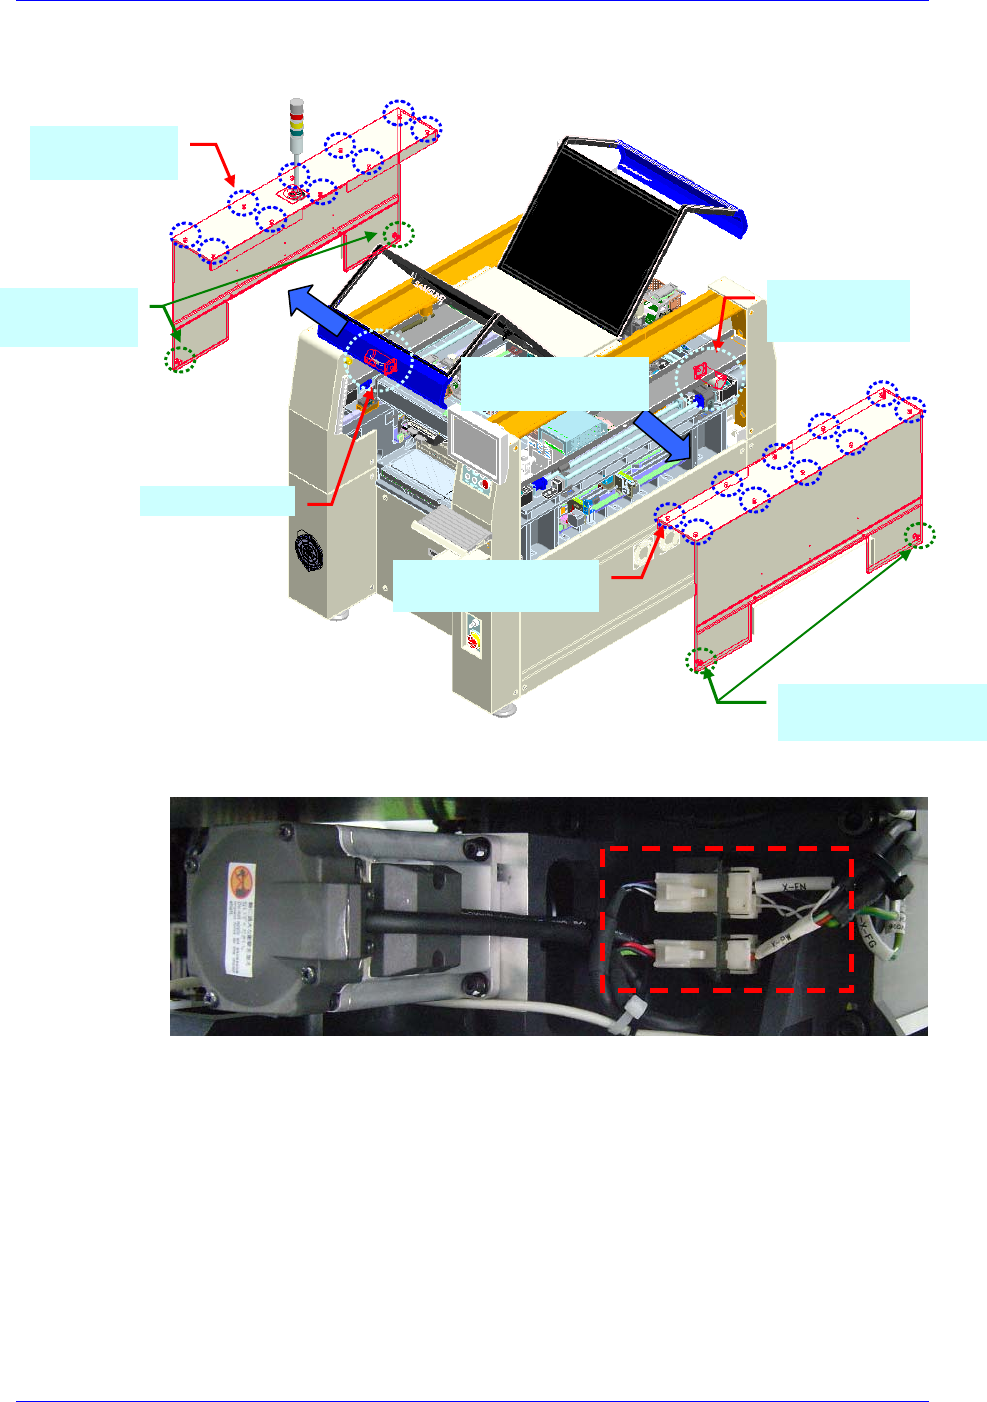
5. 分离马达的电源及编码器电线连接器。
X-Axis
Motor Position
External fixing screws
(2ea)
Removal Direction
of the Cover
X-Axis Motor
Internal fixing screws
(
10ea
)
Internal fixing
screws (10ea)
External fixing
screws (2ea)