00195427-02_AI_HeadReconfigKitsD1D2_DE+EN.pdf - 第79页
Assembly instructions Head Re configuration SIPLACE D 1 / D2 Edition 03/2007 77 : Fix the P&P head with 4 screws DIN912 M4x16 - 8.8 (03052 012-). T ighten the scr ews crosswis e with a torq ue of 270 Ncm. 2 Fig. 2.8.…
Assembly instructions Head Reconfiguration SIPLACE D1 / D2
Edition 03/2007
76
2.8.5 Assembly of C&P6/12 placement head
Handle the sleeve with the utmost care! 2
Make sure that the screws are of the right length. 2
The thread in the head plate can be damaged if screws with othe
r lengths are used. 2
Tightening torque for the fixing screws: 270 Ncm. 2
2
2
2
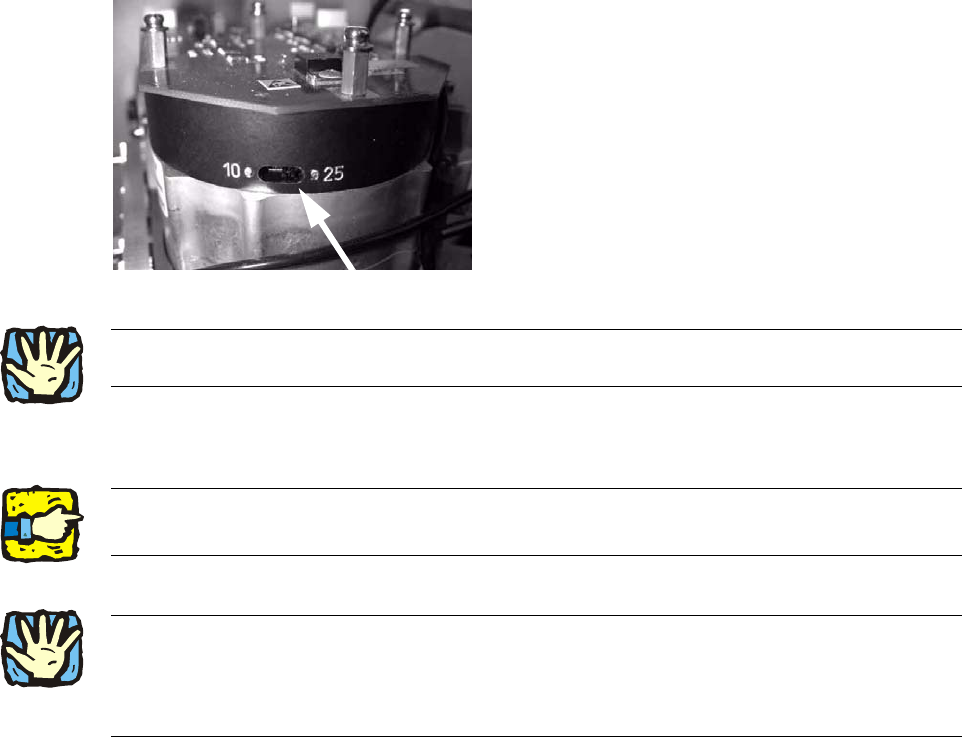
: Set the switch for the resolution of the star axis to 25.
The switch is located on the underside of the placement head.
2
2
: Remove a sleeve from the star.
: Turn the star so that it moves easily towards the screws.
2
2
2
2
2
2
2
2
2
2
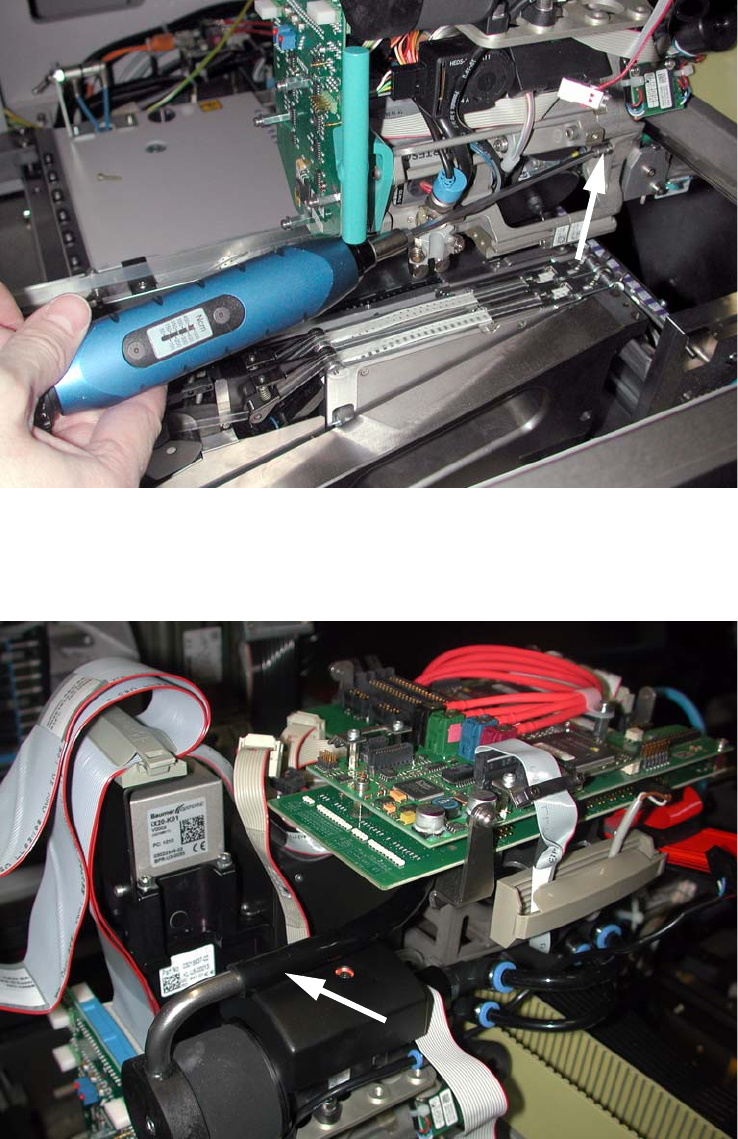
2Always use the standard tool!
Use the adjustable torque screwdriver with pivot extension insert bit for placement heads! 2
2
2
Assembly instructions Head Reconfiguration SIPLACE D1 / D2
Edition 03/2007
77
: Fix the P&P head with 4 screws DIN912 M4x16 - 8.8 (03052012-).
Tighten the screws crosswise with a torque of 270 Ncm.
2
Fig. 2.8.2 Fix C&P: Torque screw driver with pivot extension insert bit
: Connect the 3 hoses.
2
Fig. 2.8.3 Connect silicon hose size 12
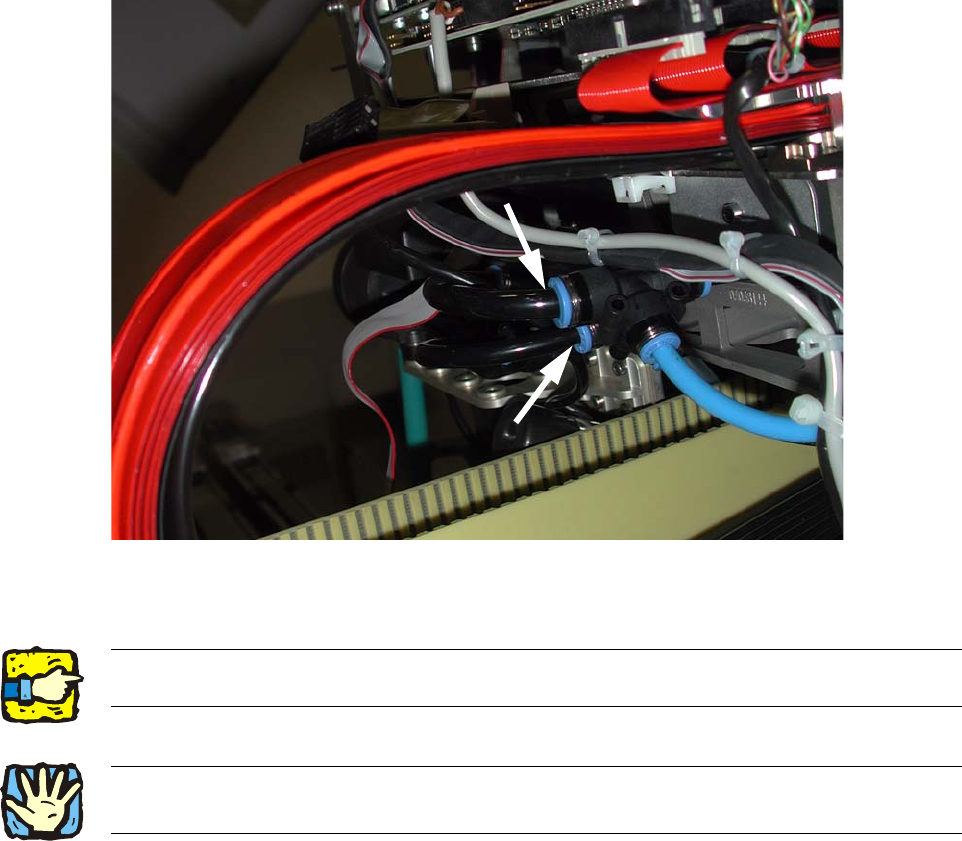
If only one head is assembled, the T-pieces must be sealed with blind plugs. 2
Under no circumstances, must blind plugs and others be able to make contact with the ribbon
cable - also not in the end position. 2
Assembly instructions Head Reconfiguration SIPLACE D1 / D2
Edition 03/2007
78
2
Fig. 2.8.4 Connect silicon hose size 8 and 6
2
2
2
2