Application Backflush 1-0 to SAP Data Converter.pdf - 第43页
Application 2 Installation instructions for the Backflush 1.0 to SAP Data Converter application 04/2006 Edition 43 2.8.2 Inst alling the Backflush program – Problems with special langua ge characters have required the Ex…
2 Installation instructions for the Backflush 1.0 to SAP Data Converter application Application
04/2006 Edition
42
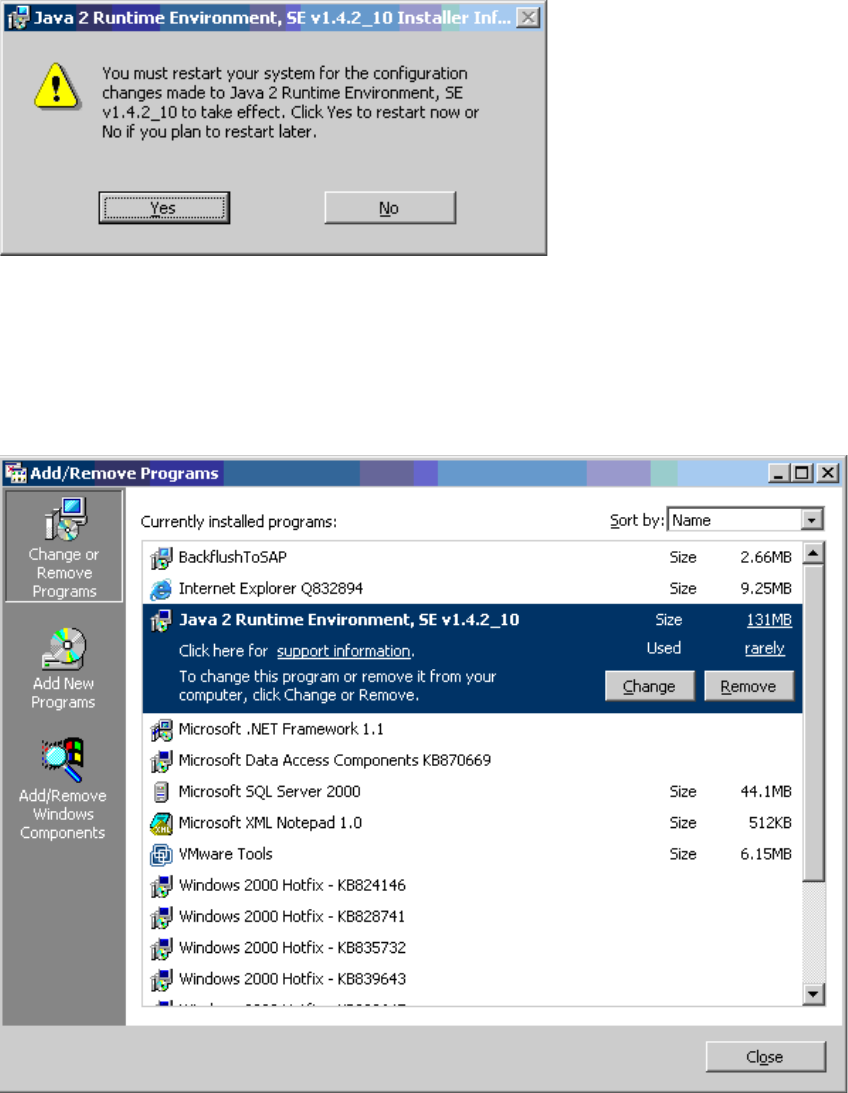
Step 4: 2
Once the installation is complete, restart the computer. 2
2
2
Step 5: 2
After installation, the Java 2 Runtime Environment is listed under Start /Settings/Control Panel/
Add –Remove Programs. 2
2
2
Application 2 Installation instructions for the Backflush 1.0 to SAP Data Converter application
04/2006 Edition
43
2.8.2 Installing the Backflush program
– Problems with special language characters have required the Explorer Backflush option to be
upgraded. This upgraded version can also be found on the CD.
– This is version 1.0.22.
– This version of Backflush must be loaded onto the SIPLACE Explorer computer to ensure that
the Backflusher conversion tool has consistent data.
2.8.3 Installing the Backflusher application
To start the installation, either use Autostart and simply insert the setup CD or start it directly by
running the "setup.exe" file. In the latter case, there is no check to ensure that the correct version
of Backflush (see above) was loaded onto the SIPLACE Explorer computer. This cannot be im-
plemented due to the possible network configuration. 2
2
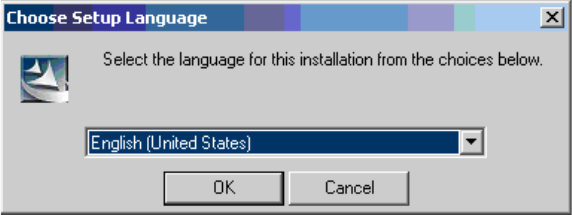
Step 1: 2
The starting window appears and you are prompted to select the language: 2
2
2
This language selection relates only to the program setup and not to the actual program. 2

2 Installation instructions for the Backflush 1.0 to SAP Data Converter application Application
04/2006 Edition
44
Step 2: 2
Once you have made this selection, the welcome screen appears. 2
2
Again you are once again expressly reminded to install the latest version of the Explorer Backflush
option on the Explorer computer. 2
Press the Next button to continue the setup. 2
Step 3: 2
The next window is used to select the installation path. 2
Press the Next button to complete the setup. 2
Alternatively, you can press the "Change" button to change the installation path. 2
2