00197191-02_IM_SIPLACE_Pro_10.1_EN.pdf - 第29页
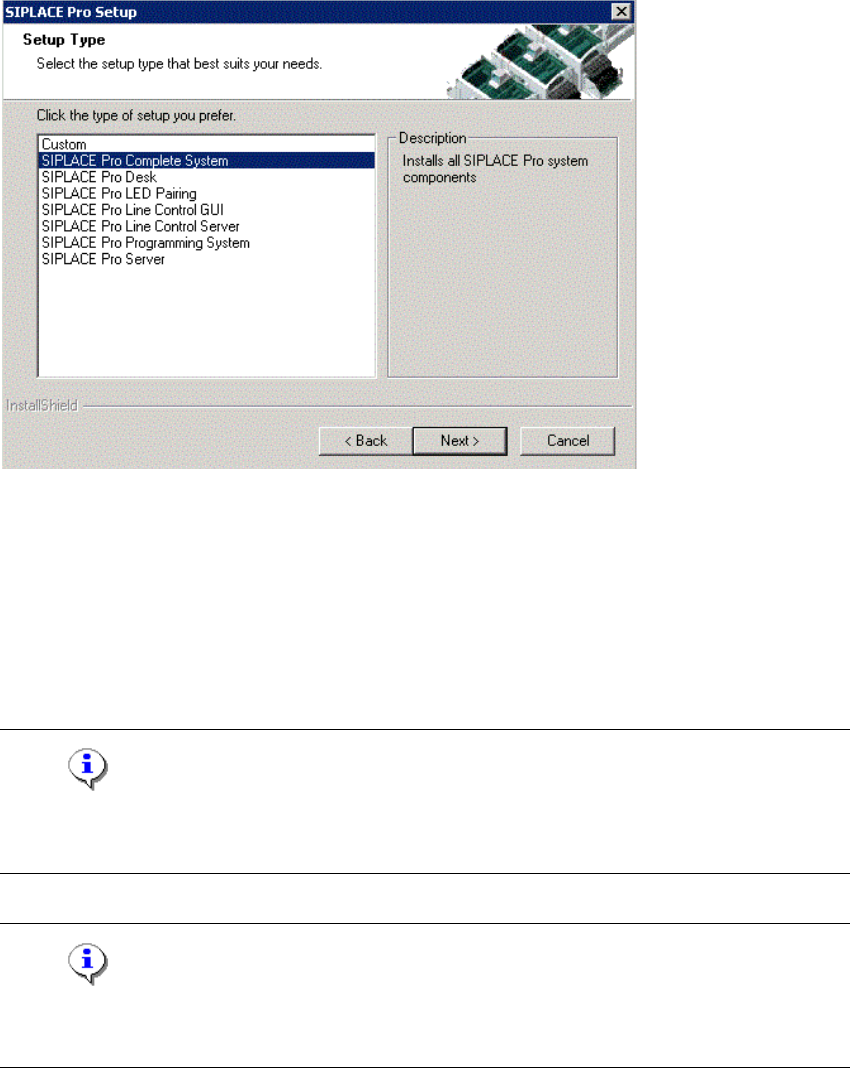
4 Installation of SIPLACE Pro and possible Setup Types Installation Manual Edition 09/2012 SIPLACE Pro 10.1 27 4 Fig. 4.2 - 1 1 "Setup T ype" dialog box In the "Setup T ype" dia log box, Select the …
Installation Manual 4 Installation of SIPLACE Pro and possible Setup Types
SIPLACE Pro 10.1 Edition 09/2012
26
Step 6
4
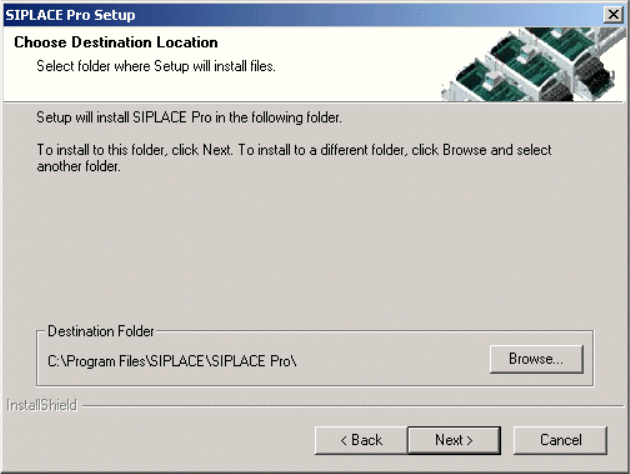
Fig. 4.2 - 10 "Choose Destination Location" dialog box
The "Choose Destination Location" dialog box prompts you to enter the name of the folder in
which SIPLACE Pro should be installed. The system suggests a default destination folder for you.
However, you can click the Browse button to open a dialog box in which you can enter or select
the path you want to use. If the folder you specify does not exist, it is created after having accepted
a confirmation dialog.
Click Next.
Step 7
The Setup Type dialog box displays the SIPLACE Pro components you can choose for installa-
tion.
4 Installation of SIPLACE Pro and possible Setup Types Installation Manual
Edition 09/2012 SIPLACE Pro 10.1
27
4
Fig. 4.2 - 11 "Setup Type" dialog box
In the "Setup Type" dialog box,
Select the setup type you want to install.
Click Next.
A short description of the setup type in question appears in the Description box when you select
a type.
Note
After choosing a setup type which includes a database installation, the setup program immediately
checks if SQL server and the proper Service Pack are installed on the computer. 4
Note
If a database already exists, setup performs an Integrity Check. If the Integrity Check fails, you
might need to cancel Setup. More information in Chapter 6. 4
Installation Manual 4 Installation of SIPLACE Pro and possible Setup Types
SIPLACE Pro 10.1 Edition 09/2012
28
4.3 Individual setup types and next steps
4.3.1 Setup Type – Custom
This setup type allows the experienced user to select any possible combination of SIPLACE Pro
components. However, you should use one of the other specified setup types if you are installing
standard components, since this means the necessary components are always installed and you
do not have to pay attention to the details.
Step 1
Run through the steps in “Starting installation – first steps” on page 21.
Select the Custom setup type
Click Next.
Step 2
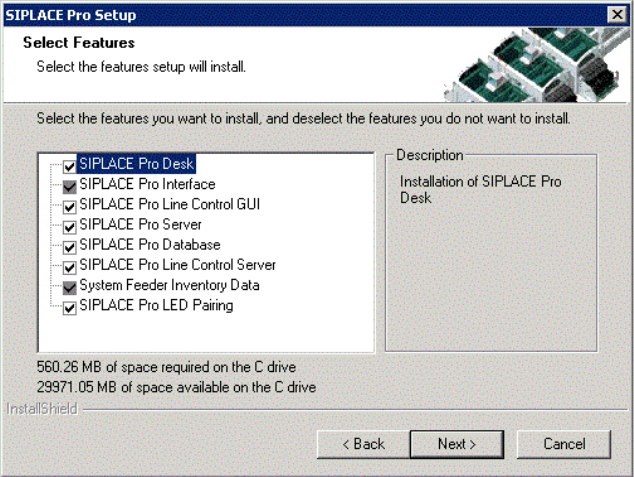
In the "Setup Features" dialog box, select the features you want to install.
4
Fig. 4.3 - 1 "Select Features" dialog box
– The disk space required by all selected components is shown. The size information for
SIPLACE Pro Database is misleading, since it only takes into account the size of the SQL
scripts copied by InstallShield and installed for these components. The size of the database
itself should also be considered. The initial value is defined in a later dialog when creating a
new database. The database size is dynamic anyway - it will grow as required during use of
SIPLACE Pro.