00197191-02_IM_SIPLACE_Pro_10.1_EN.pdf - 第50页
Installation Manual 4 Installation of SIPLACE Pro and possible Setup Types SIPLACE Pro 10.1 Edition 09/2012 48 4.4 S tep s to perform af ter inst allation Note After a new inst allation of the dat abase, it is necessary …
4 Installation of SIPLACE Pro and possible Setup Types Installation Manual
Edition 09/2012 SIPLACE Pro 10.1
47
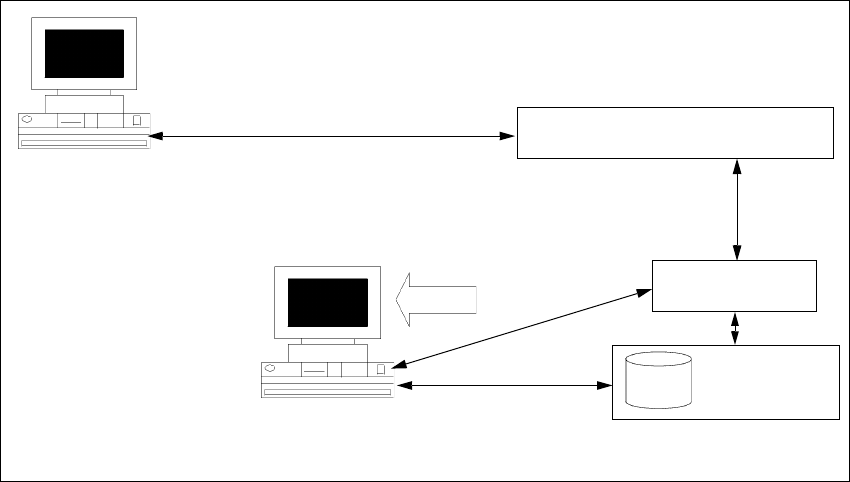
4.3.8 Setup Type – SIPLACE Pro Server
This setup type contains the "Server" portion of SIPLACE Pro, i.e. the server program and the
database. The "SIPLACE Pro Server" setup type is designed to be used if you want to separate
server and client in order to improve performance.
4
Fig. 4.3 - 18 Components – SIPLACE Pro Server
Step 1
Run through the steps in “Starting installation – first steps” on page 21.
Select the SIPLACE Pro Server setup type.
Then click Next.
The installation routine now checks whether:
– there is a connection to the SQL Server,
– whether a SIPLACE Pro database exists.
The subsequent steps are identical to the SIPLACE Pro complete system.
Step 2
Continue by running through the steps described in “Setup Type – SIPLACE Pro Complete
System” on page 30.
MS SQL Server pre-installed
Client computer with
SIPLACE Pro Desk or
Line Control GUI
SIPLACE Pro
Database
SIPLACE Pro
Interface
SIPLACE Pro
Server
Setup
COM+
COM+
OLE-DB
Resource
Manager

Installation Manual 4 Installation of SIPLACE Pro and possible Setup Types
SIPLACE Pro 10.1 Edition 09/2012
48
4.4 Steps to perform after installation
Note
After a new installation of the database, it is necessary to import the standard shape library in
SIPLACE Pro desk go to Tools-->Import-->Standard Shape Library... This step is required any-
way for you to use SIPLACE Pro and it ensures that data is available to be used for reporting.
After having upgraded the database from a previous version (see chapter 5 below) it is not nec-
essary to import data from the component shape library. 4
5 Installation of SIPLACE Pro Language Pack Installation Manual
Edition 09/2012 SIPLACE Pro 10.1
49
5 Installation of SIPLACE Pro Lan-
guage Pack
Before you install the Language Pack, please verify that SIPLACE Pro is installed. Be sure that
the installed version of SIPLACE Pro matches the version of the language pack. Check the
readme files on the language pack CD for related version information. Once you have verified this,
the language pack can be installed. For more details please refer to Section 5.2 Compatibility of
SIPLACE Pro Language Packs.
The SIPLACE Pro basic version is delivered with English and German. All additional languages
are delivered later on with a separate SIPLACE Pro Language Pack version.
Follow the instructions listed below precisely to install the language pack successfully.
5.1 Starting installation - first steps
Insert the Language Pack CD in the CD-Rom drive. The installation should start automati-
cally.
If not, go to Windows Explorer and double click on the setup.exe located in the root directory
of the installation CD.
This starts the user-controlled installation of SIPLACE Pro
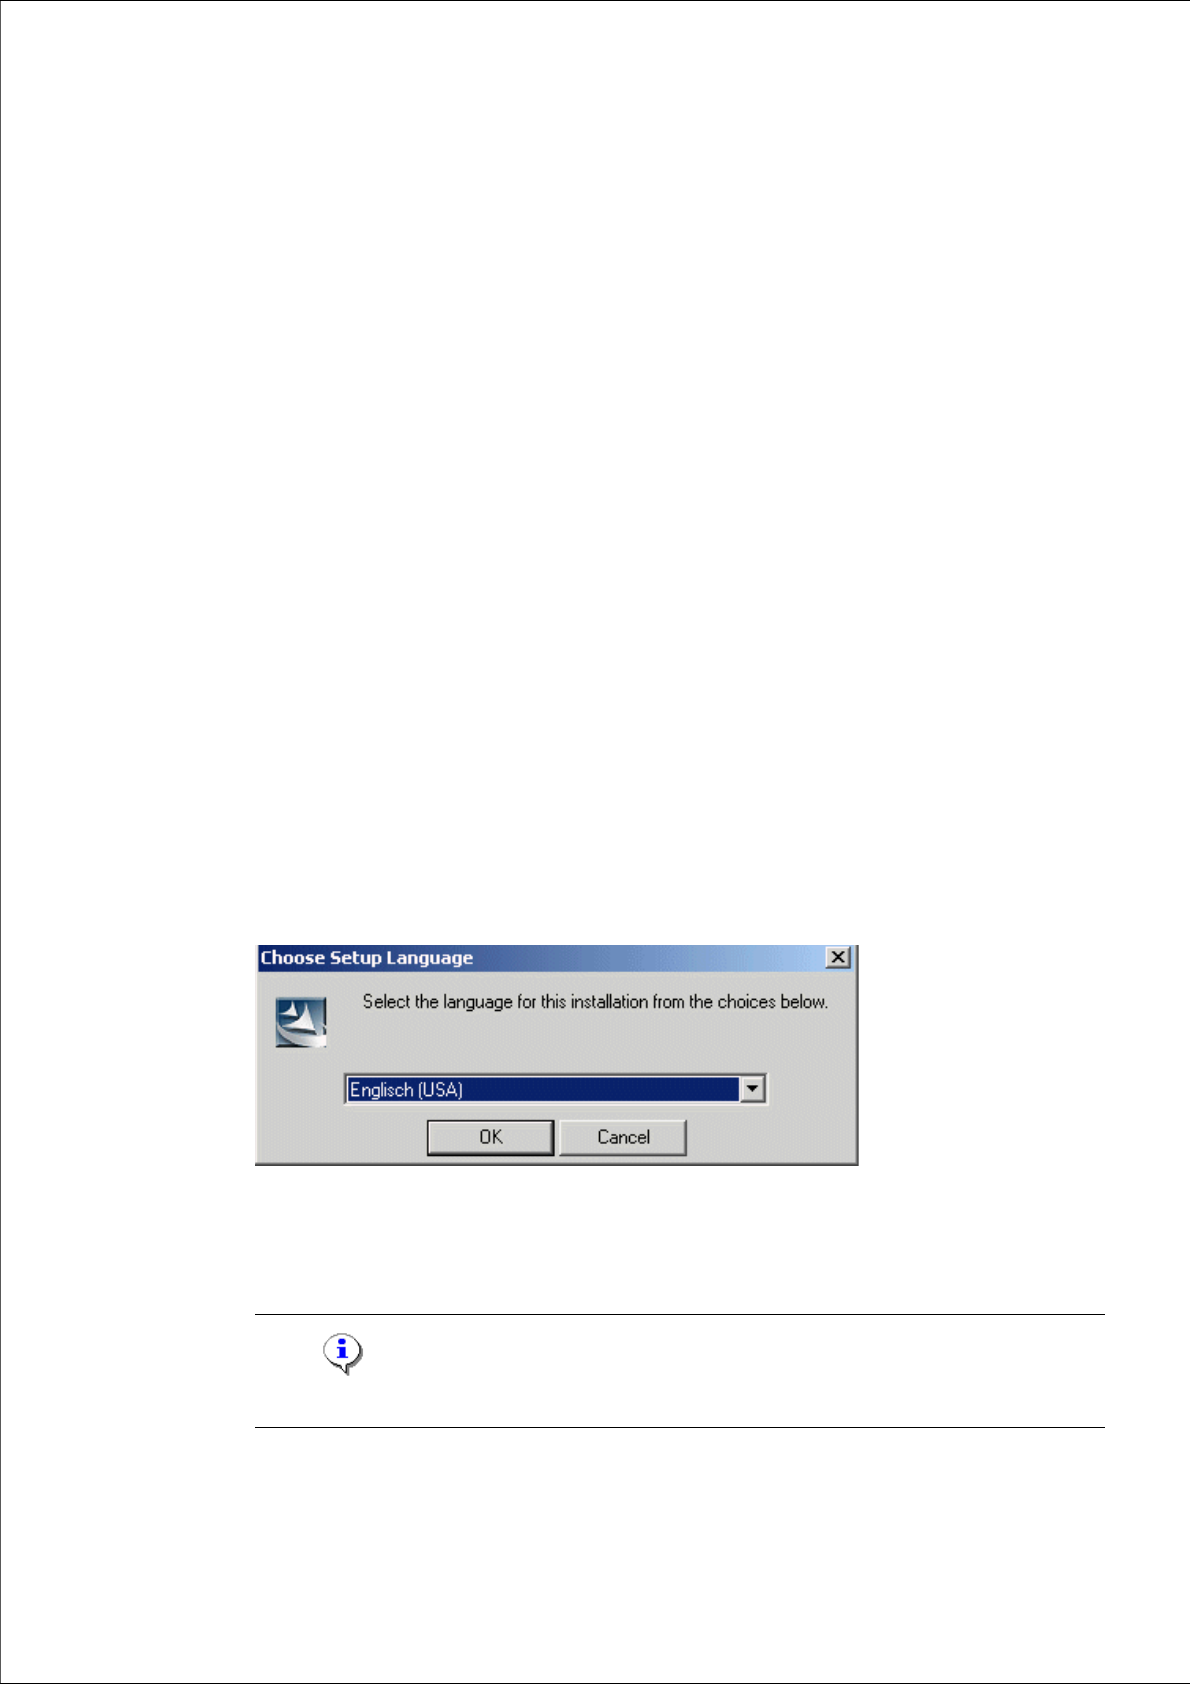
The Language Pack Update Wizard is started and you are prompted by the following dialog box.
5
Fig. 5.1 - 1 "Choose Setup Language" dialog box
Select the language which is to be used during the installation.
Click OK.
Note
This decision only relates to the language used during the installation routine! 5