YG300_Mainte_E.pdf - 第55页
3-17 3 Periodic maintenance items 2 . 7 . 2 C l e a n i n g a n d g r e a s i n g t h e T - a x i s l i n e a r g u i d e s 1 R e m ov e t h e t w o T - a x i s c ov e r s . U s e t h e h e x w r e n c h t o r e m o v e …
3-16
3
Periodic maintenance items
2.7 Cleaning and greasing the T-axis
To clean and grease the T-axis ball screws and linear guides, follow the steps below. Prepare a grease gun and
the specified grease (NSL).
c
CAUTION
When handling grease or lubricant, read and follow the precautions listed in section 2.2.2, "Lubricating tools and
grease", in Chapter 1.
2.7.1 Cleaning and greasing the T-axis ball screws
1
Remove the two T-axis covers.
Use the hex wrench to remove the bolts
securing the covers (6 bolts per cover) and
remove the covers.
e
2
Press the emergency stop button.
The machine must be in emergency stop to
ensure safety during work.
3
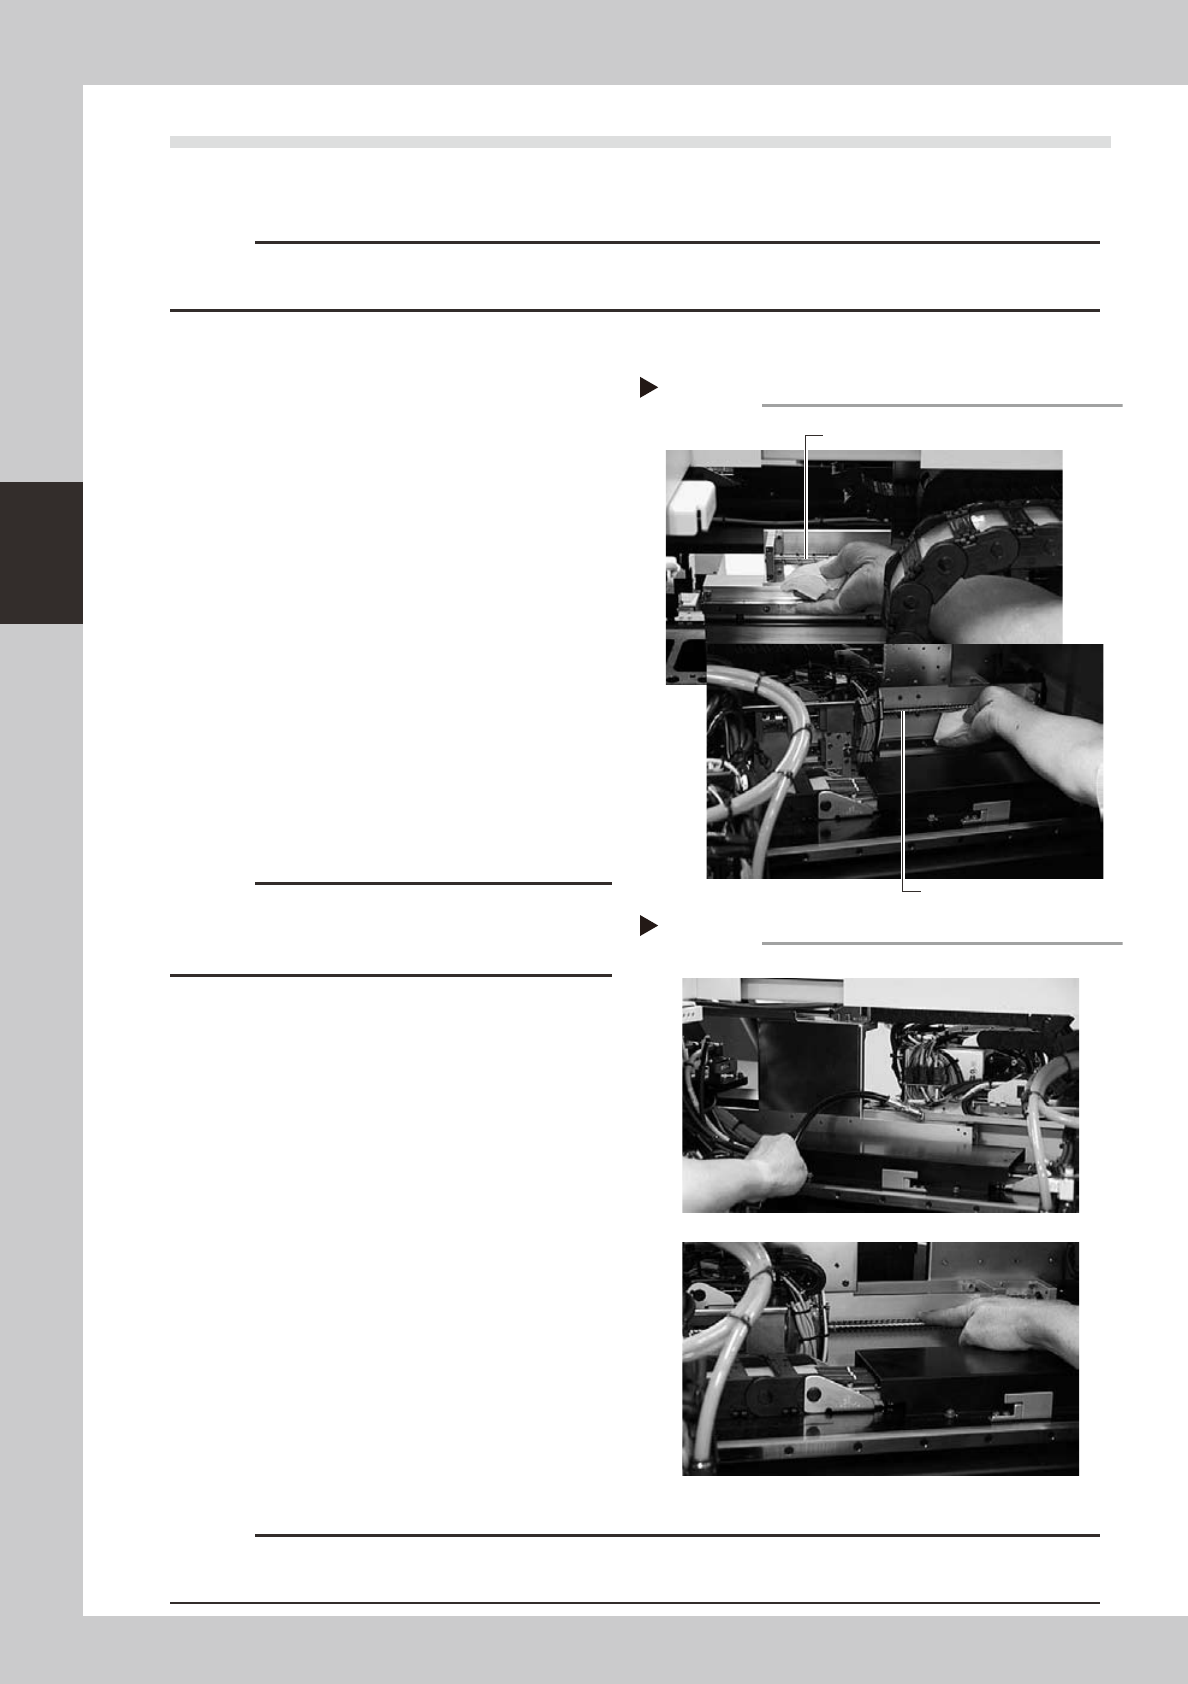
Clean the T-axis ball screws.
1. Move the board transfer claw unit to one
end of the T-axis, and wipe away the old
grease and dirt from the ball screw with
a lint-free cloth or paper towel (for clean
room use).
2. Move the board transfer claw unit to the
opposite end of the T-axis and wipe the
ball screw clean.
53327-F1-00
c
CAUTION
Wipe away the old grease and dirt in the lead groove
of the ball screw. Also check that no debris or residue
remains in the lead groove.
4
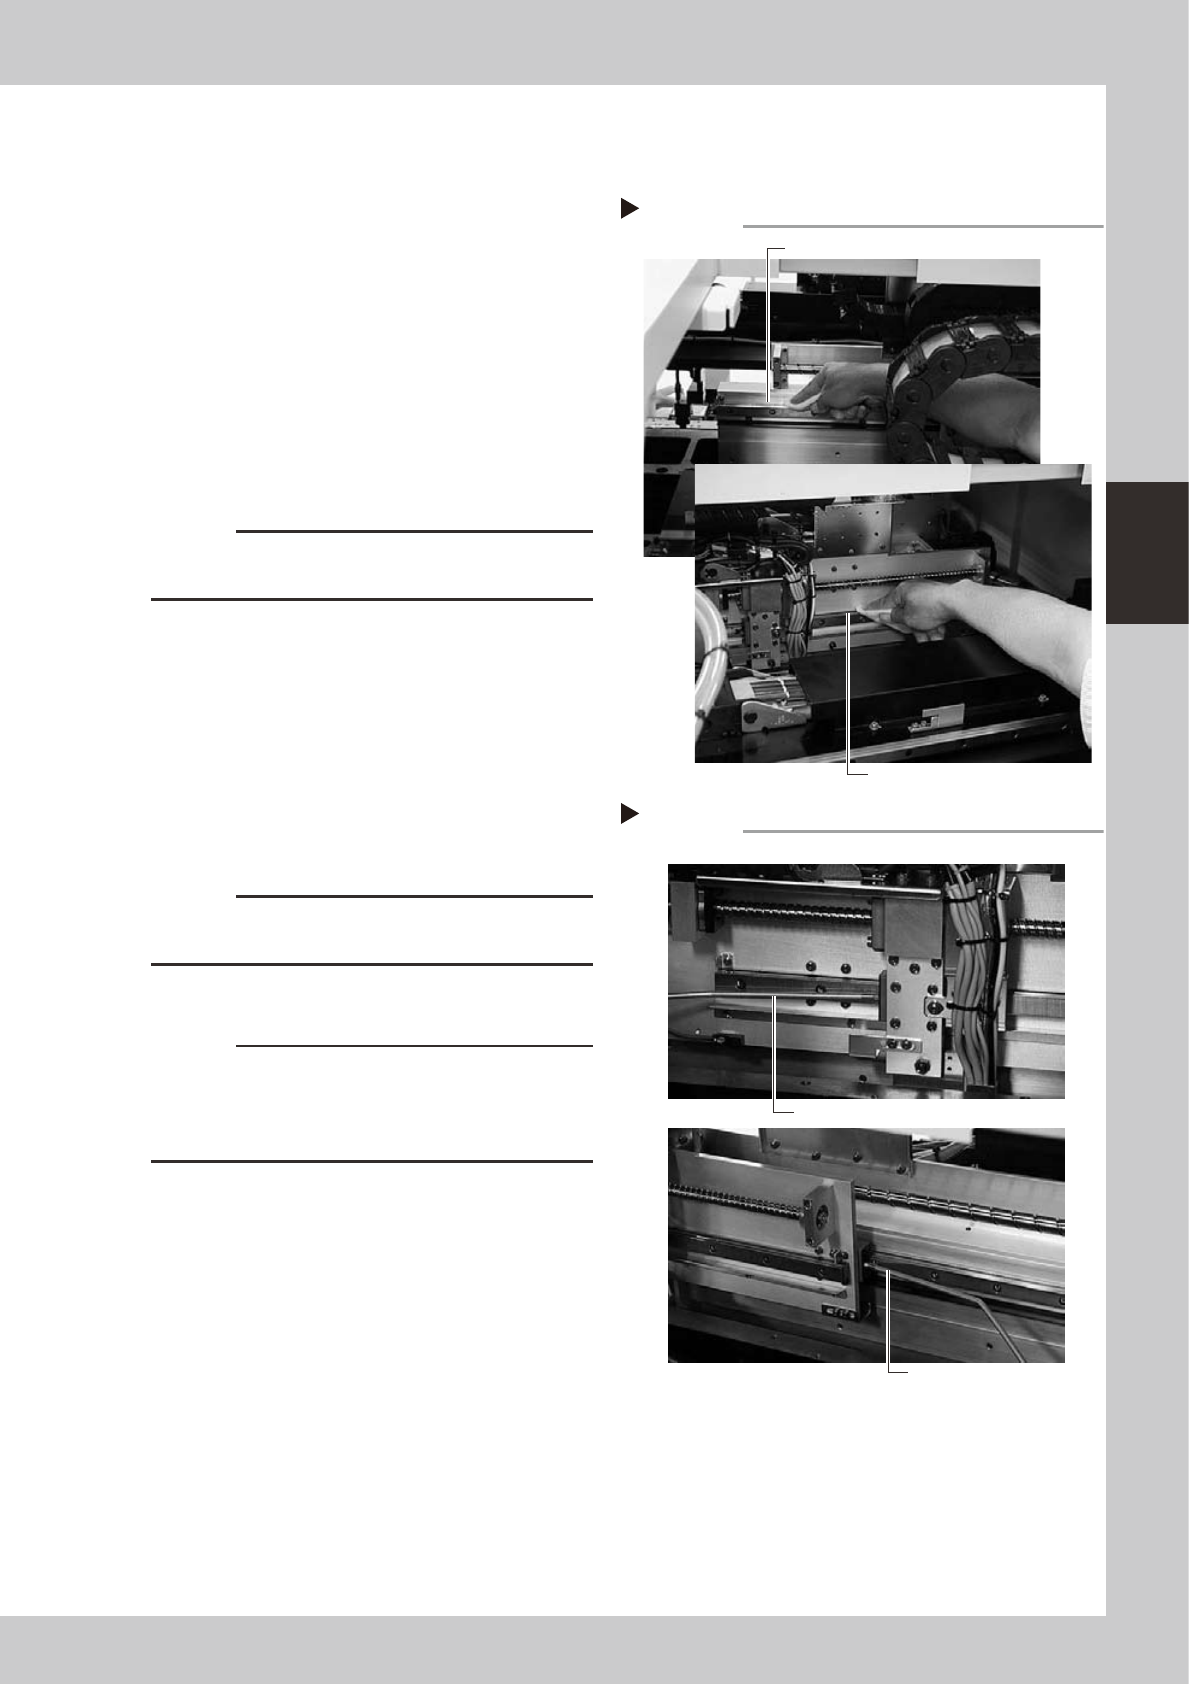
Apply new grease to the ball screw.
1. T1 axis
Use the grease gun to supply the
specified grease (NSL) to the T-axis
grease nipple (see photo at right).
2. T2 axis
Uniformly apply the specified grease
(NSL) by hand to the entire T2 axis ball
screw.
53328-F1-00
5
Remove excess grease.
1. Move the board transfer claw unit back
and forth a few times along the T-axis to
spread grease over the entire ball screw.
2. Wipe away excess grease from the ball
screw and the nut edges (left and right
sides).
6
Reattach the
T-axis
cover.
c
CAUTION
Be sure to reattach the covers back to their original positions. If production starts without reattaching the covers,
spattering grease might badly affect the production yield.
Cleaning the T-axis ball screw
Step 3
T1 axis ball screw
T2 axis ball screw
Greasing the T-axis ball screws
Step 4
T1 axis
T2 axis
3-17
3
Periodic maintenance items
2.7.2 Cleaning and greasing the T-axis linear guides
1
Remove the two T-axis covers.
Use the hex wrench to remove the bolts
securing the covers (6 bolts per cover) and
remove the covers.
e
2
Press the emergency stop button.
The machine must be in emergency stop to
ensure safety during work.
3
Clean the T-axis linear guides.
Wipe away the old grease and dirt from the
linear guides with a lint-free cloth or paper
towel (for clean room use).
53329-F1-00
c
CAUTION
Wipe away the old grease and dirt in the grooves of the
linear guides.
4
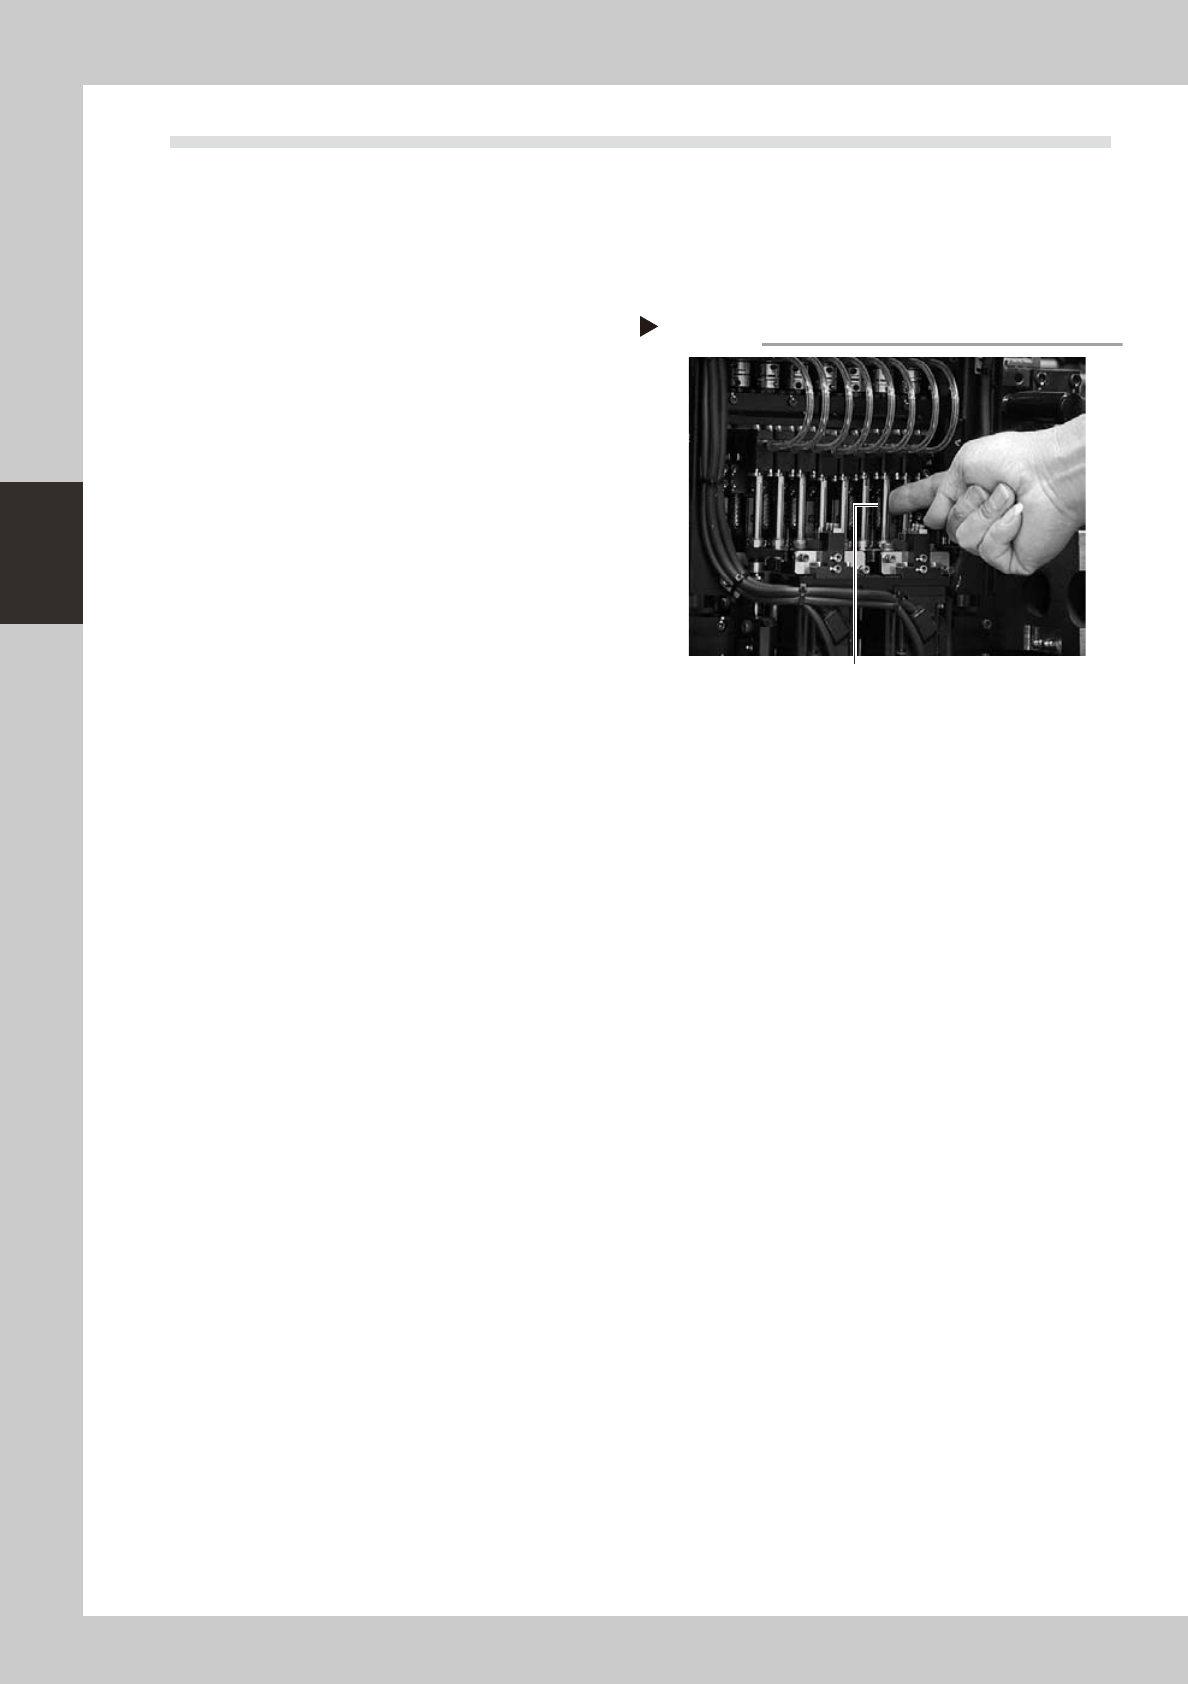
Apply new grease to the linear
guides.
Use the grease gun to supply the specified
grease (NSL) to the T-axis grease nipples (see
photos at right).
53330-F1-00
5
Remove excess grease.
After moving the T-axis unit back and forth a
few times, wipe away excess grease.
c
CAUTION
Repeat the above steps until finally there are no longer
any grease deposits.
6
Reattach the
T-axis
cover.
c
CAUTION
Be sure to reattach the covers back to their original
positions. If production starts without reattaching the
covers, spattering grease might badly affect the
production yield.
Cleaning the T-axis linear guides
Step 3
T1-axis linear guide
T2-axis linear guide
Greasing the T-axis linear guides
Step 4
T1 axis
T2 axis
Grease gun
Grease gun
3-18
3
Periodic maintenance items
2.8 Cleaning and greasing the Z-axis
To clean and grease the Z-axis used to raise and lower the alpine shaft of each head, follow the steps below.
Prepare the specified grease (NSL).
1
Turn off the machine power switch.
Quit the software and turn off the machine
power switch.
2
Apply grease to the Z-axis shafts.
Apply a thin uniform coat of the specified
grease (NSL) by hand over the surface of
each shaft.
53331-F1-00
3
Wipe excess grease.
After moving the Z-axis shafts a few times,
wipe away excess grease.
Greasing the Z-axis shafts
Step 2
Z-axis shaft