TR7500E_Manual_en_v28.pdf - 第44页
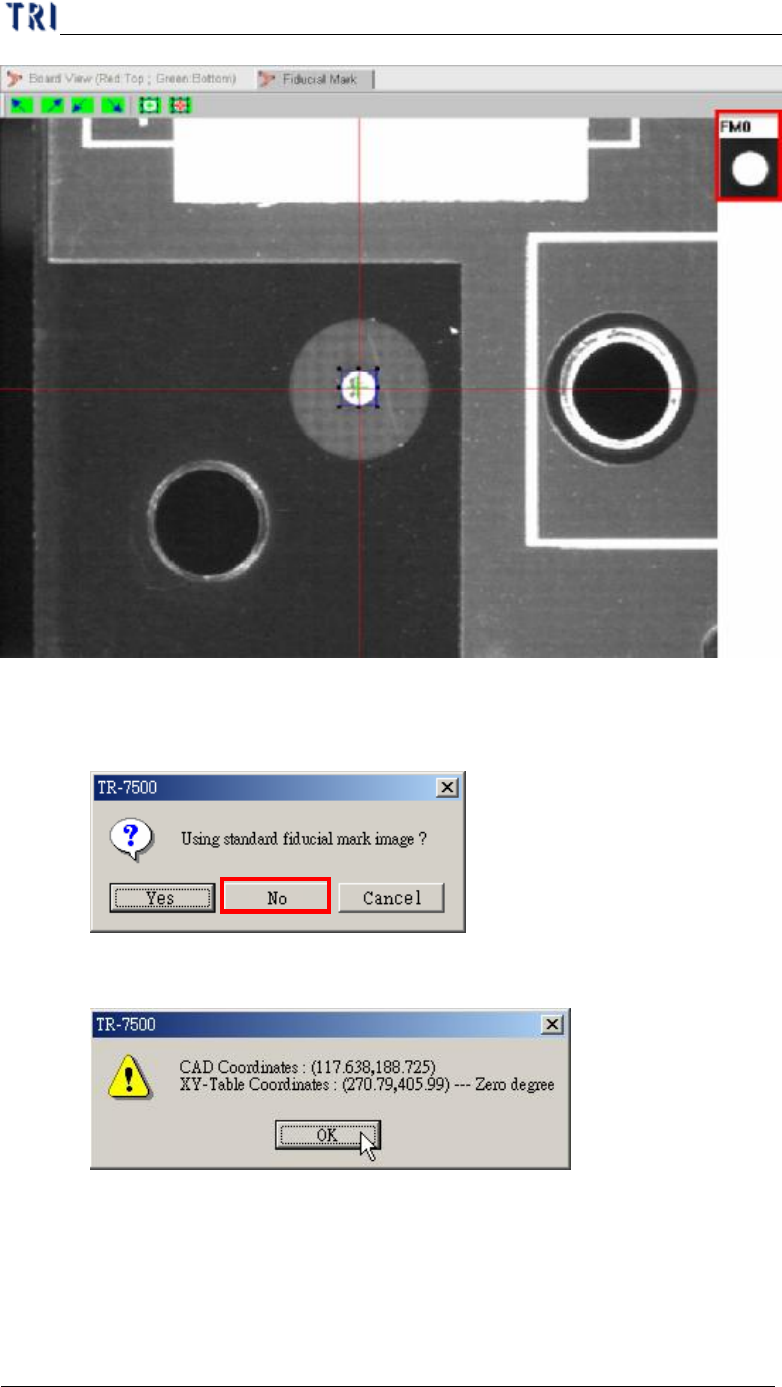
C h a p t e r 1 AO I S t a nd a r d P r o j ec t Cr ea t i on T R 7500 U S E R M A N U AL 37 l N o t u s i n g t h e s t a n d a r d f i du c i a l m a r k i m a g e . S t e p 1. S e l e c t [ N o ] . S t e p 2. T h e r …
Chapter 1 AOI Standard Project Creation
TR7500 USER MANUAL
36
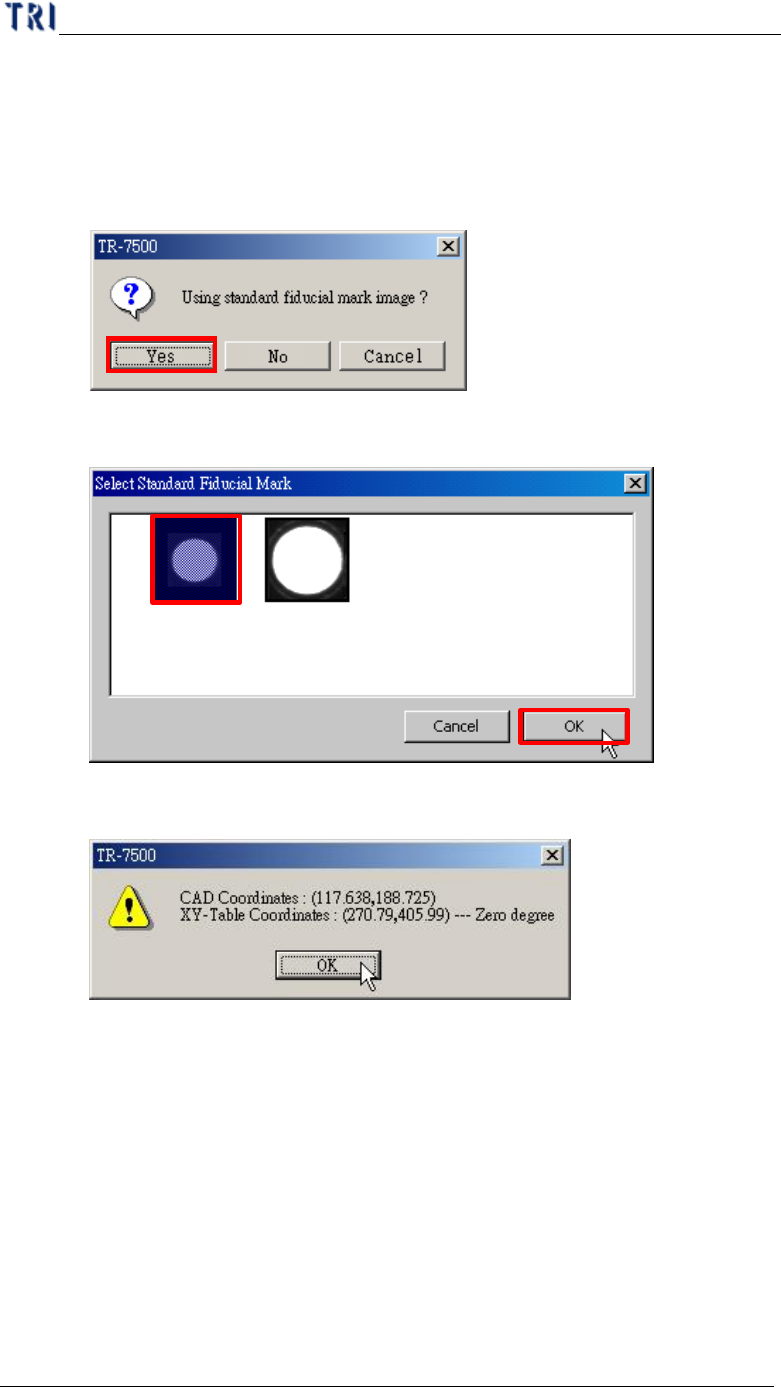
(5) You can select if you want to use the standard image. If the fiducial mark image
that you have gotten is not clear enough, you can select the standard image
saving in the computer.
l Using the standard image.
Step1. Select [Yes]
Step2. [Select Standard Fiducial Mark] dialog appears. Select a suitable
image then press [OK].
Step3. There is a window appeared to show the coordinates of fiducial
mark. Press [OK].
Step4. System takes the selected standard image as the standard matching
image.
Chapter 1 AOI Standard Project Creation
TR7500 USER MANUAL
37
l Not using the standard fiducial mark image.
Step1. Select [No].
Step2. There is a window appeared to show the coordinates of fiducial mark.
Press [OK].
Step3. System uses the grabbing image as the standard matching image.
Chapter 1 AOI Standard Project Creation
TR7500 USER MANUAL
38
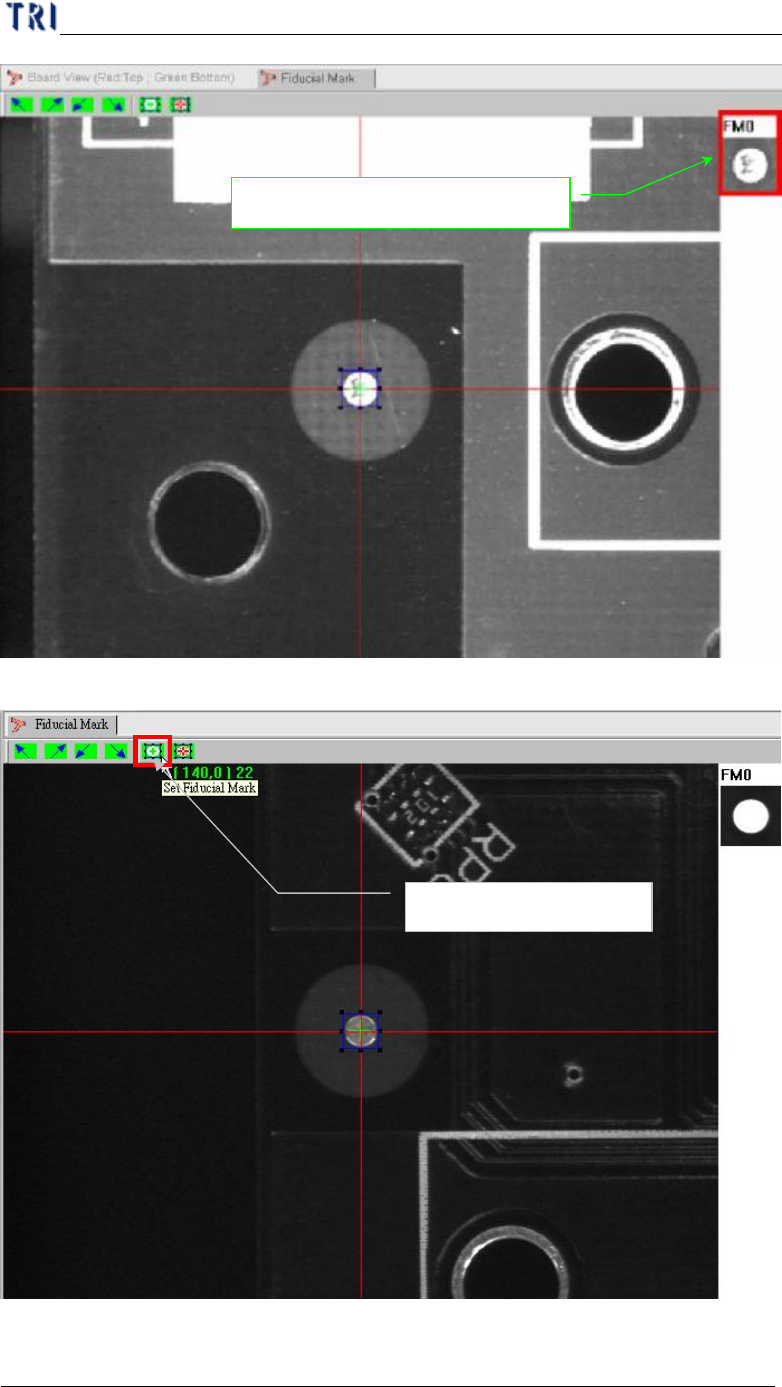
(6) Press [Set Fiducial Mark] icon to set the second fiducial mark.
(7) Input fiducial component name or choose “No CAD”.
Setting fiducial 1 mark
Image for the first Fiducial Mark