TR7500E_Manual_en_v28.pdf - 第73页
C h a p t e r 2 M a nu a l B a r i n t r o d u ce T R 7500 U S E R M A N U AL 66 B a r c od e i s t r i gg e r e d a u t o m a ti c a l l y a c c o r d i n g t o t h e n u mb e r o f b a r c o d e s . T i m e f o r e v e…
Chapter 2 Manual Bar introduce
TR7500 USER MANUAL
65
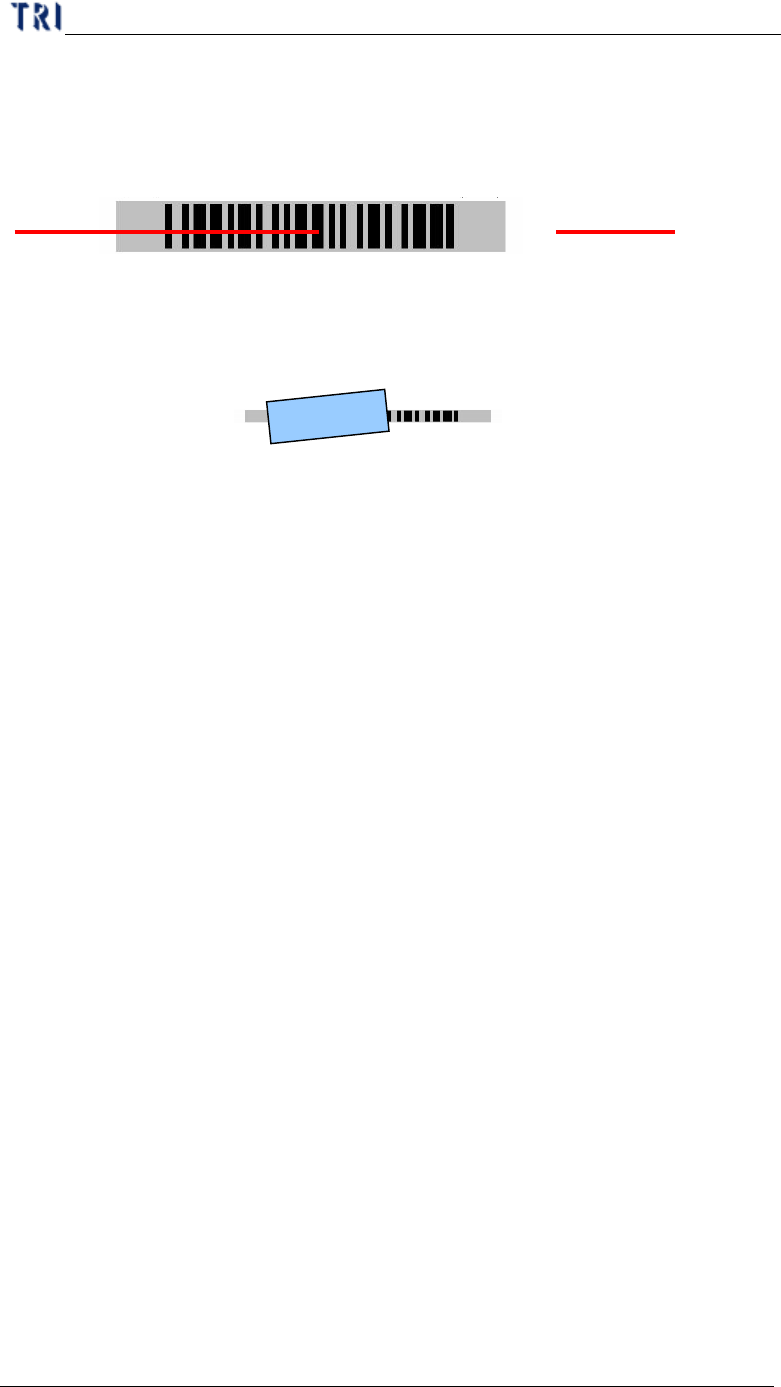
Step3. Press [Laser On] button to start the laser and adjust the scanner so that the
laser and the barcode to be scanned are at position as shown in the following
figure.
Step4. If the barcode space is too small, you can turn the scanner to an angle as
shown in the following figure to facilitate the reading.
Step5. When the barcode position is certain, click [S0 Focus] to maintain the
barcode at a fixed position and let the scanner read its focus and frequency.
When it is done, the barcode gives off a buzzing sound, the focus and the
frequency are also changed automatically.
Step6. If it is a dual barcode, you still have to adjust well the position of the scanner
and then click [S1 Focus] to set the focus and the frequency for Scanner 1.
Step7. After setting Scanner 1, click [Download to sick] button to save the setting in
the Scanner.
3.3.1.3 The detailed explanation of barcode setting
l Fill in the column of [Num.Of Barcodes] the total number of barcodes necessary
to be read. (For example, if each of two Scanners reads two barcodes, this
column is filled in 4)
l The default value for [Resolution] is 20. The smaller the number, the better the
resolution. Normally speaking, you do not have to change the value. If the
barcode material is so special that it is hard to read, you have to adjust this value
to make it easier for reading.
l You can fill in the bit number of the barcode in [Barcode Length]. After you set
the bit number, the scanner can only read the barcode with the number you have
set. If there are many kinds of barcode on a board, you can use this set number to
screen out the correct barcode to read. The default value at 0 means no limit for
bit number.
l [Trigger Mode.] – Selecting [Trigger Ext.] means that the laser turns on only
when there is an outer trigger occurred. Selecting [Trigger Free] means that the
laser of barcode scanner is always on. Selecting [Off-Line] means that the Sick
Scanner
Chapter 2 Manual Bar introduce
TR7500 USER MANUAL
66
Barcode is triggered automatically according to the number of barcodes. Time
for every trigger is about 2 seconds. Since it’s the independent accident for every
scanning, the barcode scanner will read the same barcode twice or more when
the scanner reads the same barcode.
l First In First Out- means the data on the barcode first read will first be sent out,
while [Last In First Out] means the data last read will first be sent out. [Output
By Barcode Position] means it depends on the barcode position, data near the
Scanner will first be sent out.
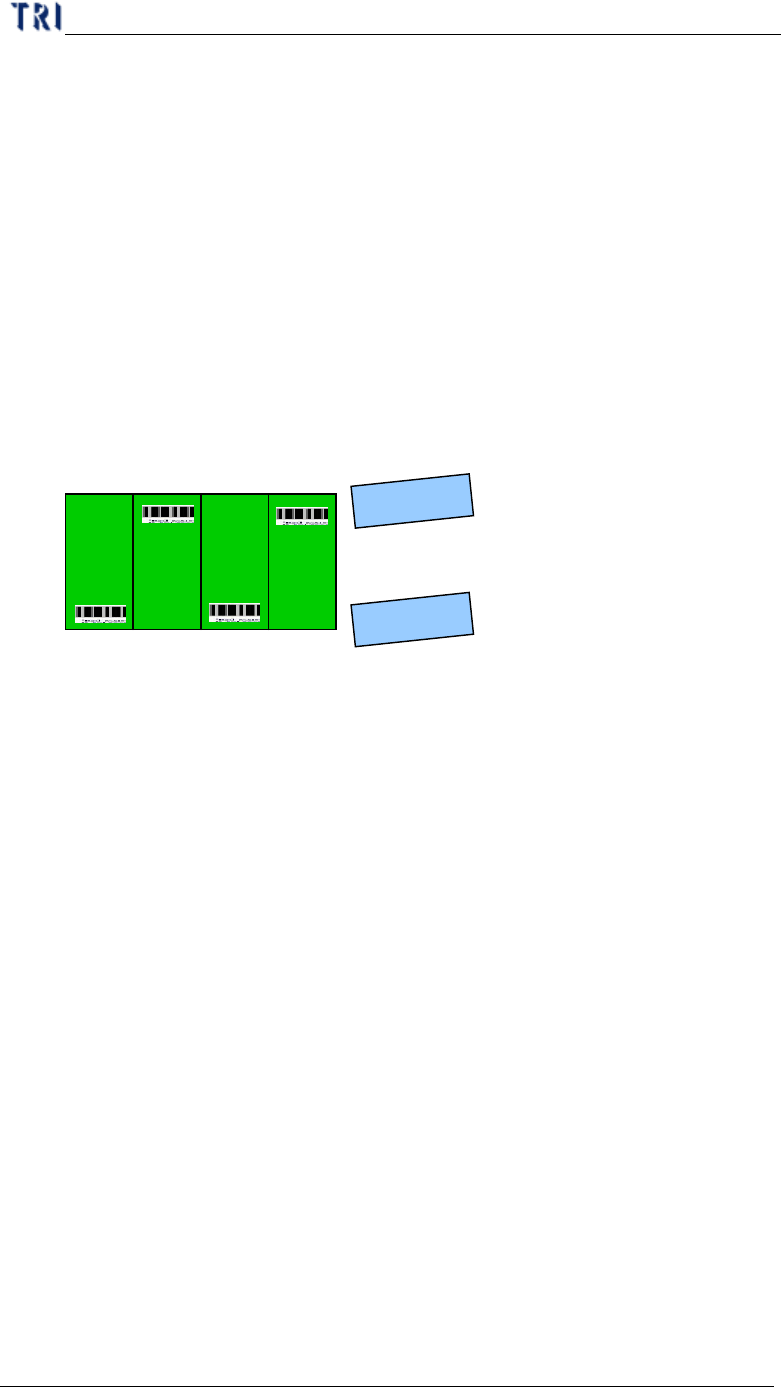
l Interlace Output- For dual scanner; if the barcodes are to be read in sequence as
shown in the following figure, you have to select it.
3.3.1.4 Handy Barcode Scanner Setting
Step1. Need a cable that one terminal is the USB connector and another is RS232
connector. The USB connector has to be connected with main PC and the
RS232 connector has to be connected with Handy Barcode. In addition,
there is another power cable have to be connected for Handy Barcode.
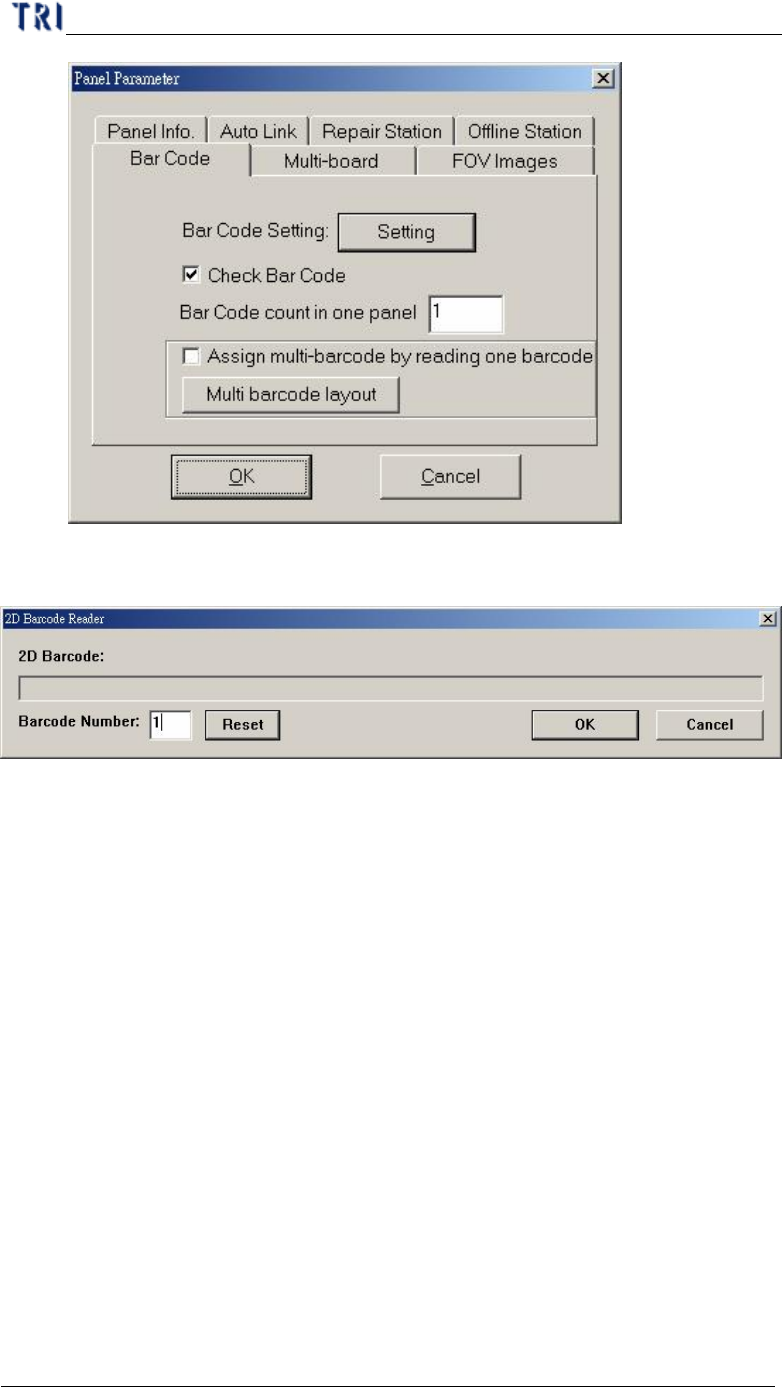
Step2. Set the COM Port to [COM6].
Step3. Select [Check Barcode].
Scanner0
Scanner1
1
2
3
4
Board in direction à
Chapter 2 Manual Bar introduce
TR7500 USER MANUAL
67
Step4. When system starts to inspect, the following barcode reading window will
be displayed.
Step5. When the total number of barcode is more than 1, you have to set the
number in [Barcode Number] field. Then press [Reset] to finish the setting.
3.3.2. MultiBoard