Nordson_EFD_RV_Series_Operating_Manual.pdf - 第130页
RV Series Automated Dispensing Systems 130 www.nordsonefd.com info@nordsonefd.com +1-401-431-7000 Sales and service of Nordson EFD dispensing systems are available worldwide. # Click Step Reference Image 6 > • Click t…
RV Series Automated Dispensing Systems
129www.nordsonefd.com info@nordsonefd.com +1-401-431-7000 Sales and service of Nordson EFD dispensing systems are available worldwide.
Importing a DXF File
PREREQUISITES
The system is properly set up. Refer to “Setting Up and Calibrating the System (Required)” on page45.
If the tip or any element of the Zaxis head was changed, repeat system setup and calibration using the Robot
Initial Setup wizard. Refer to “Setting Up the System Using the Robot Initial Setup Wizard” on page48.
The system is in the correct mode (Tip or CCD).
The DXF file for the workpiece is located on the DispenseMotion controller.
The actual workpiece is properly positioned on the fixture plate.
# Click Step Reference Image
1
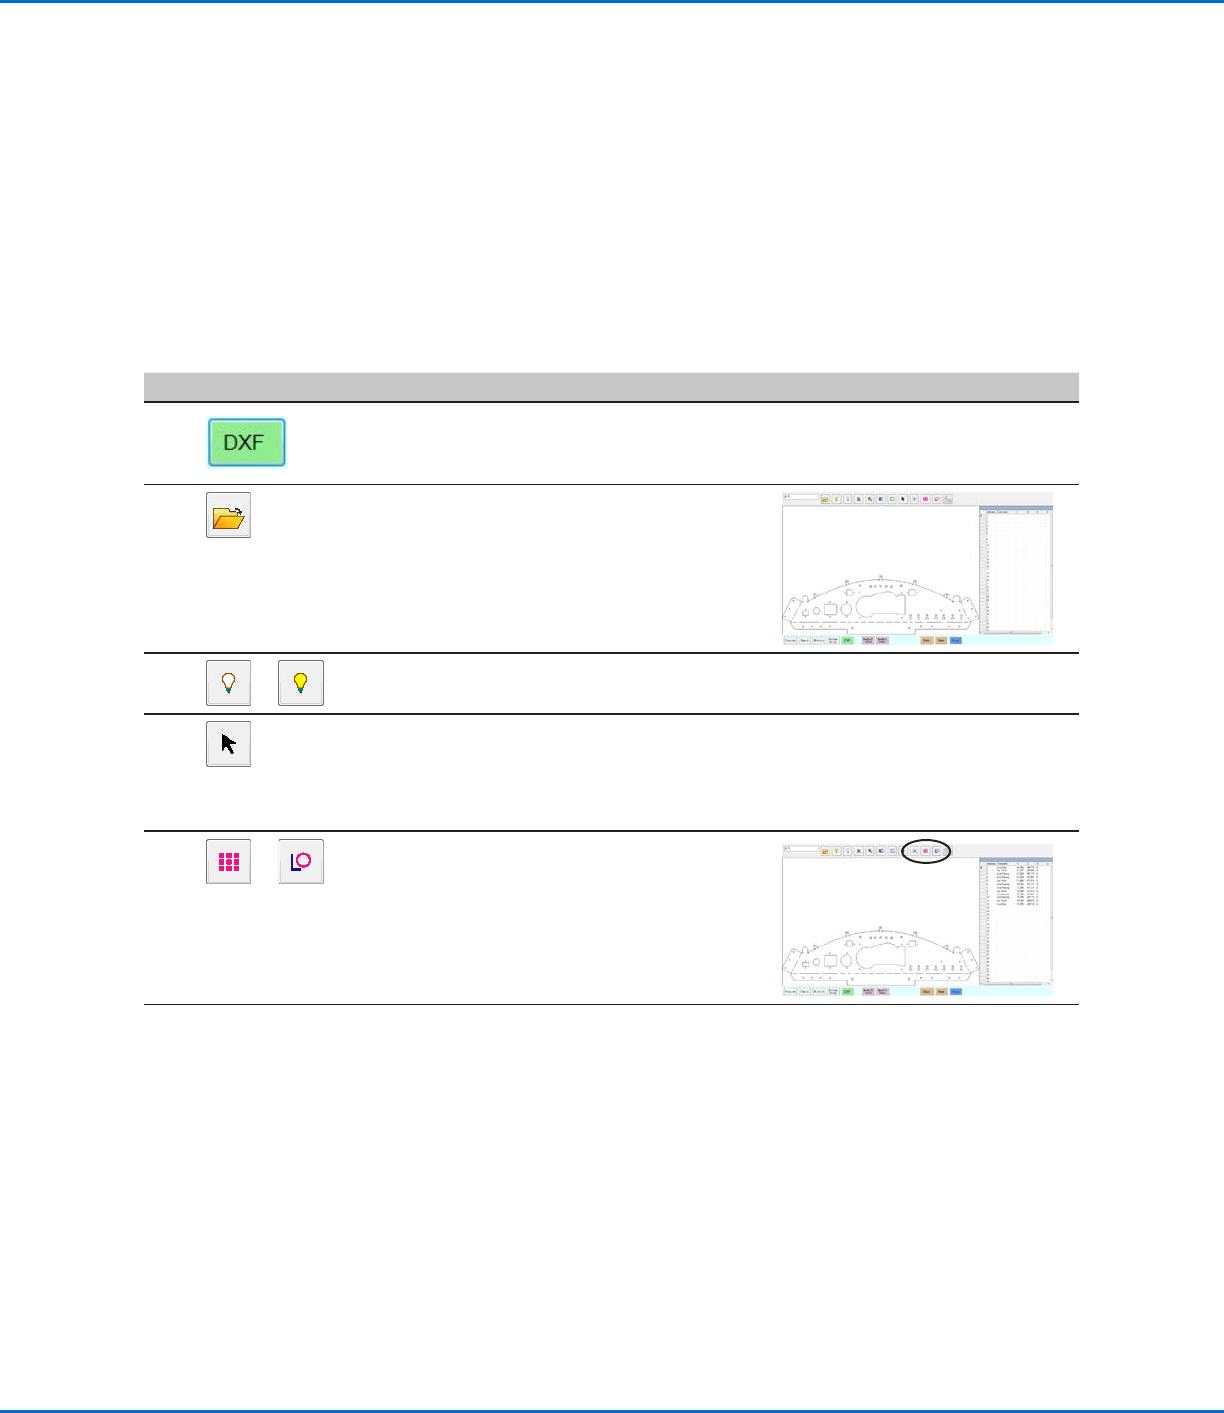
• Click DXF.
The DXF screen appears in the Primary
View screen.
2
• Open the DXF file you want to convert
to a program.
The file appears in the Primary View
screen.
3
or
• To hide or show layers, click HIDE ALL
LAYERS or SHOW ALL LAYERS.
4
• Select the points and / or lines onto
which you want to dispense material.
Refer to “Overview of the DXF Screen”
on page127 for an explanation of all
the selection icons.
5
or
• Click POINT DISPENSE (for dispense
dots) or LINE DISPENSE (for lines, arcs,
and circles).
The system generates the program
commands that will create the selected
pattern.
Continued on next page
AppendixC, DXF File Import (continued)
RV Series Automated Dispensing Systems
130 www.nordsonefd.com info@nordsonefd.com +1-401-431-7000 Sales and service of Nordson EFD dispensing systems are available worldwide.
# Click Step Reference Image
6
>
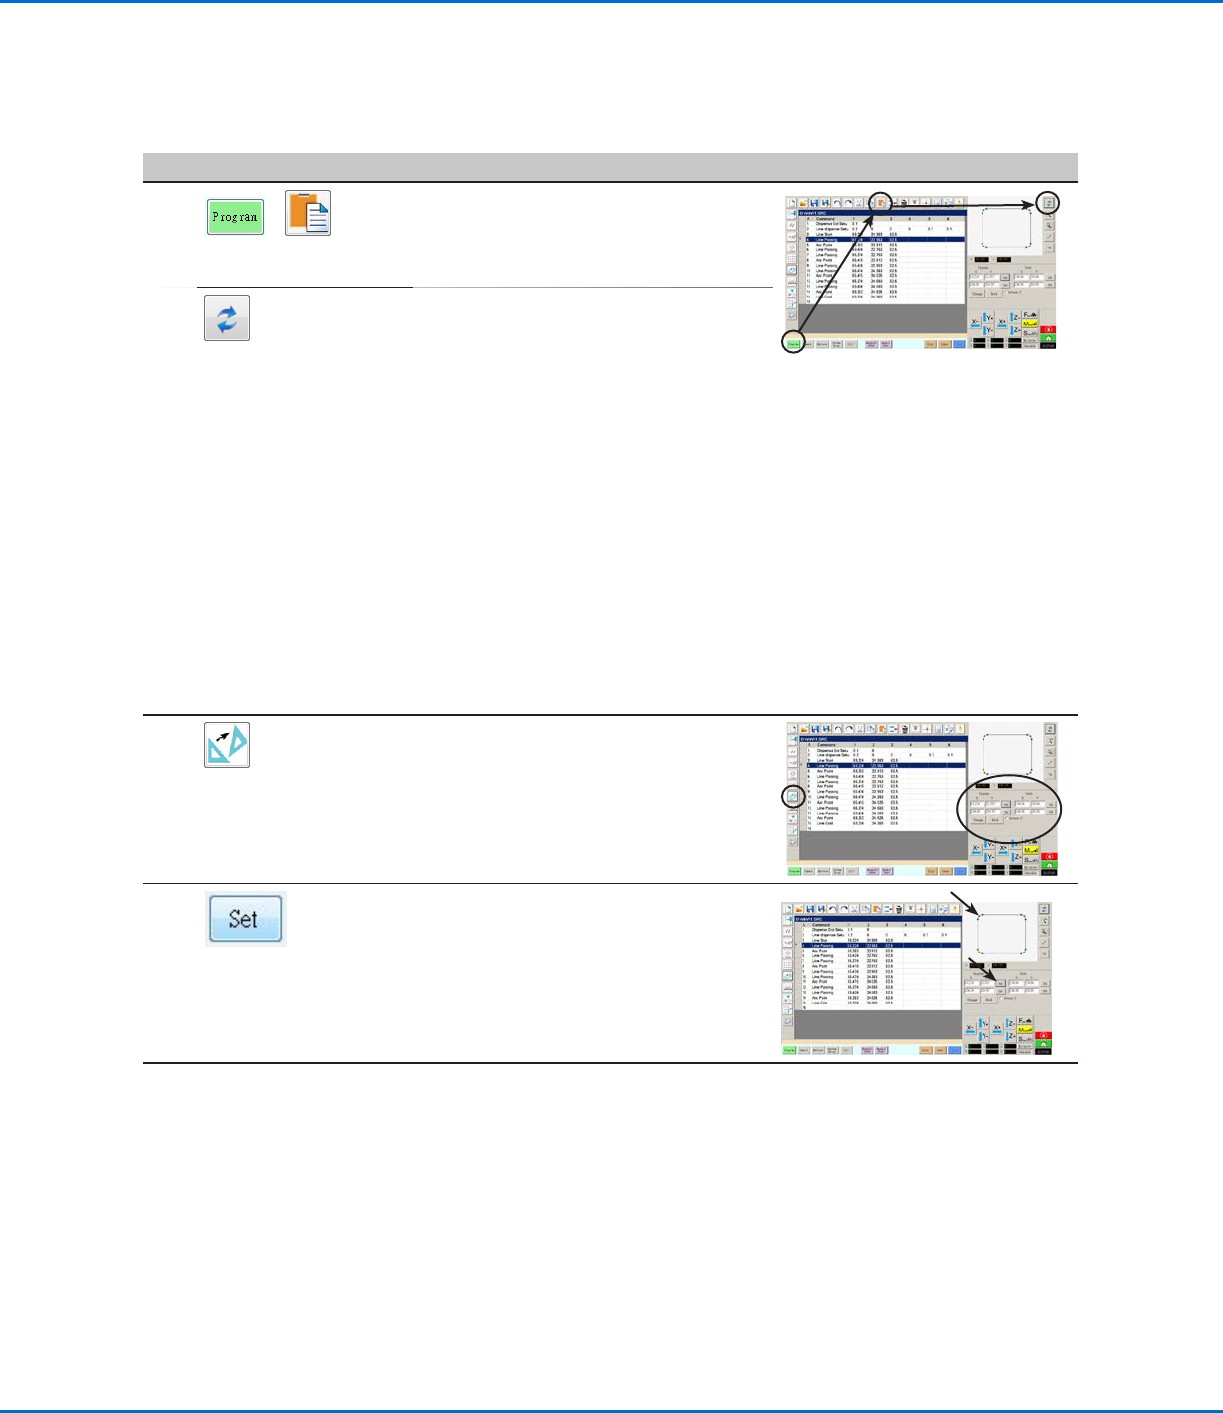
• Click the PROGRAM tab, select an
empty Address line, then click PASTE.
The commands appear in the Program
screen.
7 • Click REFRESH next to the Secondary
View screen to show the imported
points and lines and make changes as
needed to the program.
The next step is to match the program
commands to the actual workpiece.
NOTES:
• After making any change to the
program, click REFRESH to update the
view in the Secondary View screen to
show the changes.
• You may need to zoom out to see the
points. This can be avoided by entering
offset values in the DXF screen Option
window. Refer to Option X, Y under
“Setting DXF Import Preferences” on
page128.
8
• Click TRANSFORM.
The Program and Table fields appear.
9 • Click on a point at the far left side of the
points shown in the Secondary View
screen, then click the top SET button
under Program.
Continued on next page
AppendixC, DXF File Import (continued)
Importing a DXF File (continued)
RV Series Automated Dispensing Systems
131www.nordsonefd.com info@nordsonefd.com +1-401-431-7000 Sales and service of Nordson EFD dispensing systems are available worldwide.
# Click Step Reference Image
10
>
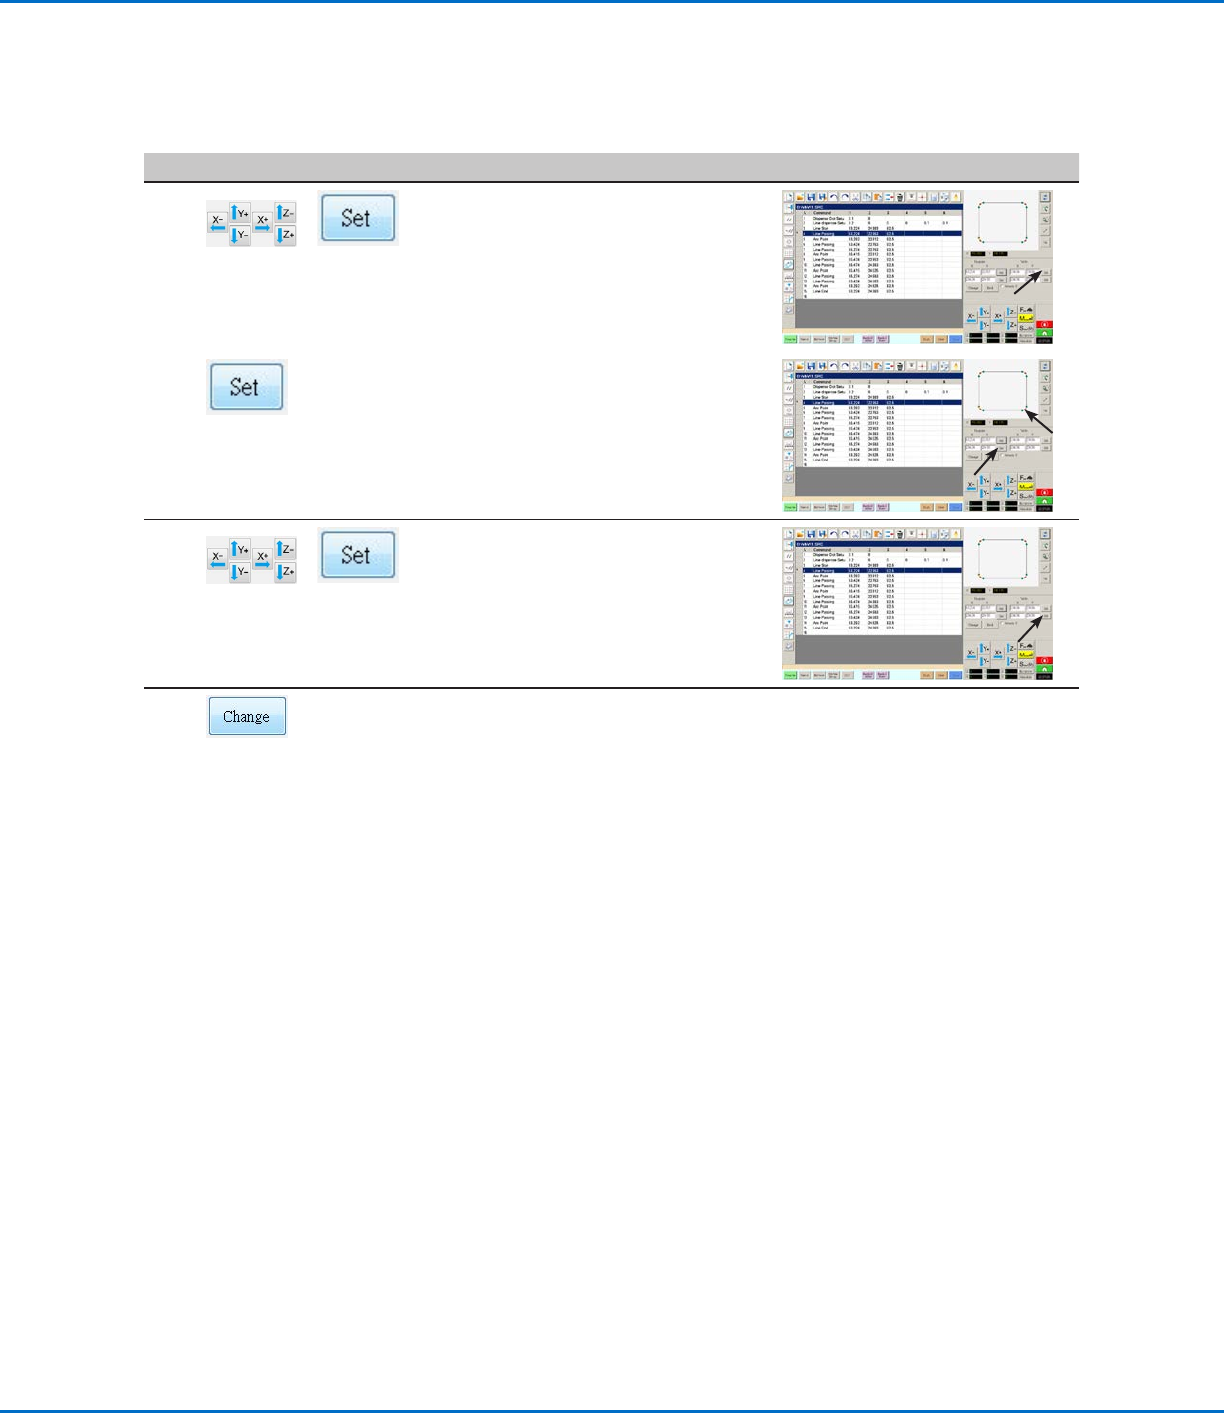
• Jog the tip to the same point on the
actual workpiece and then click the top
SET button under Table.
11 • Click on a point at the far right side
of the points shown in the Secondary
View screen, then click the bottom SET
button under Program.
12
>
• Jog the tip to the same point on the
actual workpiece and then click the
bottom SET button under Table.
13 • Click CHANGE.
The system updates all XY locations in
the program so they align with same XY
locations on the actual workpiece.
Importing a DXF File (continued)
AppendixC, DXF File Import (continued)