Nordson_EFD_RV_Series_Operating_Manual.pdf - 第134页
RV Series Automated Dispensing Systems 134 www.nordsonefd.com info@nordsonefd.com +1-401-431-7000 Sales and service of Nordson EFD dispensing systems are available worldwide. AppendixD, QR Code Scanning Setup Programs c…
RV Series Automated Dispensing Systems
133www.nordsonefd.com info@nordsonefd.com +1-401-431-7000 Sales and service of Nordson EFD dispensing systems are available worldwide.
Using the Sort Path By Option (continued)
AppendixC, DXF File Import (continued)
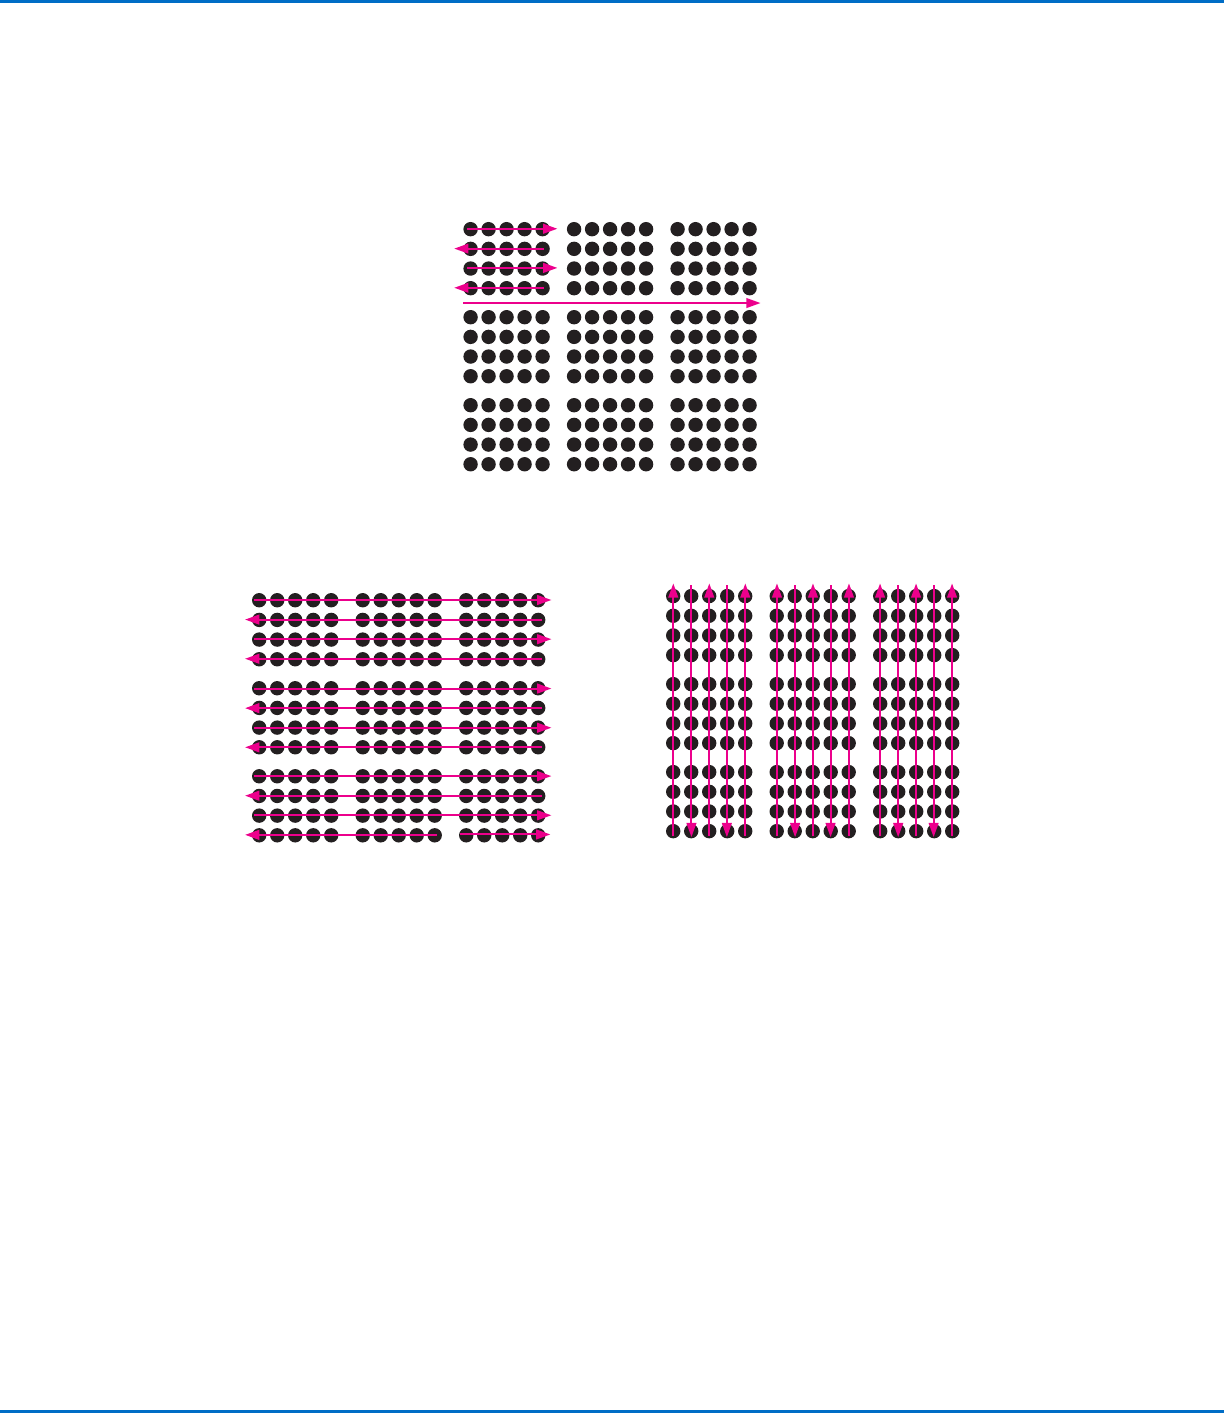
Examples of How the Sort By Path Option Affects DXF Imports
DXF array import: Sort By Path disabled
A
B
C
D
1 2 3
4 5 6
7 8 9
DXF array import: Sort By Path X enabled
A
1
3
4
5
6
7
8
9
10
11
12
13
B
DXF array import: Sort By Path Y enabled
21 3
4 576 8 9 1011 12 13 14 15
RV Series Automated Dispensing Systems
134 www.nordsonefd.com info@nordsonefd.com +1-401-431-7000 Sales and service of Nordson EFD dispensing systems are available worldwide.
AppendixD, QR Code Scanning Setup
Programs can be executed using a QR code scan. For the system to execute a program using a QR code, the
following must occur:
• A QR code for the workpiece must be present on the robot fixture plate surface (for example, on the workpiece
itself or on the workpiece fixture).
• QR code scanning must be enabled and each QR code must be associated with a program. Refer to the
procedure below.
NOTE: Bar codes are not supported.
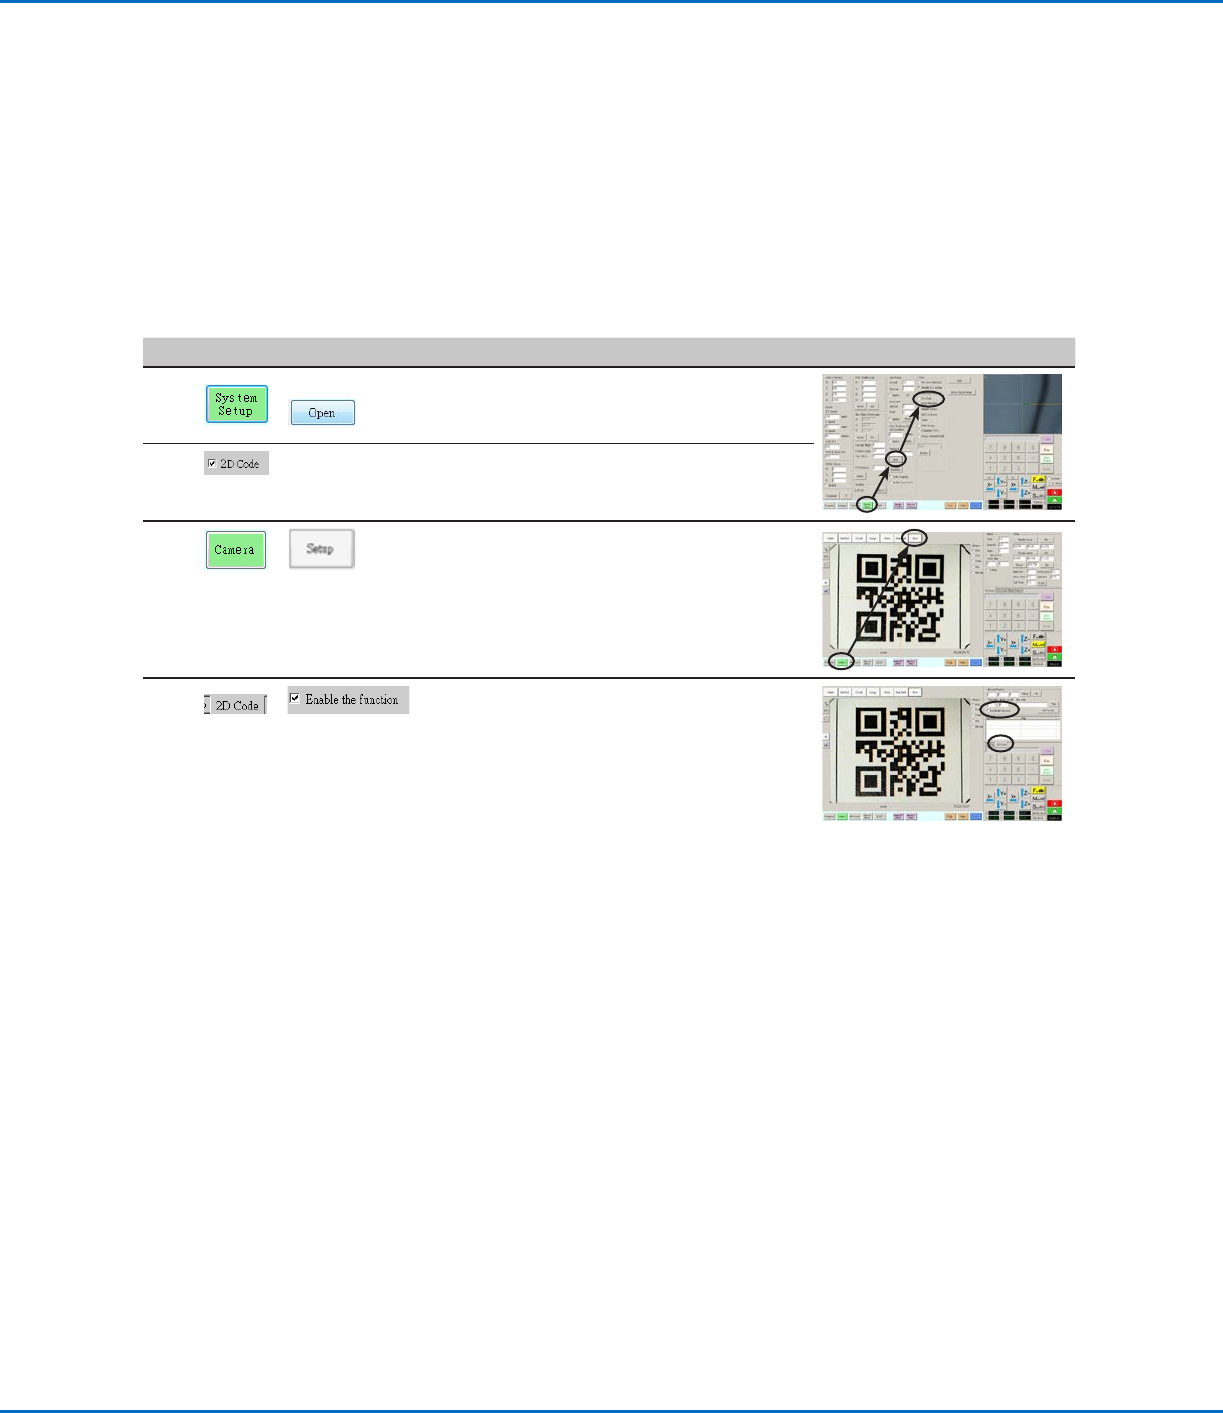
To Enable QR Code Scanning
# Click Step Reference Image
1
>
• Click the SYSTEM SETUP tab, then click
OPEN.
2 • Check 2D CODE to enable QR code
scanning.
3
>
• Click the CAMERA tab and then click
SETUP at the top of the Camera screen.
The camera setup fields appear.
4
>
• Click the 2D CODE tab to open the code
setup fields, then check ENABLE THE
FUNCTION.
RV Series Automated Dispensing Systems
135www.nordsonefd.com info@nordsonefd.com +1-401-431-7000 Sales and service of Nordson EFD dispensing systems are available worldwide.
AppendixD, QR Code Scanning Setup (continued)
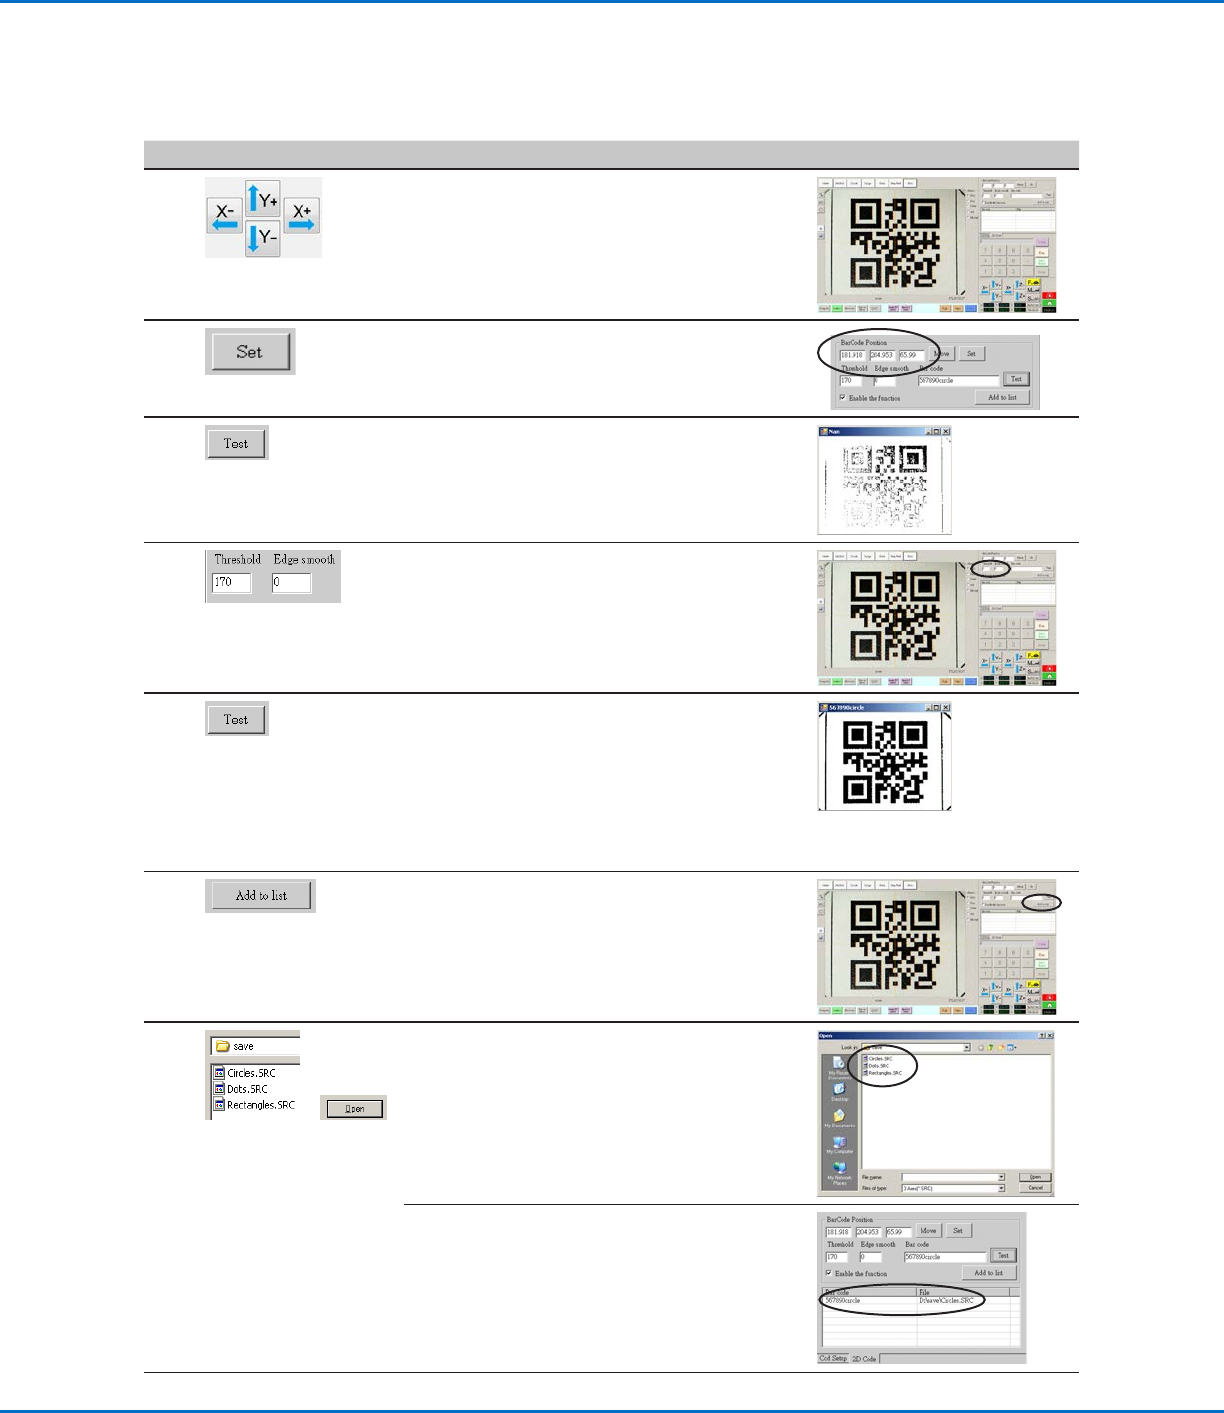
To Associate a QR Code with a Program
# Click Step Reference Image
1
• Jog the camera until it is centered over
the QR code you want to associate with a
program.
2 • Click SET to record the location.
The QR code location coordinates appear in
the BarCode Position fields.
3 • With the QR code in view and in focus, click
TEST to scan the QR code.
If the system cannot identify the QR code, the
Nan pop-up window appears.
4 • Adjust the THRESHOLD and EDGE SMOOTH
values:
- THRESHOLD: Range = 0–255
- EDGE SMOOTH: Range = 0–5
5 • Click TEST again.
When the system properly identifies the QR
code, a window like the one at right appears.
• Repeat steps 4 and 5 until the system
recognizes the QR code. After the QR code
is recognized, continue with the next steps to
associate it with a program.
6 • Click ADD TO LIST.
The Open file window appears.
7
>
• Select the dispense program to associate
with the QR code, the click OPEN.
The dispense program is now associated with
the QR code.
Continued on next page