YS24 保养手册.pdf - 第34页
3-32 3 Periodic maintenance items 4.4 Checking the R-axis spline belt (1 year) T here are four R-axis spline belts. Check the condition of each belt. n R-axis spline belt checkpoints • Is the belt becoming fra yed due to…
3-31
3
Periodic maintenance items
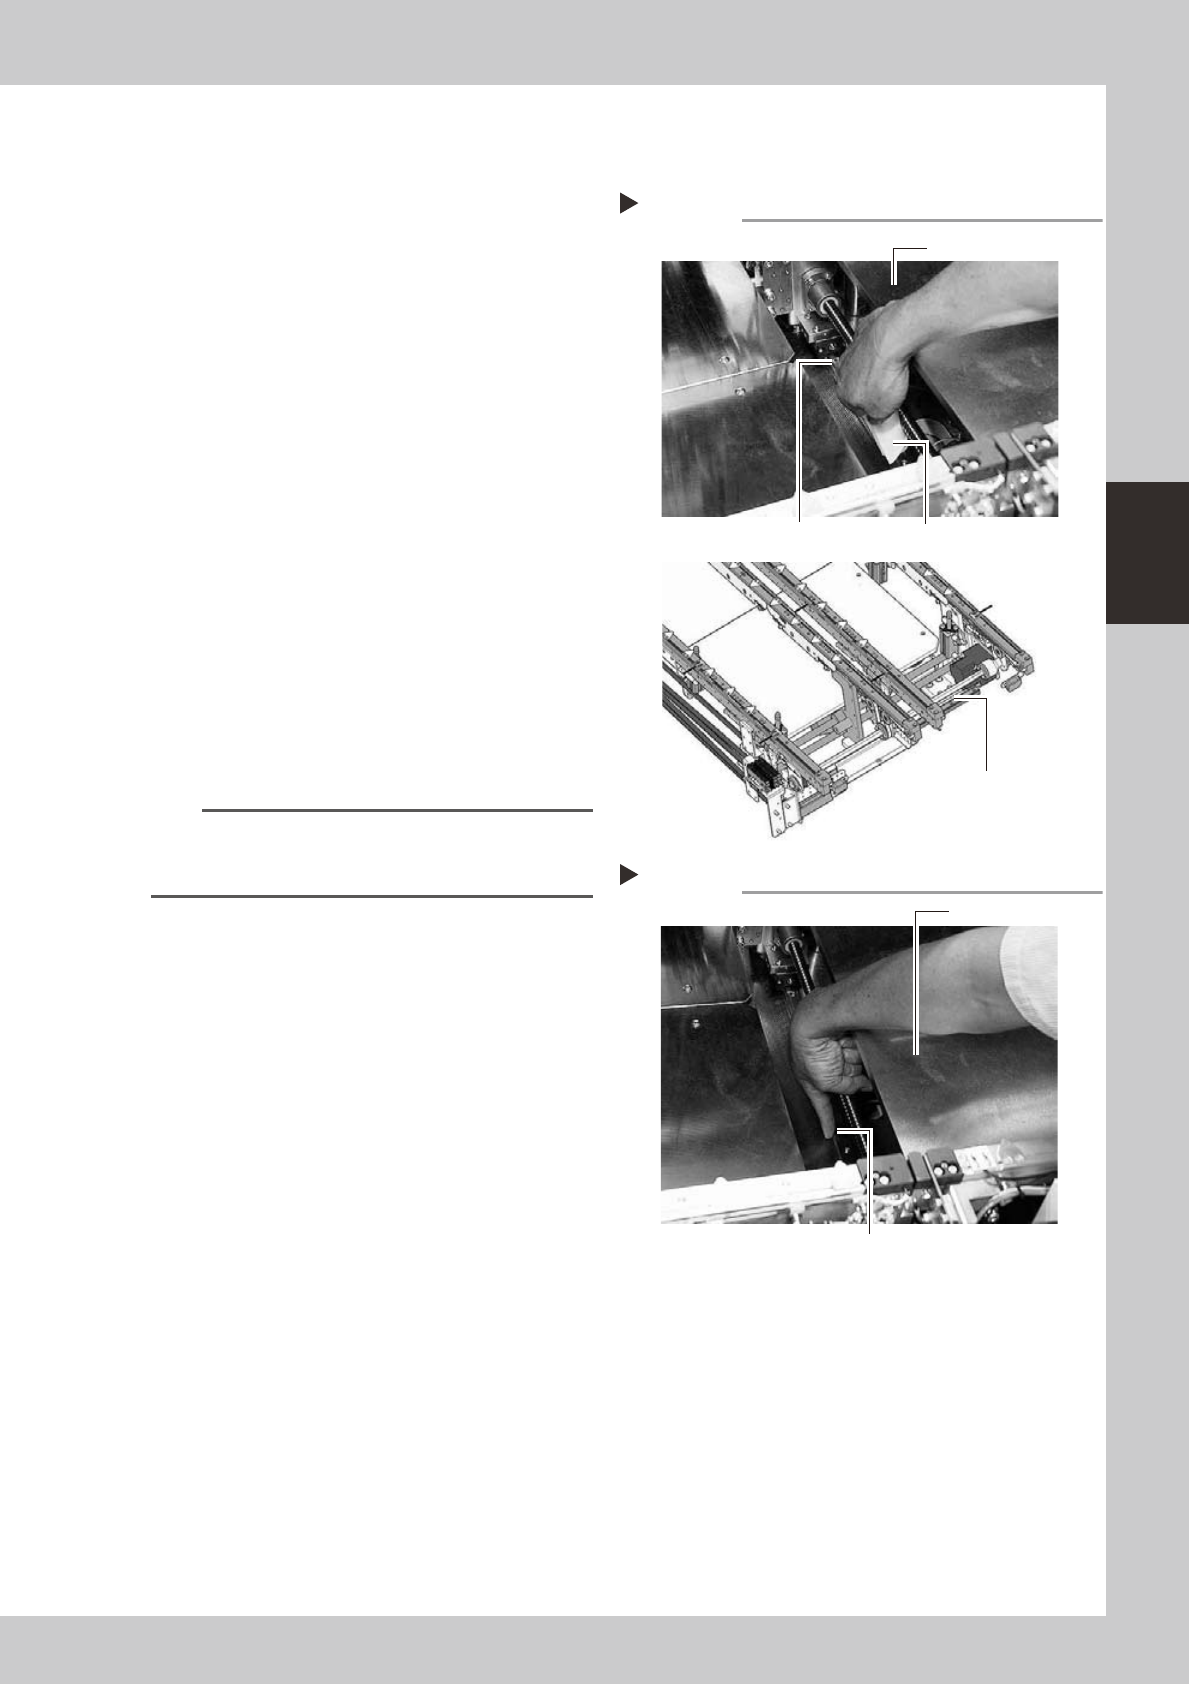
4.3.2 Cleaning and greasing the W-axis linear guide
1
Make the preparations for the
cleaning and greasing work.
Take off all accessories susceptible to the
magnetic fields, such as a wristwatch and/
or magnetic ID card.
2
Clean the linear guide.
1. Set the board width to its maximum with
manual operation and then press the
emergency stop button. In the case of
dual-stage machines, raise the stage 1
and then press the emergency stop
button.
e
2. Wipe away the old grease and dirt from
the entire linear guide with a lint-free
cloth or paper towel (for clean room).
3. Cancel the emergency stop and make
the board width narrower. After that,
wipe also the remaining portions.
53386-L2-10
3
Apply grease.
Apply the specified grease (NSL) by hand
uniformly over the surface of the linear
guide.
n
NOTE
In the same manner as described in step 2, adjust the
board width and apply the grease to the entire linear
guide.
53387-L2-00
Applying grease
Step 3
Stage 1
Grease
Cleaning the linear guide
Step 2
Stage 1
Cleaning cloth
Linear guide
Dual-stage
Dual-lane
W-axis Linear guide
3-32
3
Periodic maintenance items
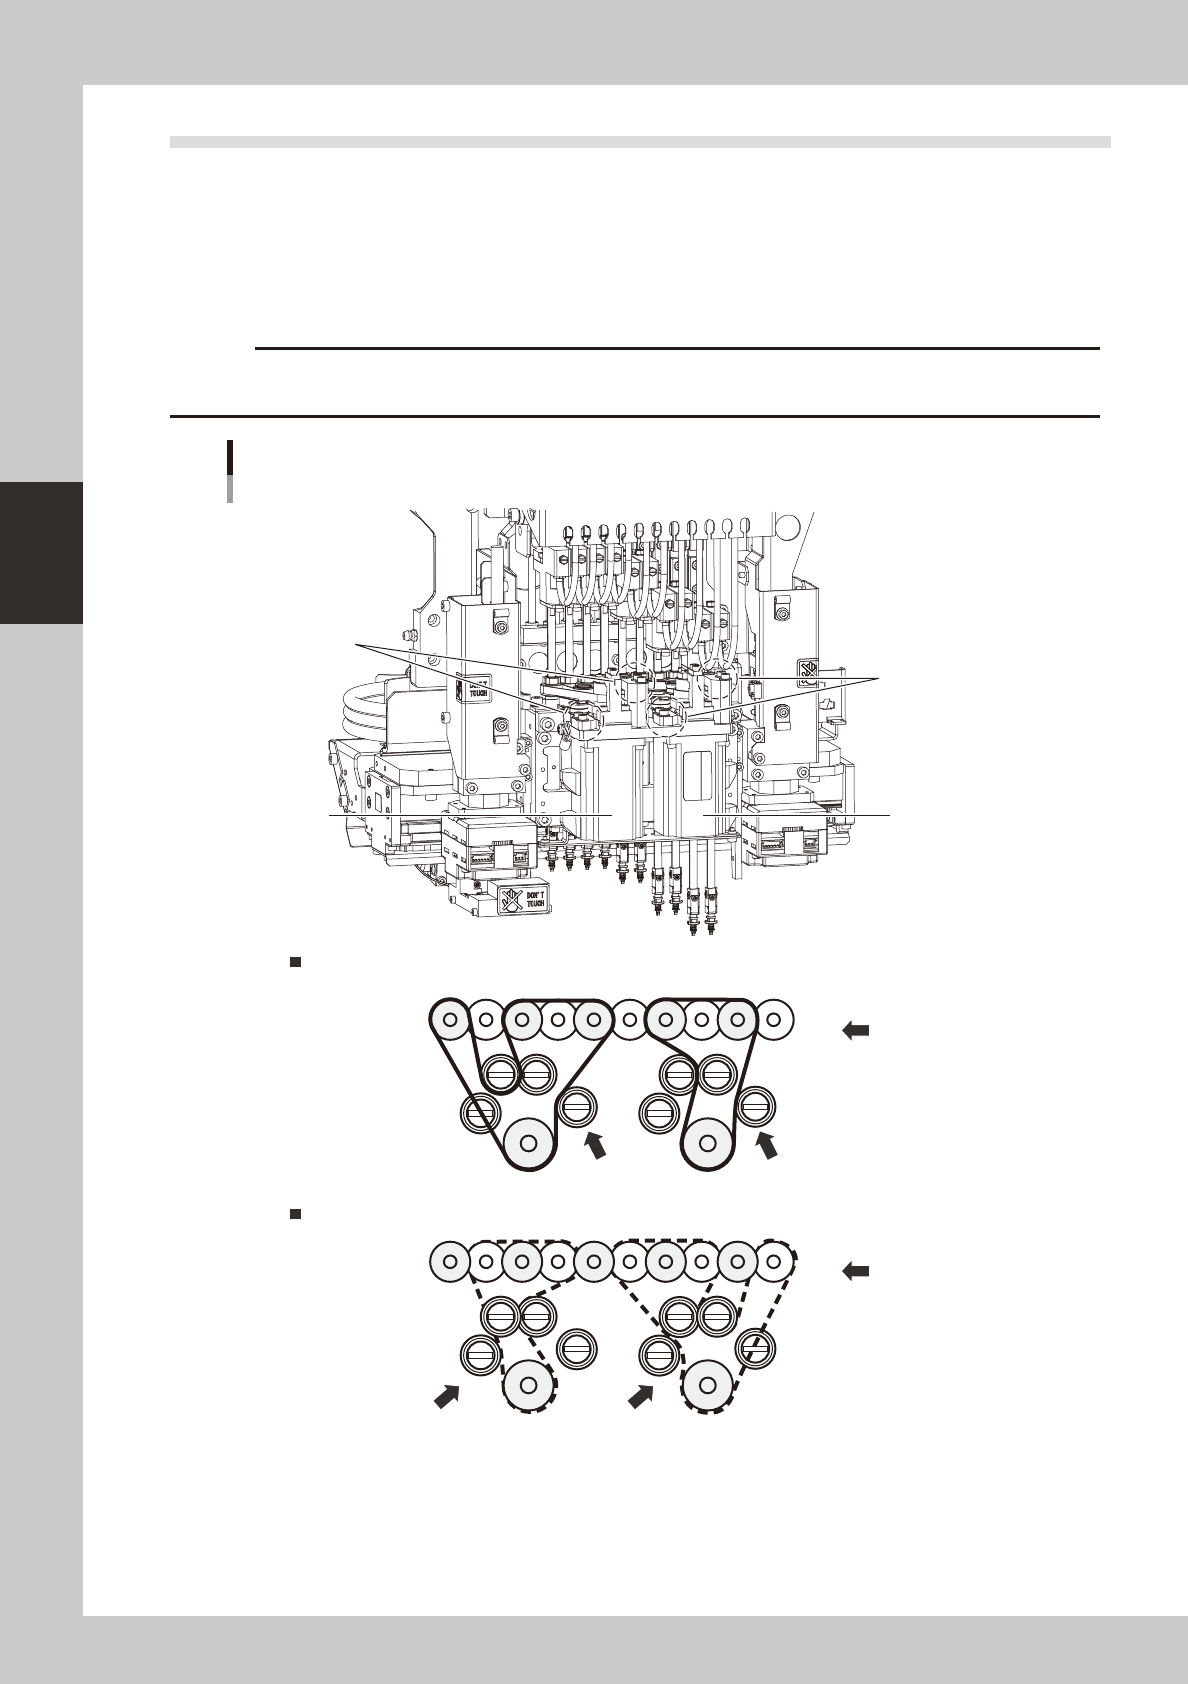
4.4 Checking the R-axis spline belt (1 year)
There are four R-axis spline belts. Check the condition of each belt.
n
R-axis spline belt checkpoints
• Is the belt becoming frayed due to belt wear or chipping?
• Is the belt splitting due to cracks or deterioration?
• Is the belt tension too loose? Is the belt itself loose?
c
cleaning of the spline belt by the user will void the warranty.
Spline belt
R-axis belt (upper stage)
R-axis belt (lower stage)
Belt tensioner
Belt tensioner
HEAD 1HEAD 10
R1-axis motor
R2-axis motor
Belt tensioner
Belt tensioner
53345-L2-00
3-33
3
Periodic maintenance items
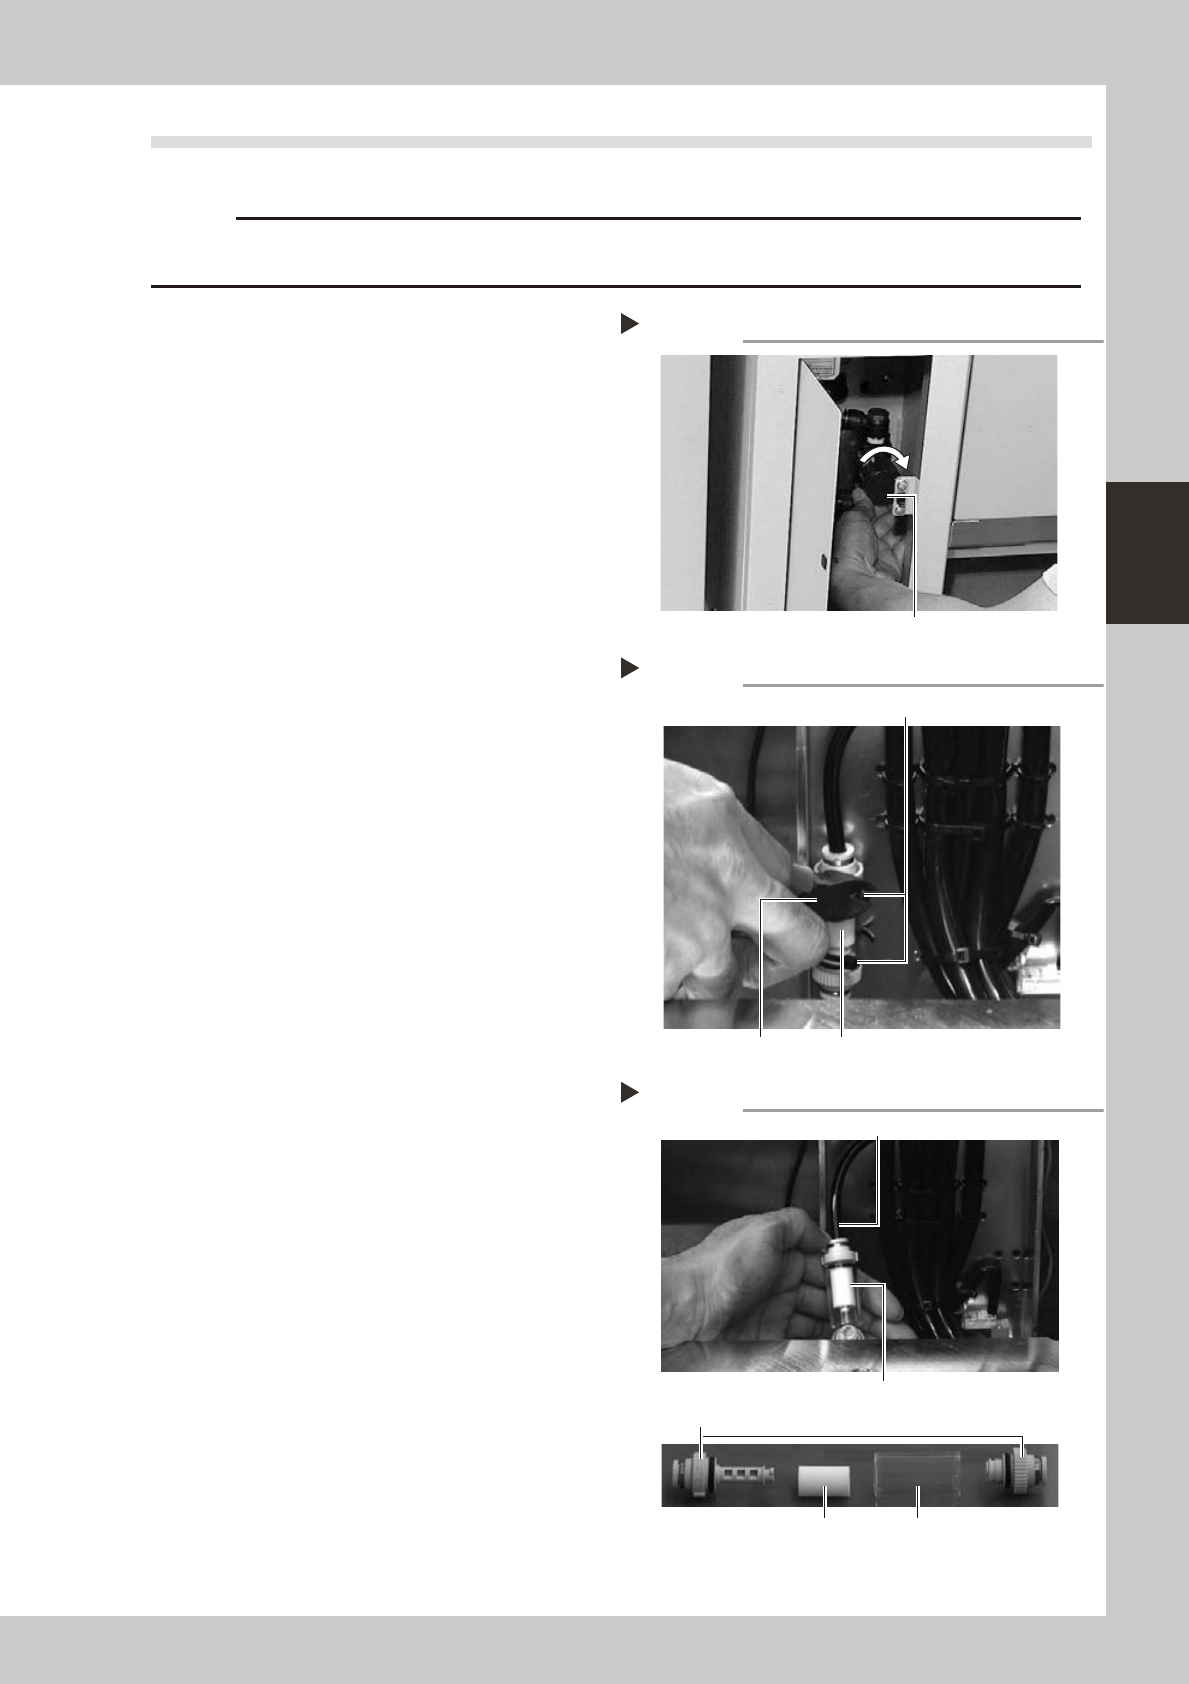
4.5 Cleaning and replacing the blow station filter (1 year)
This section describes how to clean and replace the blow station filter.
c
of the blow station by the user will void the warranty.
1
Turn off the air supply and the
power to the machine.
1. Quit the software and turn off the
machine power switch.
2. Turn the air supply/shutoff valve inside
the machine lower left panel to the right,
to stop the air supply.
53346-L2-00
2
Cut the cable ties on the filter.
Using a wire cutter or similar tool, cut the
cable ties that hold the filter unit inside the
blow station stand.
53347-L2-00
3
Disconnect the air hose from one
end of the filter unit and take out
the filter.
1. Disconnect the air hose from one end of
the in-line filter unit.
2. Remove the filter joint caps on both sides
of the filter by rotating them 90 degrees.
3. Pull the transparent case to remove it
and take out the filter.
53348-L2-00
4
Clean the filter.
Use an air blow tool to blow air through the
filter from the inside and from the outside. If
the filter is excessively dirty and cannot be
cleaned, replace it with a new filter.
Turning off the air supply
Step 1
Air supply/shutoff valve
Cutting the cable ties
Step 2
Cable tie
Wire cutter In-line filter unit
Taking out the filter
Step 3
Air hose
Filter
Transparent filter case
In-line filter unit
Filter joint caps