00193732-02.pdf - 第57页
SIPLACE HS-50/HS-60 2 Retrofit Instructions for PCB Camera Mult icolor, HS-50 / HS-60 11/2004 Edition 2.7 Installing PCB Camera Board and P CB Camera Multicolor 57 2.7.1 Removing P CB Camera (Normal Illumination) incl. O…
2 Retrofit Instructions for PCB Camera Multicolor, HS-50 / HS-60 SIPLACE HS-50/HS-60
2.7 Installing PCB Camera Board and PCB Camera Multicolor 11/2004 Edition
56
2.7 Installing PCB Camera Board and PCB Camera
Multicolor
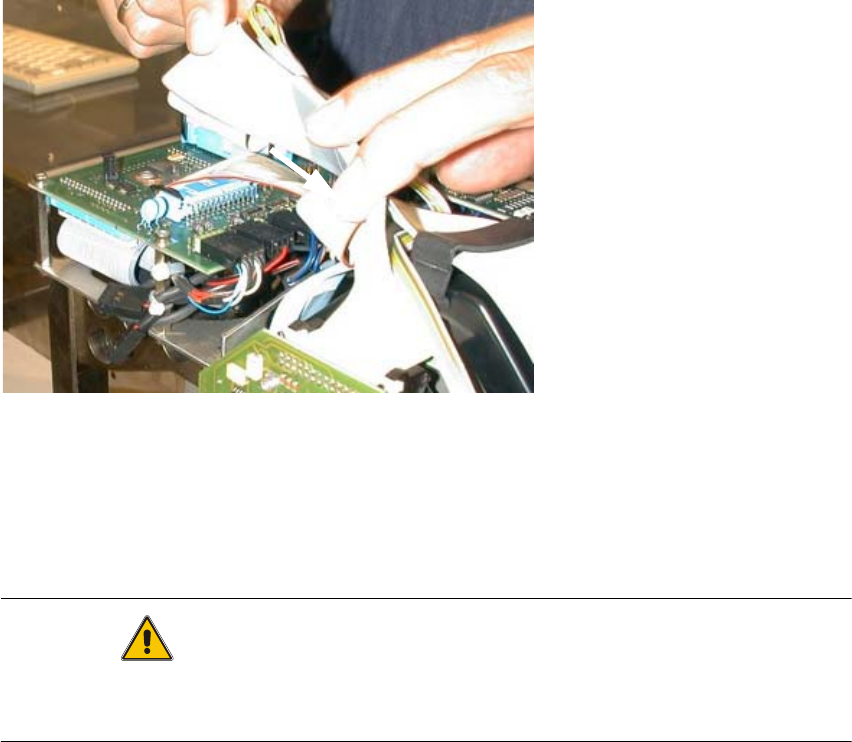
Possibly at HS-50 the modular head PCB is not mounted yet. 2
2
Fig. 2.7.1 "Conversion PCB small axis" still installed (= old PCB version)
: If the conversion PCB "small axis" is still installed on the placement head, retrofit the modular
head PCB unit now. Retrofit kit and instructions see chapter 2.2.
At HS-60 the modular head PCB unit is installed. 2
CAUTION
Comply the ESD regulations during the following handling of the PCBs.
Make certain that no screws or other parts drop into the machine or the placement head !! 2
2
1
SIPLACE HS-50/HS-60 2 Retrofit Instructions for PCB Camera Multicolor, HS-50 / HS-60
11/2004 Edition 2.7 Installing PCB Camera Board and PCB Camera Multicolor
57
2.7.1 Removing PCB Camera (Normal Illumination) incl. Oblique Illumination
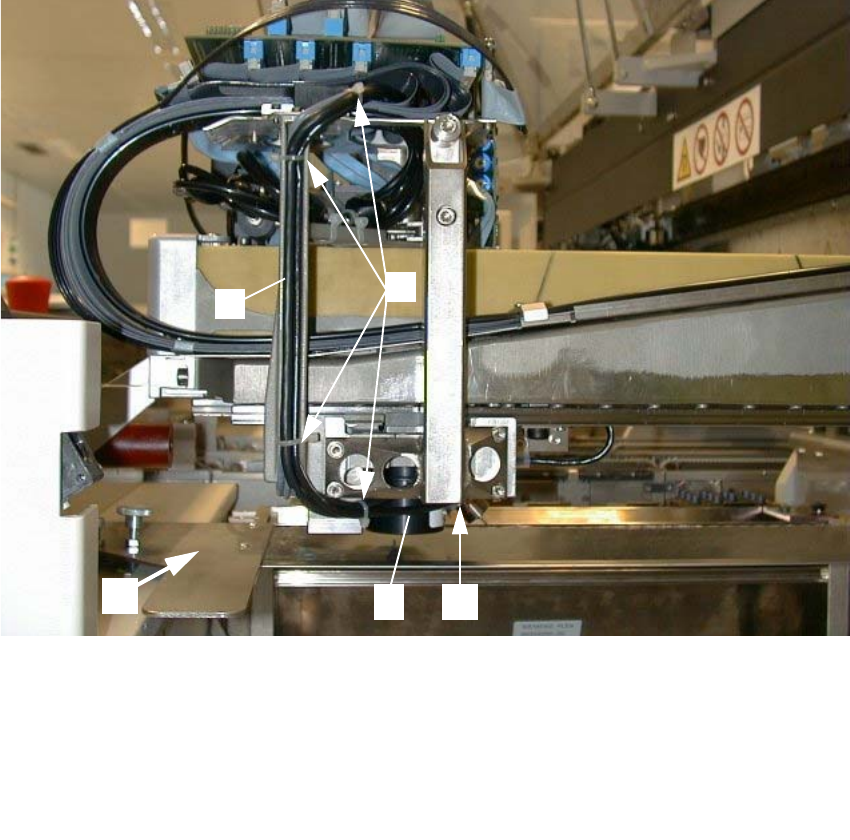
Abb. 2.7.2 Loosening Cable Ties, Removing Subgantry PCB Camera
2
: Remove the cover over the placement heads.
: Remove the flat ribbon cable on the placemant head.
: Cautiously undo the cable ties along the cable harness.
2
2
2
2
1 Cover of feeder modules: to be removed
2 U-shaped rail for cable guide
3 4 unit, cable ties
4 Subgantry PCB camera (with normal illumination) to be removed)
5 Fasteners for the PCB camera: 3 socket hex head cap screws M3 x 10
2
3
45
1
2 Retrofit Instructions for PCB Camera Multicolor, HS-50 / HS-60 SIPLACE HS-50/HS-60
2.7 Installing PCB Camera Board and PCB Camera Multicolor 11/2004 Edition
58
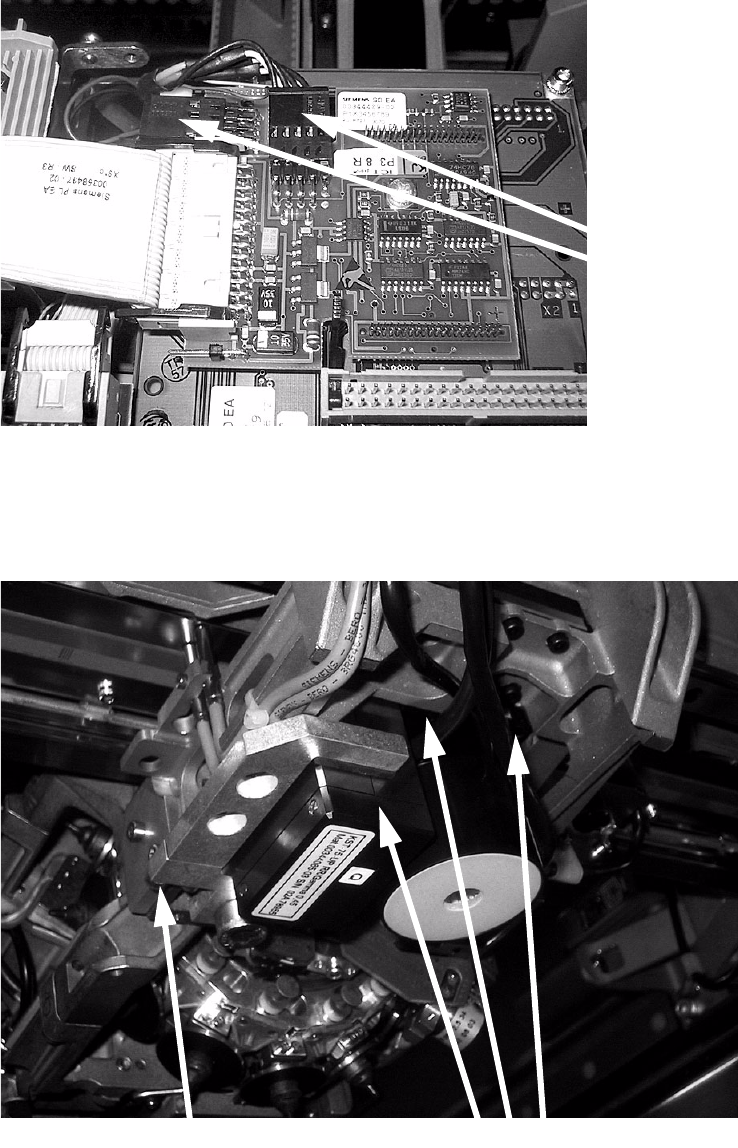
: On the "Vision board, modular" unplug the connectors of the subgantry PCB camera (normal
illumination) and - if present - the oblique illumination.
2
2
: Unscrew the three screws of the camera and the one of the frame on the side and remove the
camera.
2
Unplug
camera cable
Unscrew camera screws
Unscrew screw on frame