YSM20_YSM20W_Mainte_E.pdf - 第166页
6-13 6 How to replace consumable parts * This image is right flow type. Regarding YSM20W Single-lane, the tensioner (pulley) locates at the downstream side of the flow direction. YSM20 Single-lane YSM20 Single-lane (for …
6-12
6
How to replace consumable parts
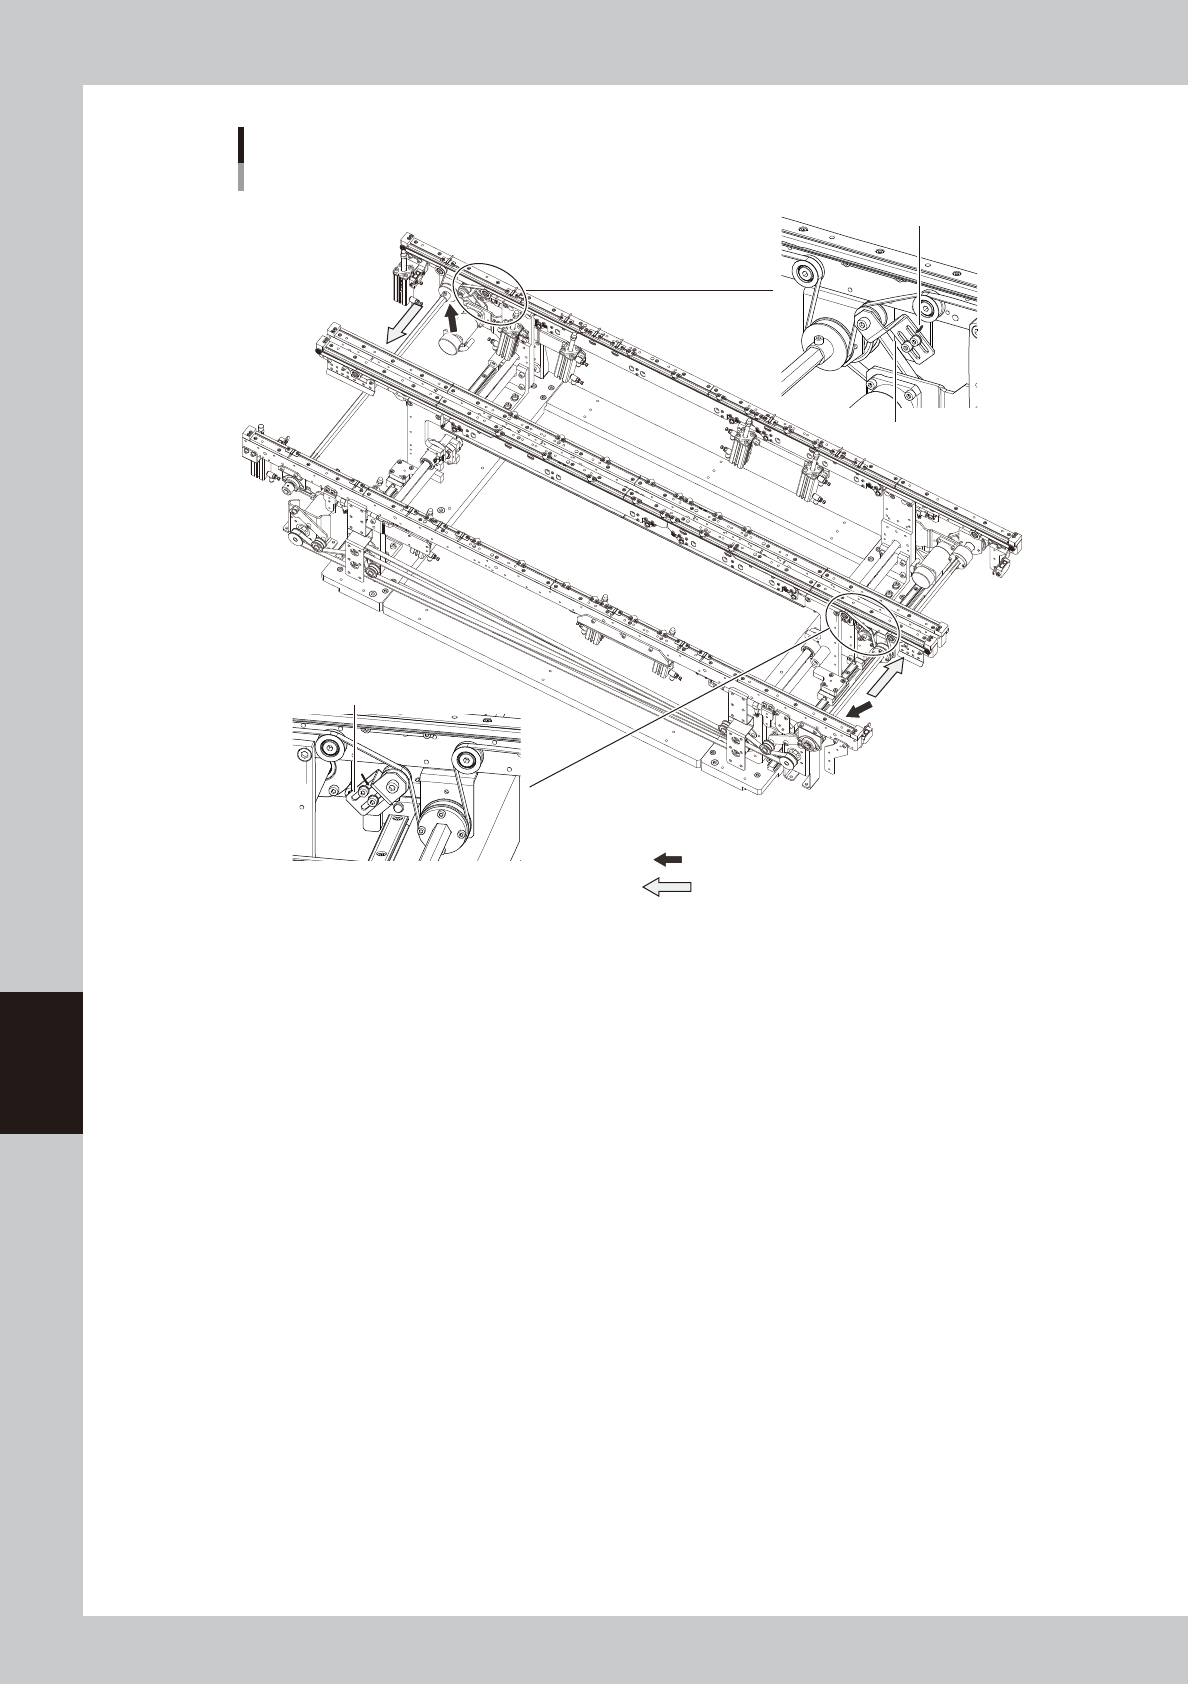
Replacing the conveyor belt
Dual-lane (YSM20 / YSM20W )
: Place where the shaft is separated from the pulley.
: Shaft pull-out direction
Put a marking at the bracket
position with a permanent marker.
Loosen this bracket.
Loosen this bracket.
53617-N2-00
6-13
6
How to replace consumable parts
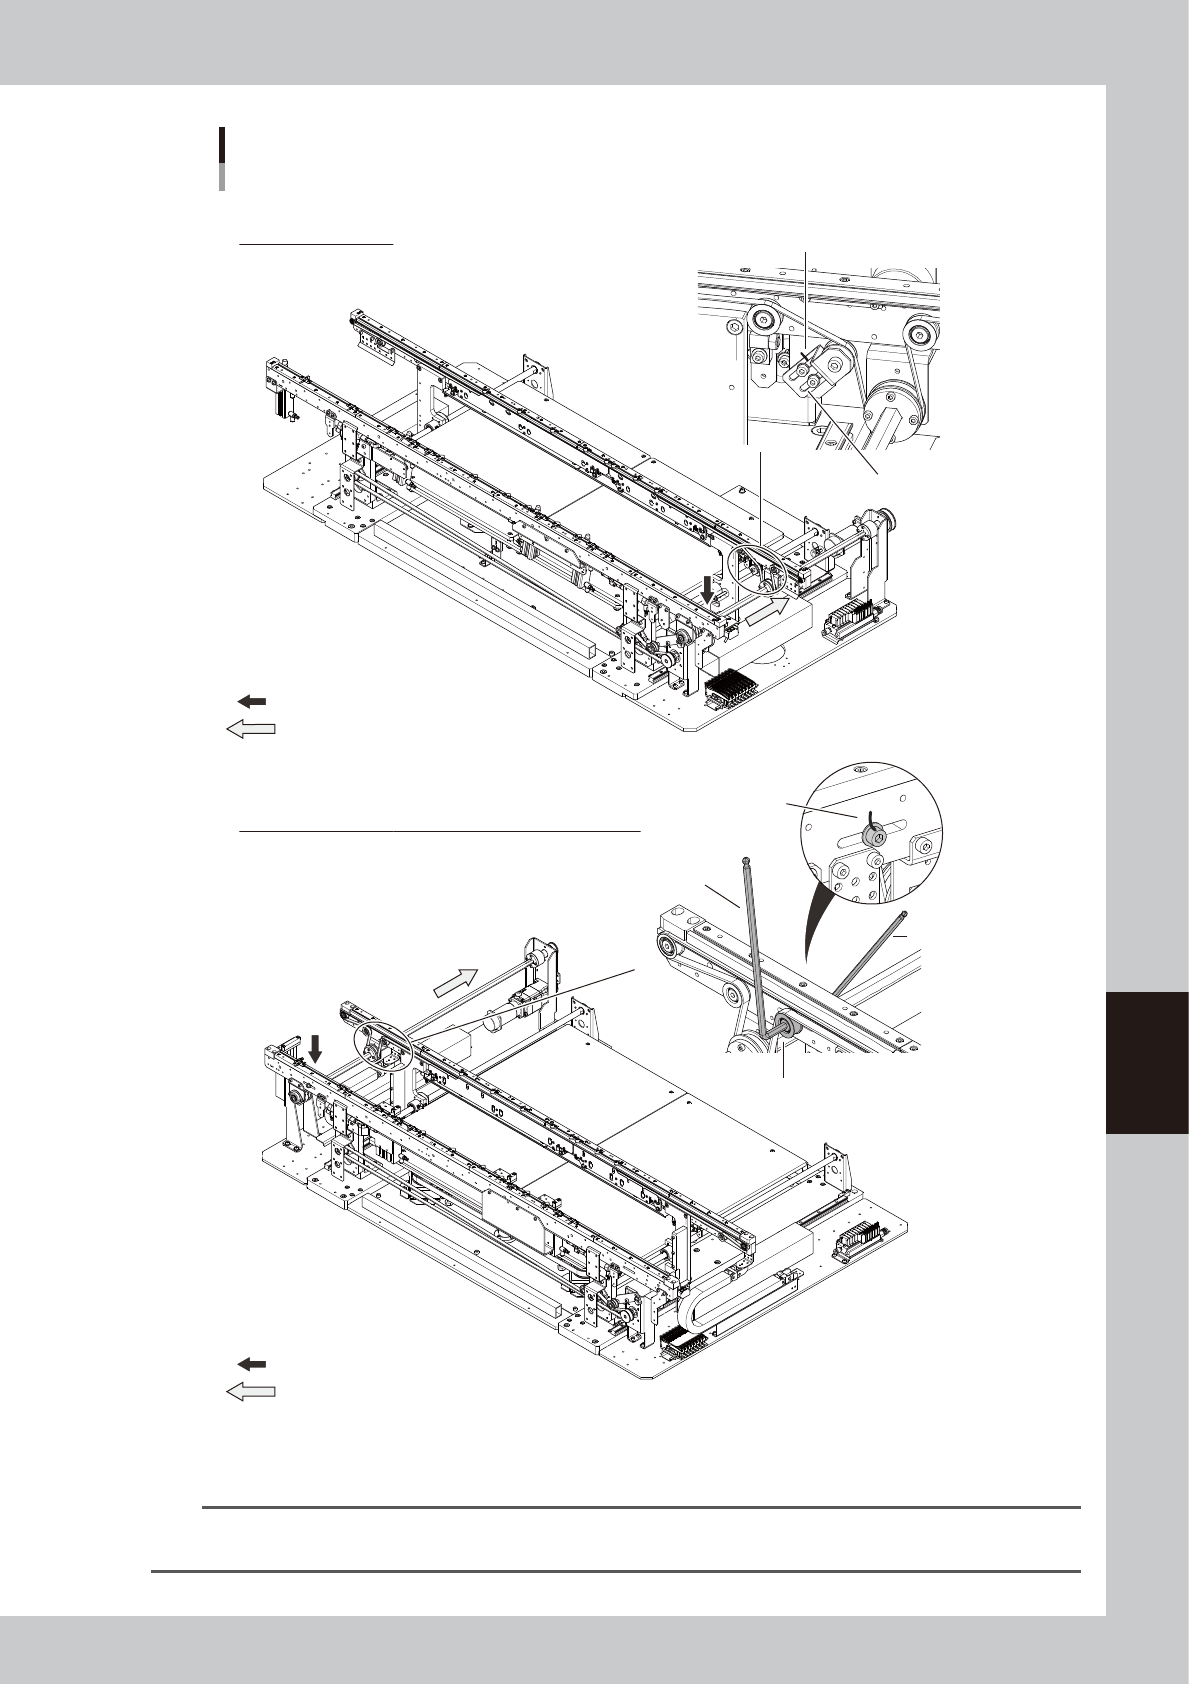
* This image is right flow type.
Regarding YSM20W Single-lane, the tensioner (pulley) locates at the downstream side of the flow direction.
YSM20 Single-lane
YSM20 Single-lane (for transferring heavy boards)
Loosening the conveyor belt
YSM20 Single-lane / YSM20W Single-lane (for transferring heavy boards)
Put a marking at the bracket
position with a permanent marker.
Put a marking at the pulley
position with a permanent marker.
Loosen this bracket.
Loosen this pulley.
Hex wrench (5)
Hex wrench (4)
: Place where the shaft is separated from the pulley.
: Shaft pull-out direction
: Place where the shaft is separated from the pulley.
: Shaft pull-out direction
53631-N2-00
TIP
Regarding YSM20W Single-lane type, the position separating the tensioner (pulley) and the shaft locates at the
downstream side of the conveyor flow direction. Therefore the layout varies if the machine flow direction is different.
6-14
6
How to replace consumable parts
n
Differences in conveyor belt replacement depending on the machine stage type
Regarding W2 and W3 conveyor belts of YSM20 Dual-stage type, the belt replacement procedure is different from other
conveyor belts. For replacement procedures other than W2/W3 conveyor belts of YSM20 Dual-stage type, go on to Step 9.
n
Replacing the conveyor belt (YSM20 Dual-stage W2,W3)
5
Move the conveyor U-axis.
1. Close the machine safety cover and
cancel the emergency stop. Set the
carriage if the machine is the carriage
type.
2. Press the [Mount Position] button on the
[Setup] screen to move the conveyor to
the component mounting position.
e
3. Press the emergency stop button and
then open the machine safety cover.
4. Detach the carriage if the machine is the
carriage type.
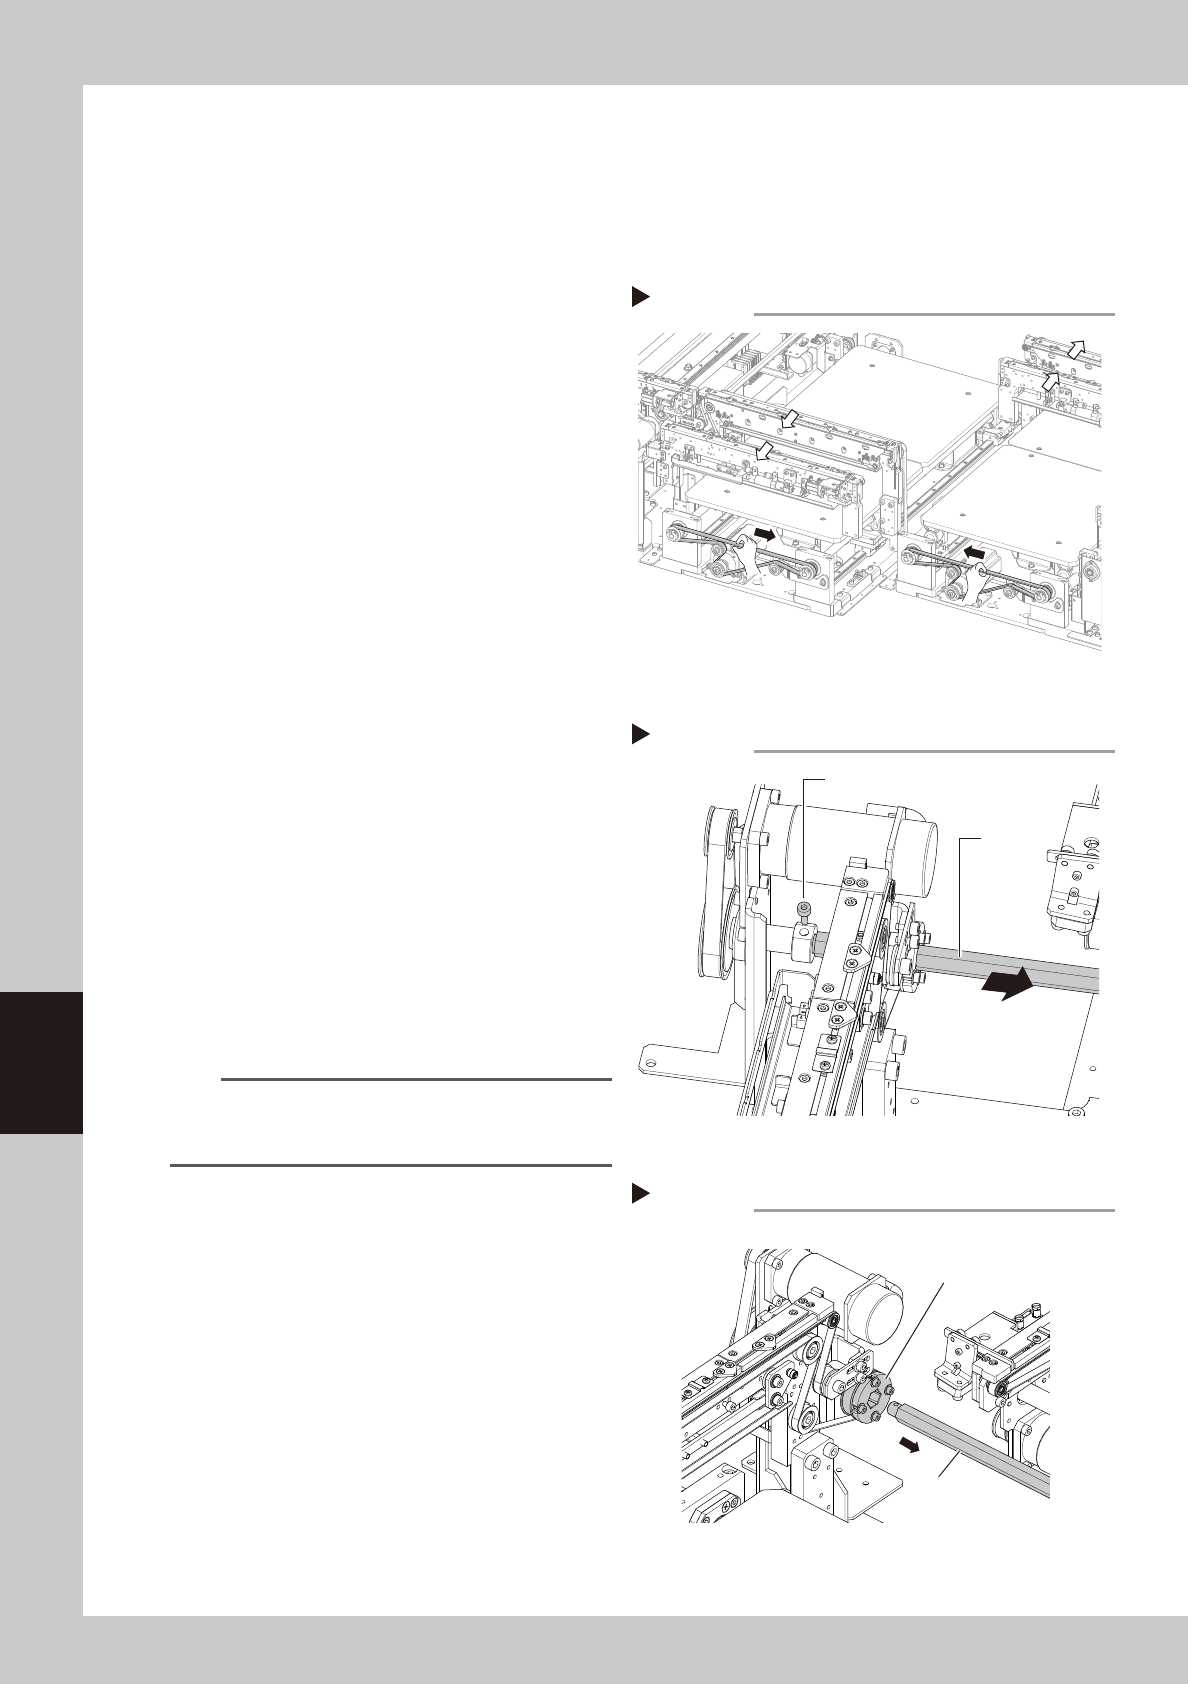
5. Moving the U-axis belt manually moves
the entire conveyor. For the W2-axis, fully
move the conveyor to the rear side by
moving the U-axis belt in the direction
indicated by an arrow shown in the
figure on the right. For the W3-axis, fully
move the conveyor to the front in the
same manner.
6
Separate the shaft.
Remove the bolt from the shaft (for the
pulley position, see the figure shown in Step
4) with a hex wrench (3).
7
Pull out the shaft from the belt
drive pulley.
Pull the shaft toward the front for the W2-axis
or the rear for the W3-axis to pull it out from
the drive pulley completely.
n
NOTE
When pulling out the shaft, the drive pulley is easy to
remove. Therefore, pull out the shaft while holding the
pulley manually.
W2-axis
W3-axis
Moving the conveyor U-axis
Step 5
53624-N2-00
Removing the shaft
Step 6
Shaft
Bolt
53630-N2-00
Drive pulley
Shaft
Pulling out the shaft from the drive pulley
Step 7
53625-N2-00