YSM20_YSM20W_Mainte_E.pdf - 第89页
3-31 3 Periodic maintenance items 3.8 Air intake fan filter T his machine is equipped with the air intake fan filters (left and right on the front (2 locations), left and right on the rear (2 locations), 4 locations in t…
3-30
3
Periodic maintenance items
5
Apply the new grease by hand.
Apply as much as 2 cm of new grease to
finger and rub it evenly into the ball screw
grooves.
6
Spread the grease.
e
1. Press the emergency stop button and
then open the machine safety cover.
Attach the carriage if the machine is the
carriage type.
2. The push-up unit moves down by pressing
the [Push up] button.
3. Move up and down the push-up unit
several times to spread the grease. After
spreading the grease, put the push-up
unit in its up state.
e
7
Wipe away excess grease by hand.
1. Press the emergency stop button and
then open the machine safety cover.
Detach the carriage if the machine is the
carriage type.
2. Remove excess grease by hand.
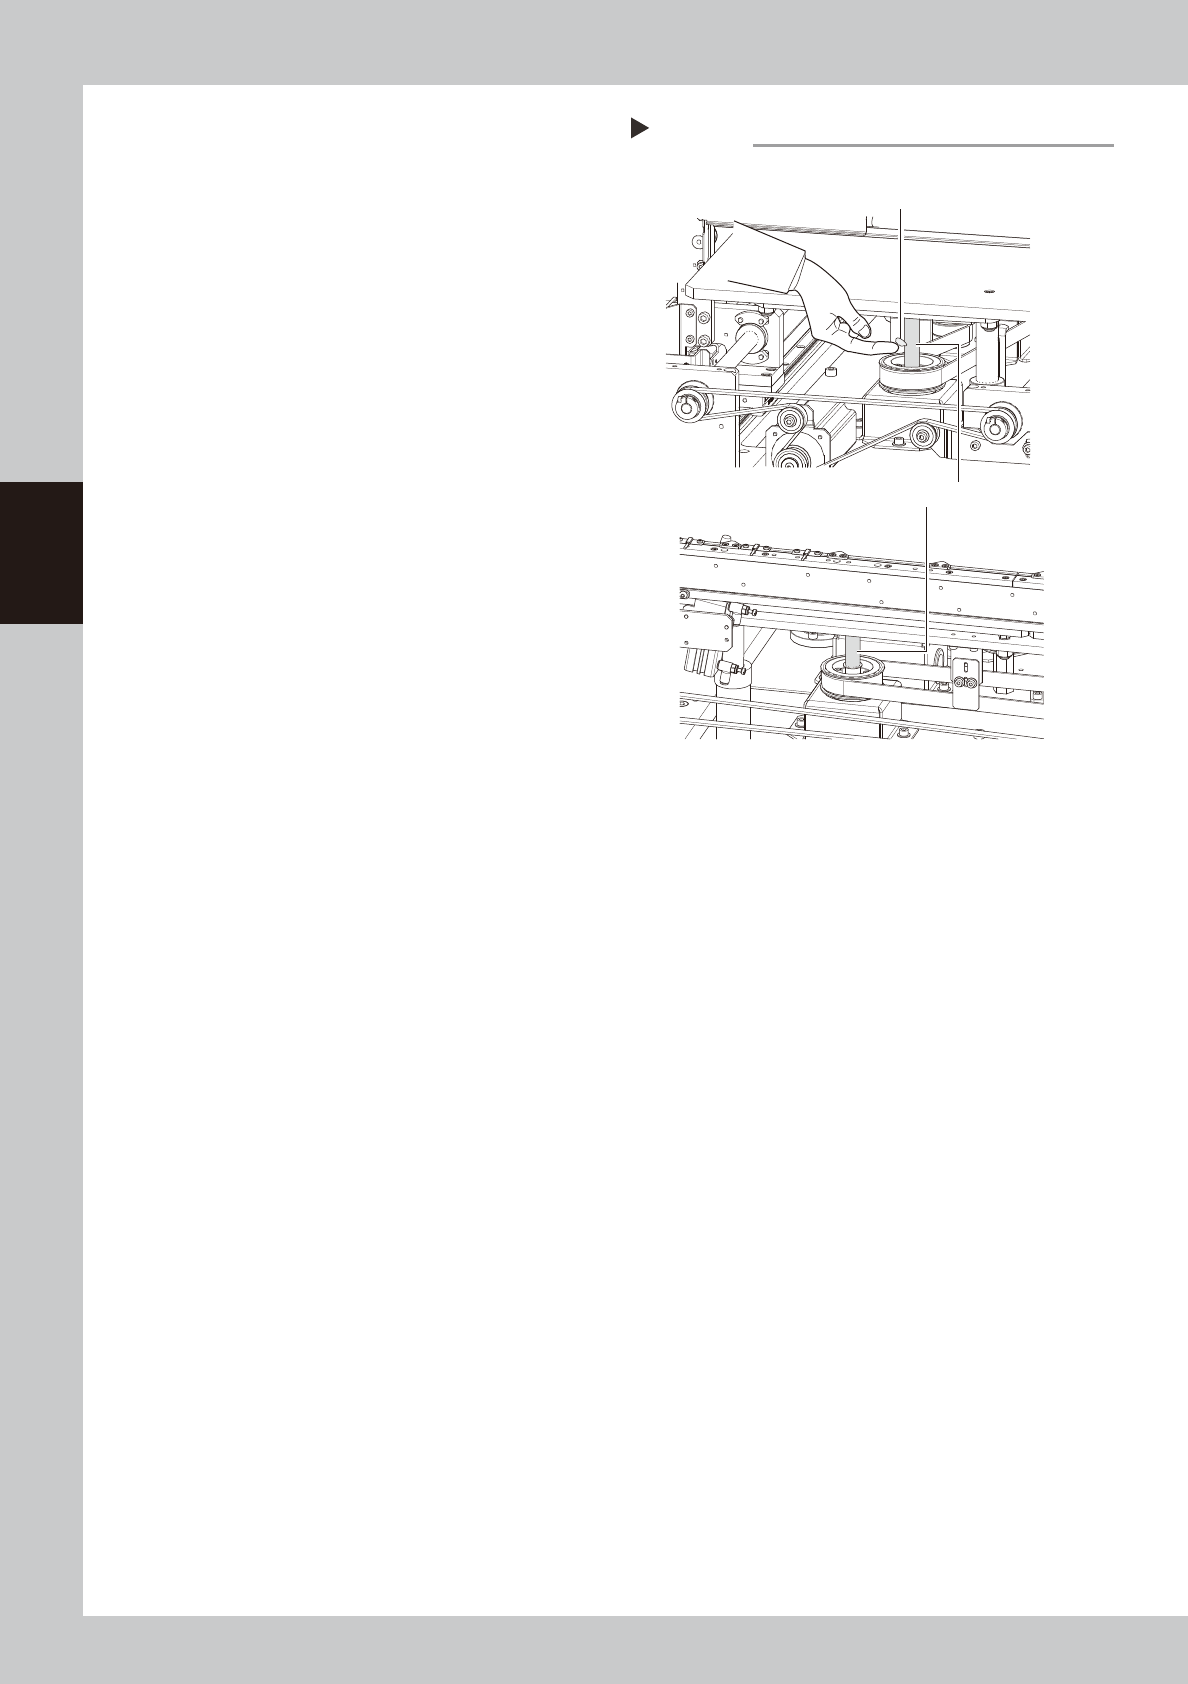
Applying the grease
Step 5
Ball screw (2 places)
Dual-stage
Dual-lane
Grease
53339-N2-00
3-31
3
Periodic maintenance items
3.8 Air intake fan filter
This machine is equipped with the air intake fan filters (left and right on the front (2 locations), left and right
on the rear (2 locations), 4 locations in total).
If the filters are not cleaned properly, the temperature inside the machine may rise due to filter clogging. Clean
the filters to prevent lowering of the machine function or shortening of the service life.
Additionally, the filter and removing procedures used for the YSM20 differ from those used for the YSM20W.
The following describes both procedures.
3.8.1 Cleaning filters (YSM20)
1
Power off the machine.
1. If the machine is carriage type, detach
the carriage.
2. Exit the software and power off the
machine.
2
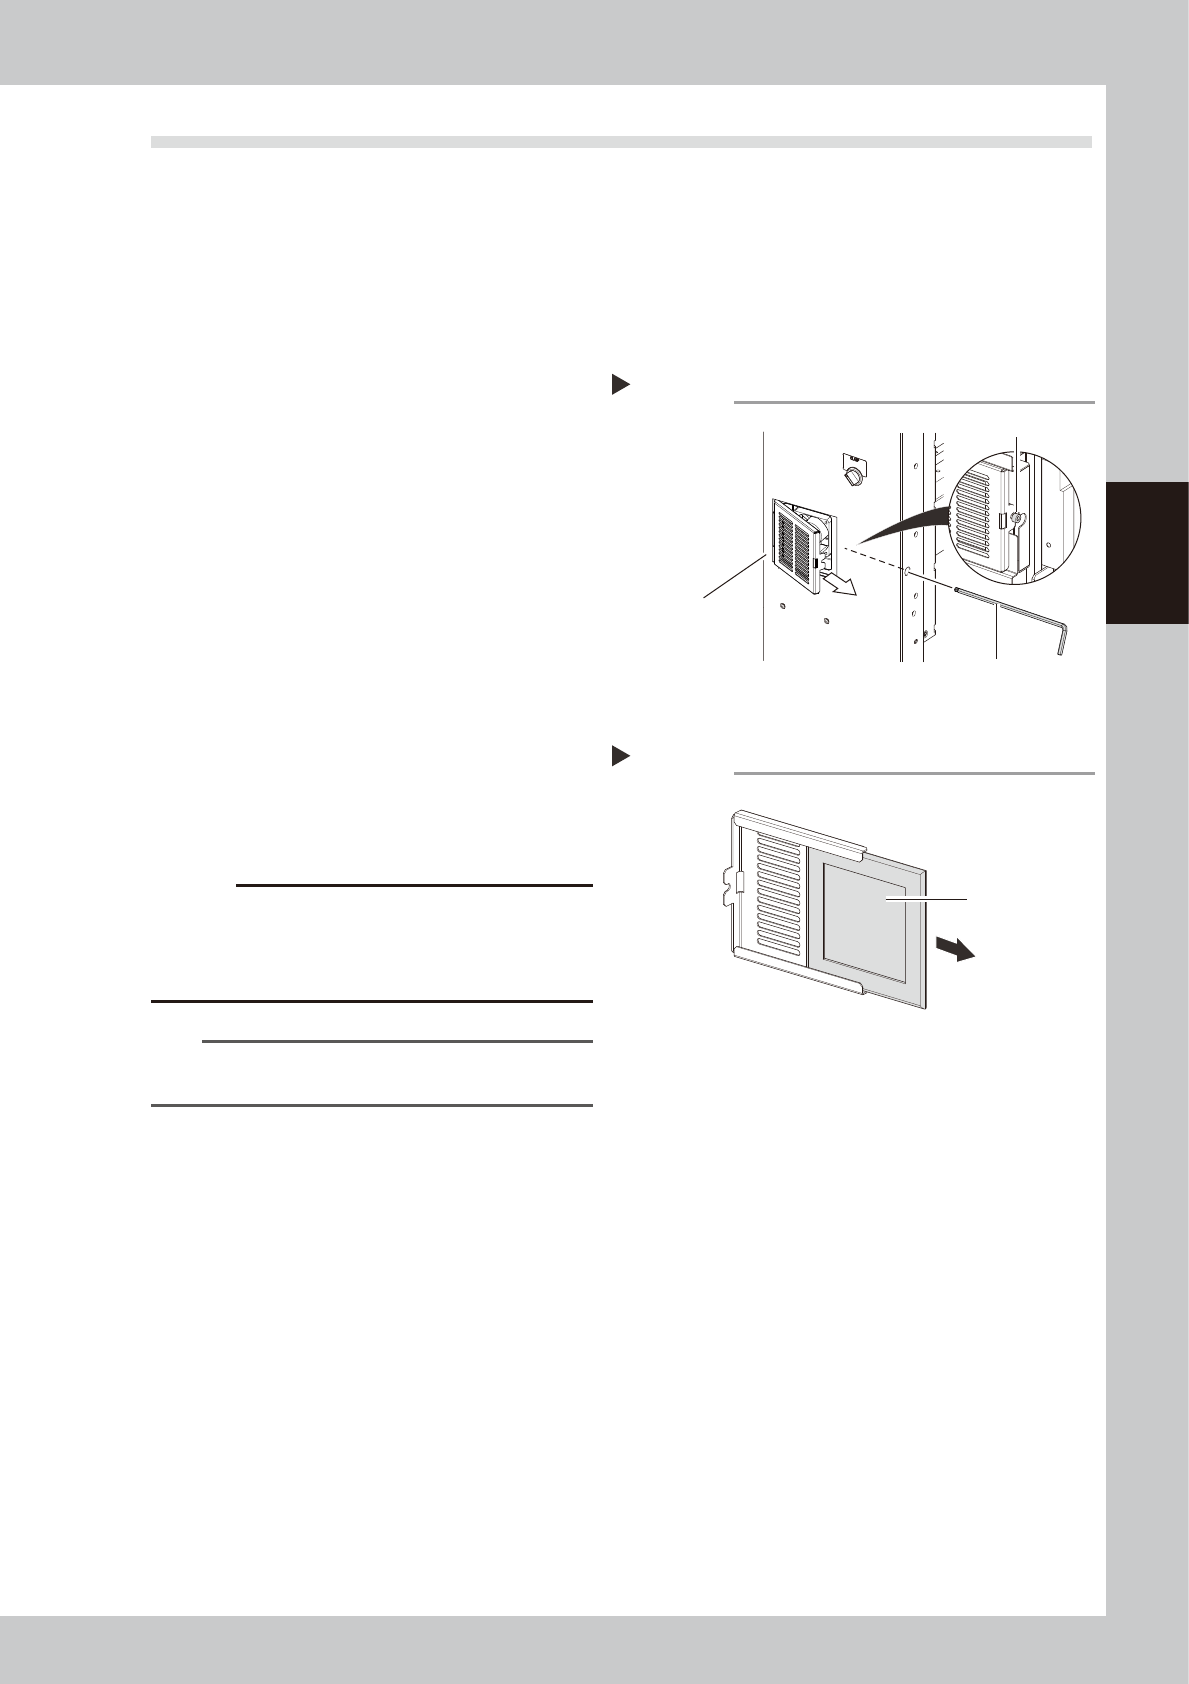
Detach the filter cover.
1. As shown in the figure on the right, use a
hex wrench to loosen the mounting bolt
of the filter cover. At this time, it is not
necessary to remove the bolt.
2. Pull out the filter cover obliquely and
forward.
3
Clean the filters.
1. Pull out the filter from the filter cover.
2. Suck both surfaces of the filter with a
vacuum cleaner or vacuum tool to
remove dust.
c
CAUTION
If the moistened filters are used, the dust combines with
moisture and causes clogging. Since it is enough to
clean the filters with a vacuum cleaner, do not wash
the filters with water.
n
NOTE
If dust cannot be removed or the filter has worn out,
replace the filter with a new one.
4
Return the filters to their original
positions.
Attach the filters and cover in the reverse
order of removal.
Removing the filter cover
Step 2
Filter cover
Mounting bolt
Hex wrench (3)
533C5-N2-10
Cleaning the filter
Step 3
Filter
533C6-N2-00

3-32
3
Periodic maintenance items
3.8.2 Cleaning filters (YSM20W)
1
Power off the machine.
1. Detach the carriage if the machine is the
carriage type.
2. Exit the software and power off the
machine.
2
Detach the filter cover.
1. As shown in the figure on the right, use a
hex wrench to loosen the mounting bolt
of the filter cover. At this time, it is not
necessary to remove the bolt.
2. Pull out the filter cover forward and
upward.
3
Clean the filters.
1. Remove the filter mounting bolts with a
wrench (7).
2. The filter locates between 2 covers.
Remove the filter and suck both surfaces
of the filter with a vacuum cleaner or a
vacuum tool to remove dust.
c
CAUTION
If the moistened filters are used, the dust combines with
moisture and causes clogging. Since it is enough to
clean the filters with a vacuum cleaner, do not wash
the filters with water.
n
NOTE
If the dust cannot be removed or the filter has worn out,
replace the filter with a new one.
4
Return the filters to their original
positions.
Attach the filter sand cover in the reverse
order of removal.
Removing the filter cover
Step 2
Mounting bolt
Filter cover Hex wrench (3)
53394-N2-00
Cleaning the filter
Step 3
Filter
Mounting bolt
53395-N2-00