Service Manual SIPLACE SmartFeeder.pdf - 第126页
7 Repairs to SmartFeeder 8 mm X / Xi 7.7 Drives 126 Service Manual SIPLACE SmartFeeder 4 - 8 mm X / Xi SIPLACE SmartFeeder 2 x 8 mm X / Xi 11/2020 ► Carefully pull the motor (12) straight off the foil disposal unit. Mak…
7 Repairs to SmartFeeder 8 mm X / Xi
7.7 Drives
Service Manual SIPLACE SmartFeeder 4 - 8 mm X / Xi SIPLACE SmartFeeder 2 x 8 mm X / Xi 11/2020 125
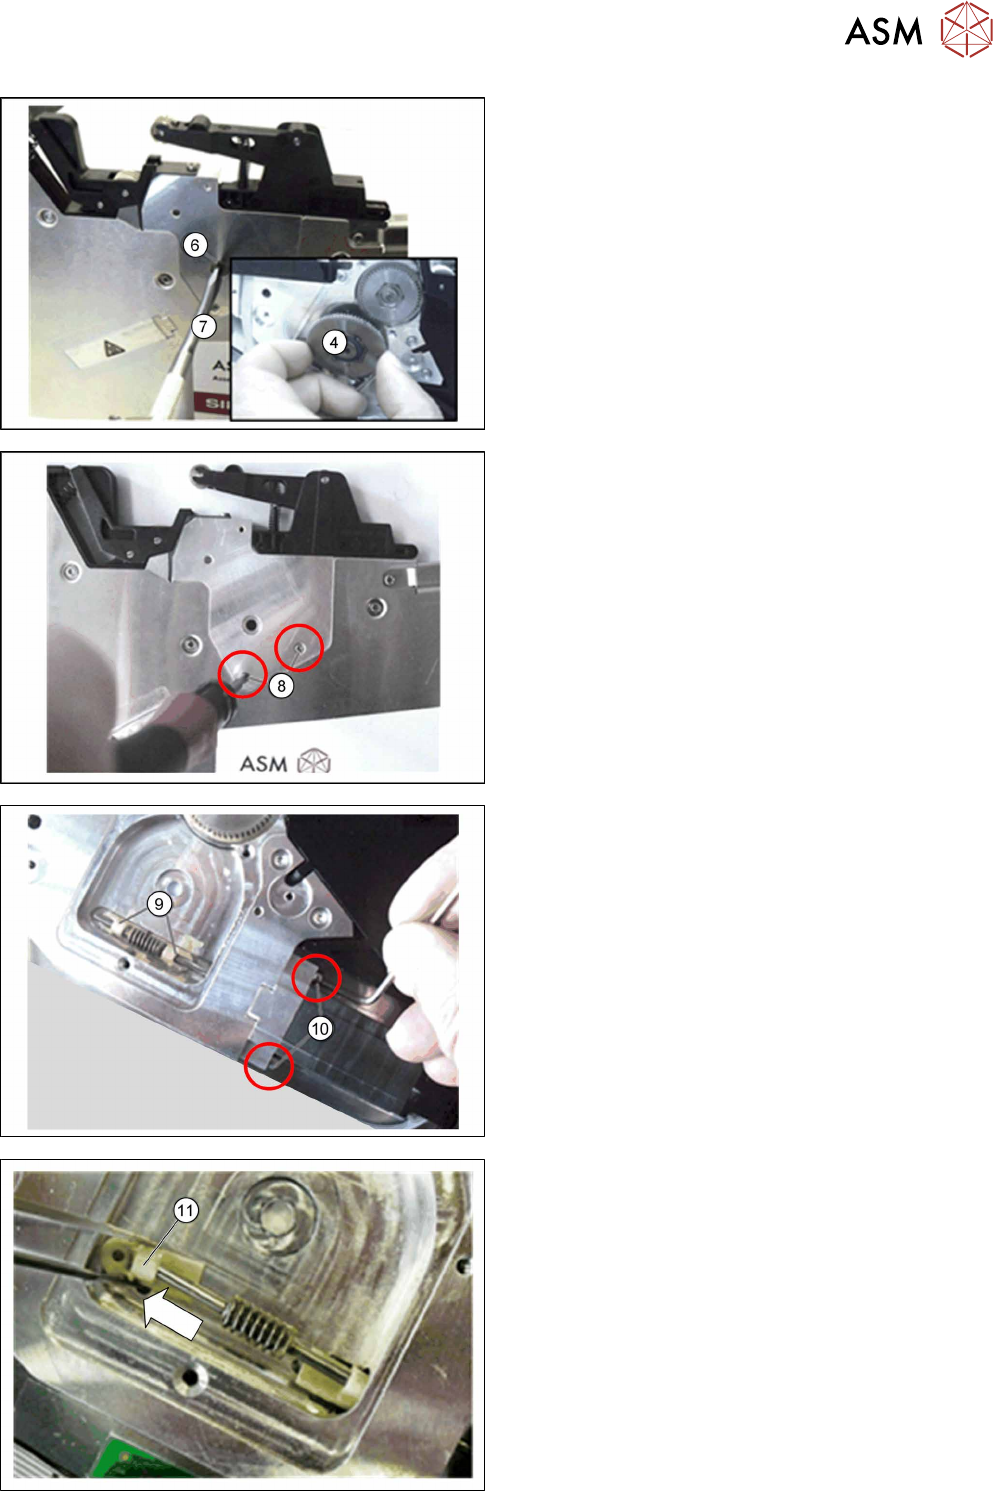
► Move the feeder module to an upright and stable
position.
On the right-hand side of the feeder module you can
access the bearing screw (6)
for the spiral gear.
► On the left-hand side of the feeder module, you
can hold the spiral gear(4)
, while on the right-
hand side, you can open the connection using a
size 3 flat-bladed screwdriver(7)
.
► Pull the spiral gear(4) off completely.
► Remove the two screws(8), with which the
ceramic bearing blocks(9)
are fixed on the other
side.
► Turn the feeder module on to its right side.
► Open the two screws(10), with which the motor
is fastened. Use a size 2 angled Allen key for
this.
► Use a pair of tweezers to pull the outer bearing
block(11)
off the motor shaft.

7 Repairs to SmartFeeder 8 mm X / Xi
7.7 Drives
126 Service Manual SIPLACE SmartFeeder 4 - 8 mm X / Xi SIPLACE SmartFeeder 2 x 8 mm X / Xi 11/2020
► Carefully pull the motor(12) straight off the foil
disposal unit.
Make sure that the motor shaft is not bent when
pulled out.
► Lift the motor(12) somewhat at the back and pull
it completely out of the foil disposal unit, together
with its worm gear and the inner bearing
block(13)
.
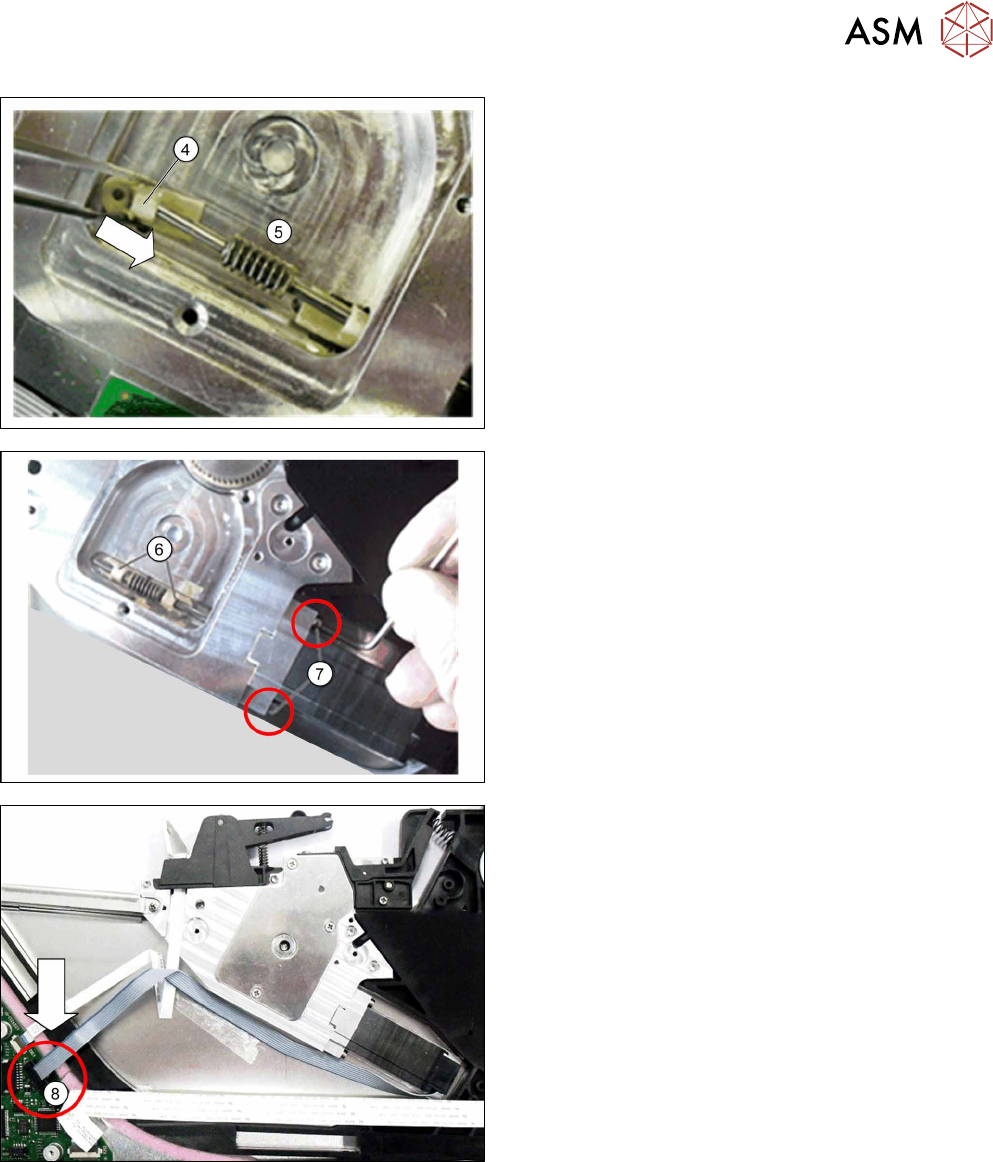
7.7.1.2 Fitting the Foil Disposal Motor
► Carefully place the feeder module with the right
side down on a stable, level and clean surface.
► Push the replacement motor(1) with worm gear
and inner bearing block(2)
carefully into the foil
stripping unit(3)
.
► When pushing it in, make sure that the motor
shaft is not bent.
7 Repairs to SmartFeeder 8 mm X / Xi
7.7 Drives
Service Manual SIPLACE SmartFeeder 4 - 8 mm X / Xi SIPLACE SmartFeeder 2 x 8 mm X / Xi 11/2020 127
► Use tweezers to carefully push the outer bearing
block(4)
onto the motor shaft.
► Apply a little grease to the worm gear(5).
Use Klübersynth GE14-151 for this.
► Push the two bearing blocks(6) into the position
shown.
► Fasten the motor with the two Allen screws
marked(7)
. Use a size 2 angled Allen key for this
(hand-tighten).
► Apply a little grease to the bearing blocks(6).
Use Klübersynth GE14-151 for this.
► Insert the motor cable connector into the connec-
tion on the control board. (8)
► Close the connection.