Service Manual SIPLACE SmartFeeder.pdf - 第165页
7 Repairs to SmartFeeder 8 mm X / Xi 7.17 Foil container Service Manual SIPLACE SmartFeeder 4 - 8 mm X / Xi SIPLACE SmartFeeder 2 x 8 mm X / Xi 11/2020 165 ► Open the connection X202 on the control board. ► Remove the fl…
7 Repairs to SmartFeeder 8 mm X / Xi
7.17 Foil container
164 Service Manual SIPLACE SmartFeeder 4 - 8 mm X / Xi SIPLACE SmartFeeder 2 x 8 mm X / Xi 11/2020
► Remove the rear sliding guide (see 7.2.1 "Re-
moving the Sliding Guide" [}100]).
► Carefully place the feeder module on its right
side.
► Remove the left side cover (see 7.3.1 "Removing
the Left Side Cover" [}102]).
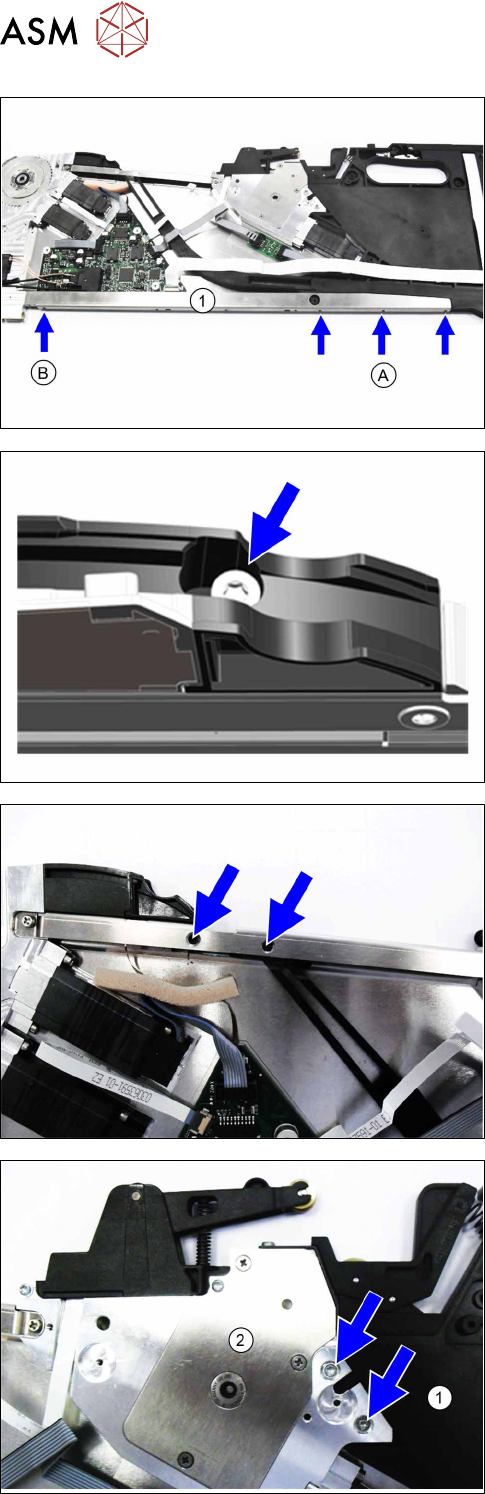
► Loosen the screw marked B (M 2.5x5) with a
Phillips screwdriver.
► Loosen the 3 screws marked A (RF 2.5x6) with a
TORX screwdriver.
ð The lower stiffener (1) also loosened will be
pulled off the foil box at a later time.
► Remove the TORX screw (RF 2.5x7.5) fastening
the filler piece for the splice sensor.
► Remove the two TORX screws (RF 2.5x7.5)
fastening the foil box to the empty tape duct.
► Remove the two TORX screw fastening the foil
box (1)
to the foil stripping unit (2).
7 Repairs to SmartFeeder 8 mm X / Xi
7.17 Foil container
Service Manual SIPLACE SmartFeeder 4 - 8 mm X / Xi SIPLACE SmartFeeder 2 x 8 mm X / Xi 11/2020 165
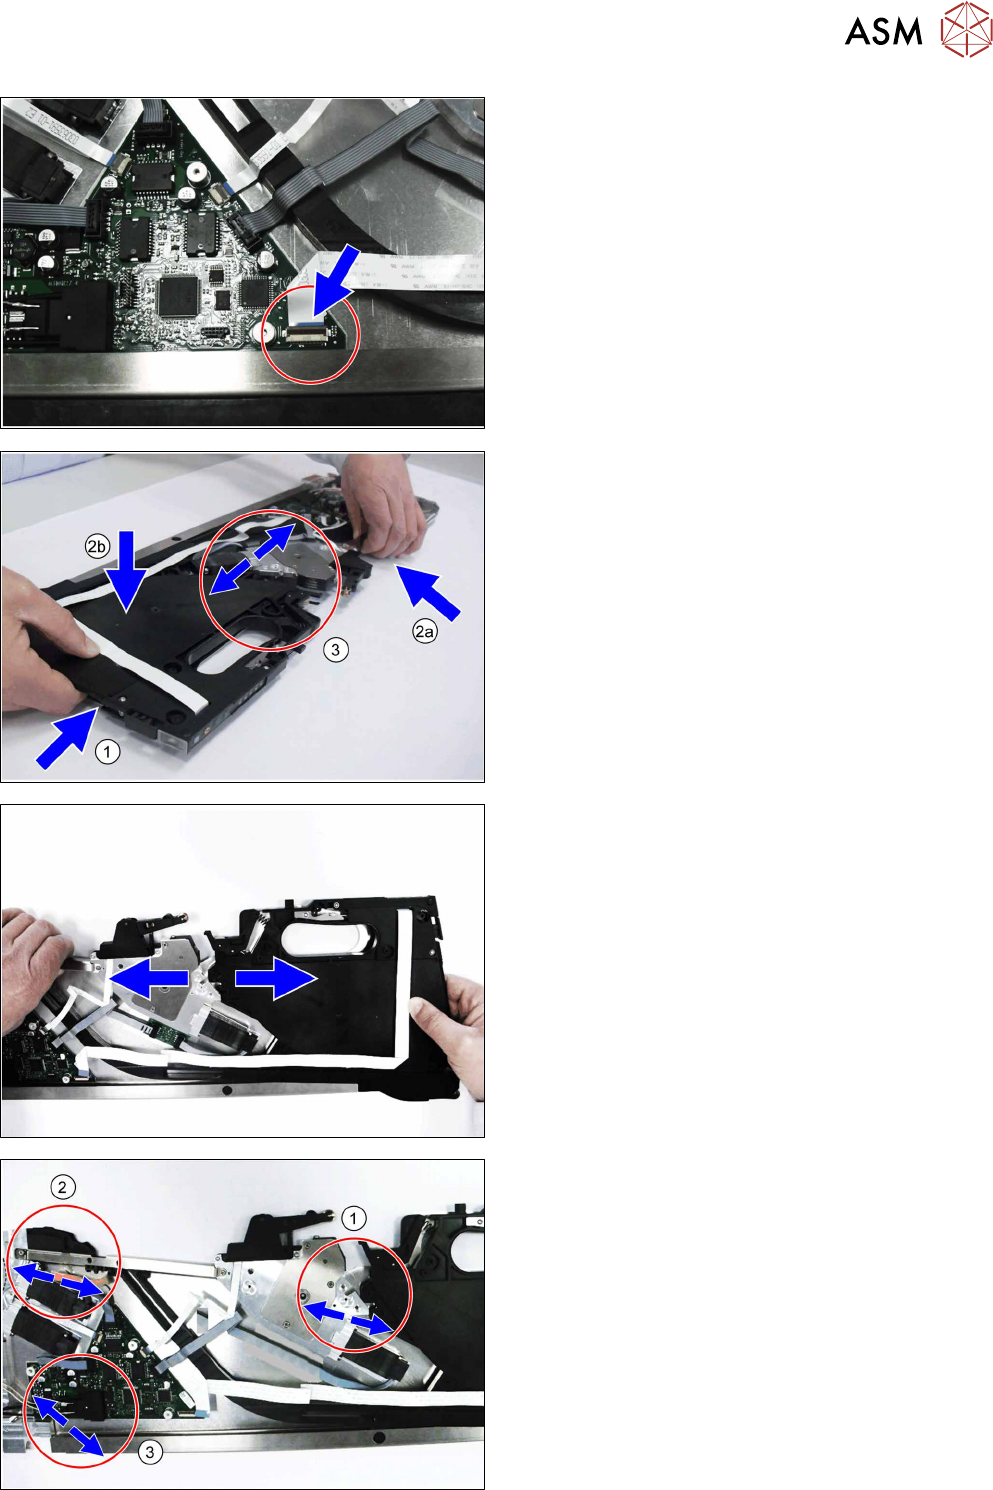
► Open the connection X202 on the control board.
► Remove the flat ribbon cable leading to the con-
trol panel.
► Reach between the foil box and the righthand
side cover with the finger of your right hand.(1)
► Use your left hand to carefully lift the top stiffener
together with the foil stripping unit.(2a)
► At the same time, press the foil box down with
the thumb of your right hand.(2b)
The connection between the foil stripping unit and the
foil box should now open.(3)
If the connection does not open:
► Move the rocker, to separate the tamp wheels of
the foil rocker from the rocker.
► Pull the foil stripping unit and the foil box carefully
apart.
► Observe the following instructions.
When pulling these apart, take care that the marked
areas as soon as the foil box has separated from the
foil stripping unit at (1)
.
► Make sure that the empty tape duct slides out of
the upper stiffener.(2)
► Make sure that the bottom stiffener is released
from the foil stripping unit.(3)
7 Repairs to SmartFeeder 8 mm X / Xi
7.17 Foil container
166 Service Manual SIPLACE SmartFeeder 4 - 8 mm X / Xi SIPLACE SmartFeeder 2 x 8 mm X / Xi 11/2020
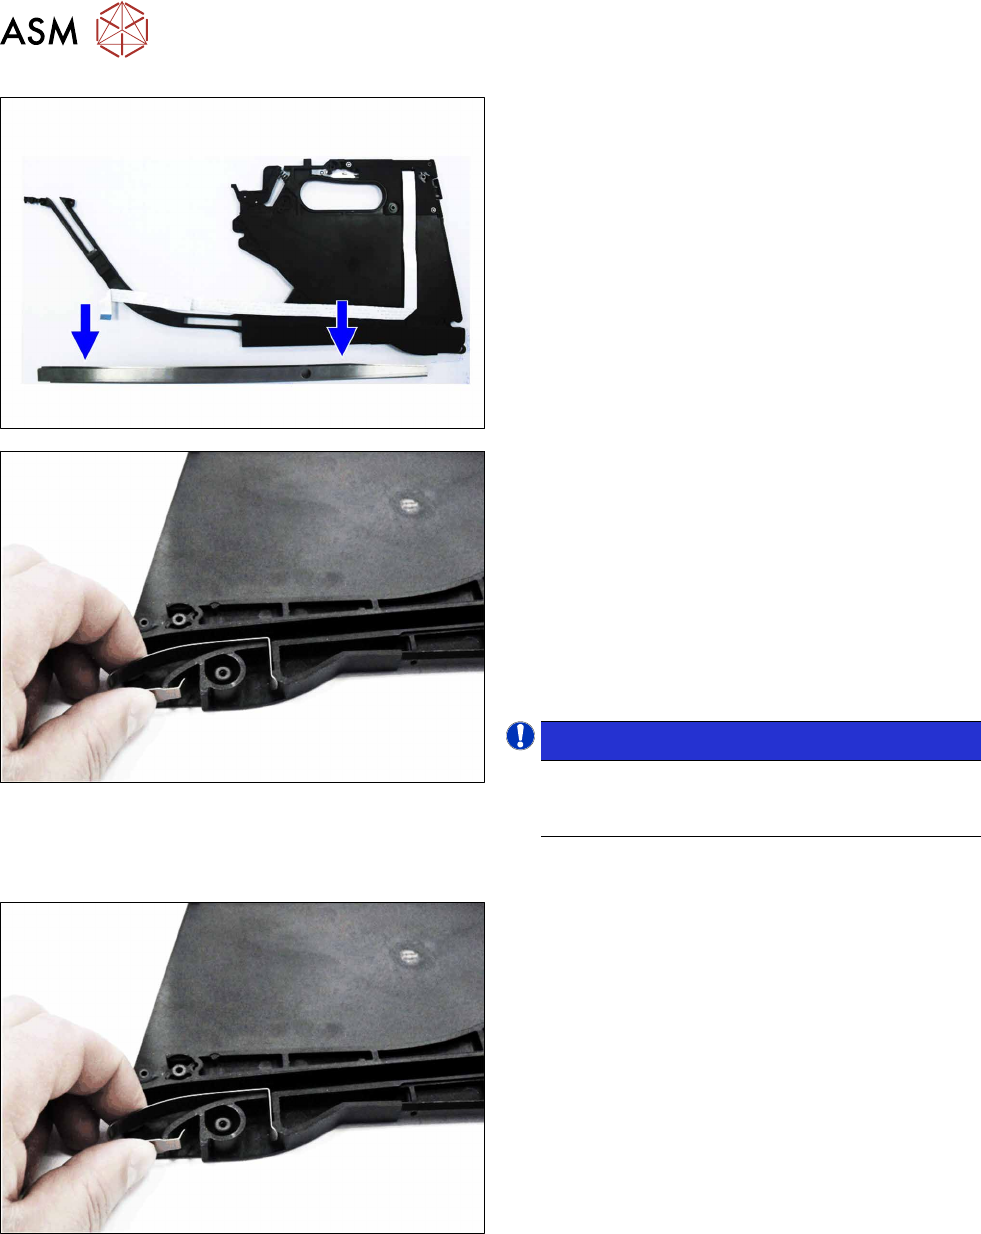
► Pull the bottom stiffener off the foil box.
► Remove the leaf spring from the righthand side of
the foil box.
► Remove the control panel from the handle (see
7.15.2.1
"Removing the Control Panel and
Board" [}152]).
► Remove the individual parts from the handle (see
7.15.3.1
"Removing individual parts from the
handle" [}155]).
► Remove the rocker (see 7.9.1.1 "Removing the
rocker assembly" [}137]).
NOTICE!
Keep the parts removed from the foil box
safe. You will need to fit these parts onto the
new foil box.
.
7.17.1.2 Fitting the foil box
► Fasten the rocker (see 7.9.1.2 "Fitting the rocker
assembly" [}137]).
► Fasten the individual parts of the handle (see
7.15.3.2
"Fitting individual parts to the
handle" [}156]).
► Fasten the control panel to the handle (see
7.15.2.2
"Fitting the Control Panel and
Board" [}153]).
► Insert the leaf spring into the righthand side of the
foil box.