00196056-0102 RI Shutterless 3x8 SL.pdf - 第38页
Replacing the Tape Duct Dismantling the Tape Duct Loosening the Flaps 38 Nachrüstanleitung / Retrofit In structions Feeder Module 3x8 mm S 0201/0402 to 7.1.4 Loosening the Flaps X Loosen the screws marked in the diagram …
Replacing the Tape Duct
Removing the Tape Duct Dismantling the Tape Duct
Nachrüstanleitung / Retrofit Instructions Feeder Module 3x8 mm S 0201/0402 to Shutterless (3X8 mm SL)
37
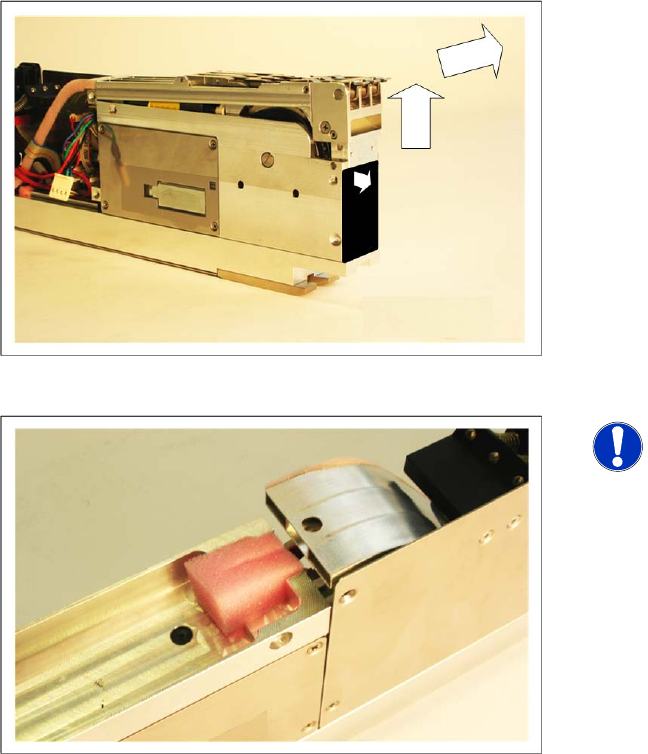
X Carefully bend the top of the protective cover
slightly forwards.
X Lift the tape duct first at the front and then tilt it
forwards and out of the feeder.
NOTE:
Take care not to lose the rubber foam
seal shown in the diagram.
You will need this seal again later on,
when you install the shutterless tape
duct.The seal prevents components
from falling down the back, into the
feeder and causing damage.
Replacing the Tape Duct
Dismantling the Tape Duct Loosening the Flaps
38 Nachrüstanleitung / Retrofit Instructions Feeder Module 3x8 mm S 0201/0402 to
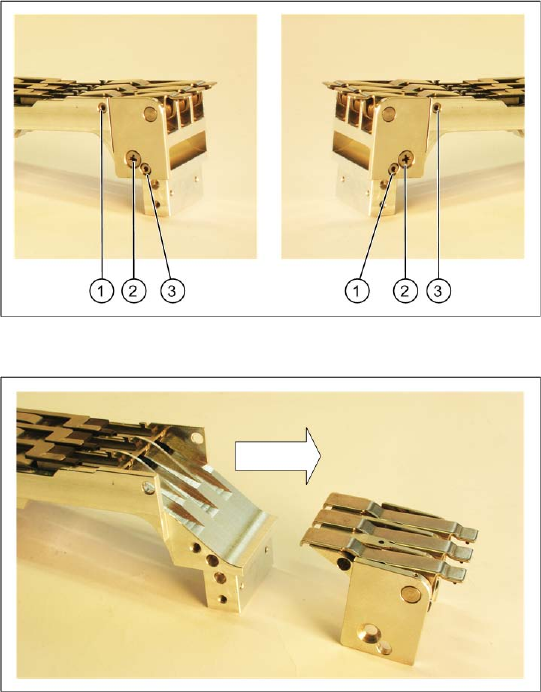
7.1.4 Loosening the Flaps
X Loosen the screws marked in the diagram (1-
3), on the left and right of the tape duct.
X Lift the flaps off towards the front.
Replacing the Tape Duct
Fixing the Flaps on the Shutterless Tape Duct Fitting the Shutterless Tape Duct
Nachrüstanleitung / Retrofit Instructions Feeder Module 3x8 mm S 0201/0402 to Shutterless (3X8 mm SL)
39
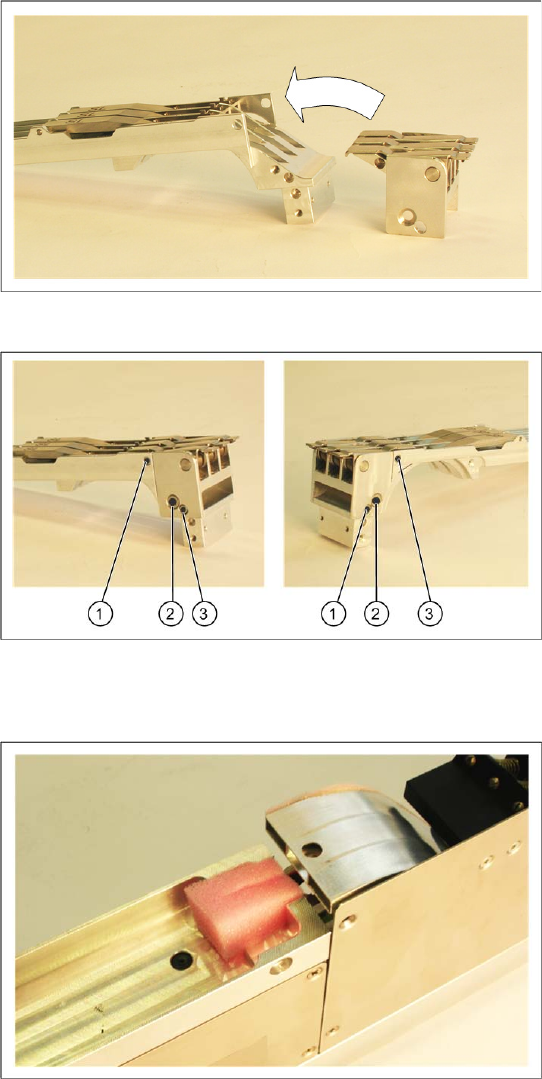
7.2 Fitting the Shutterless Tape Duct
7.2.1 Fixing the Flaps on the Shutterless Tape Duct
7.2.2 Fixing the Shutterless Tape Duct
X Push the flaps onto the shutterless tape duct,
from the front.
X Fix the flaps with the screws marked in the
diagram (1-3), on the left and right of the tape
duct.
X Make sure that the rubber foam seal is in the
position shown in the diagram.
This seal prevents components from falling down
the back and into the feeder.