NPM-D3维修手册.pdf - 第205页
NPM-D3 Service Manual 5.6 2D Inspection Head EJM6D3-MB-05SM-00( 編集中 ).DOC Page 5-77 Put the gray plate in its own case, and then store it in the dedicat ed case A. グレイ板は、 ( グレイ板用 ) ケースに収納した状態で、専用ケース A に収納する。 在将灰色板收纳到 ( 用…
NPM-D3
Service Manual
5.6 2D Inspection Head
Page 5-76 EJM6D3-MB-05SM-00(
編集中
).DOC
5.6.4 Removing the Calibration Jig for 2D Inspection
2D 検査用校正ジグ取り外し
取出用于 2D 检查的校正治具
Remove the calibration jig for 2D inspection from the nozzle changer and store it in the dedicated
case A.
ノズルチェンジャ部に取り付けられている 2D 検査用校正ジグを取り外し、専用ケース A に収納します。
取出装在吸嘴交换器部分的用于 2D 检查的校正治具,收纳到专用盒 A 内。
32.
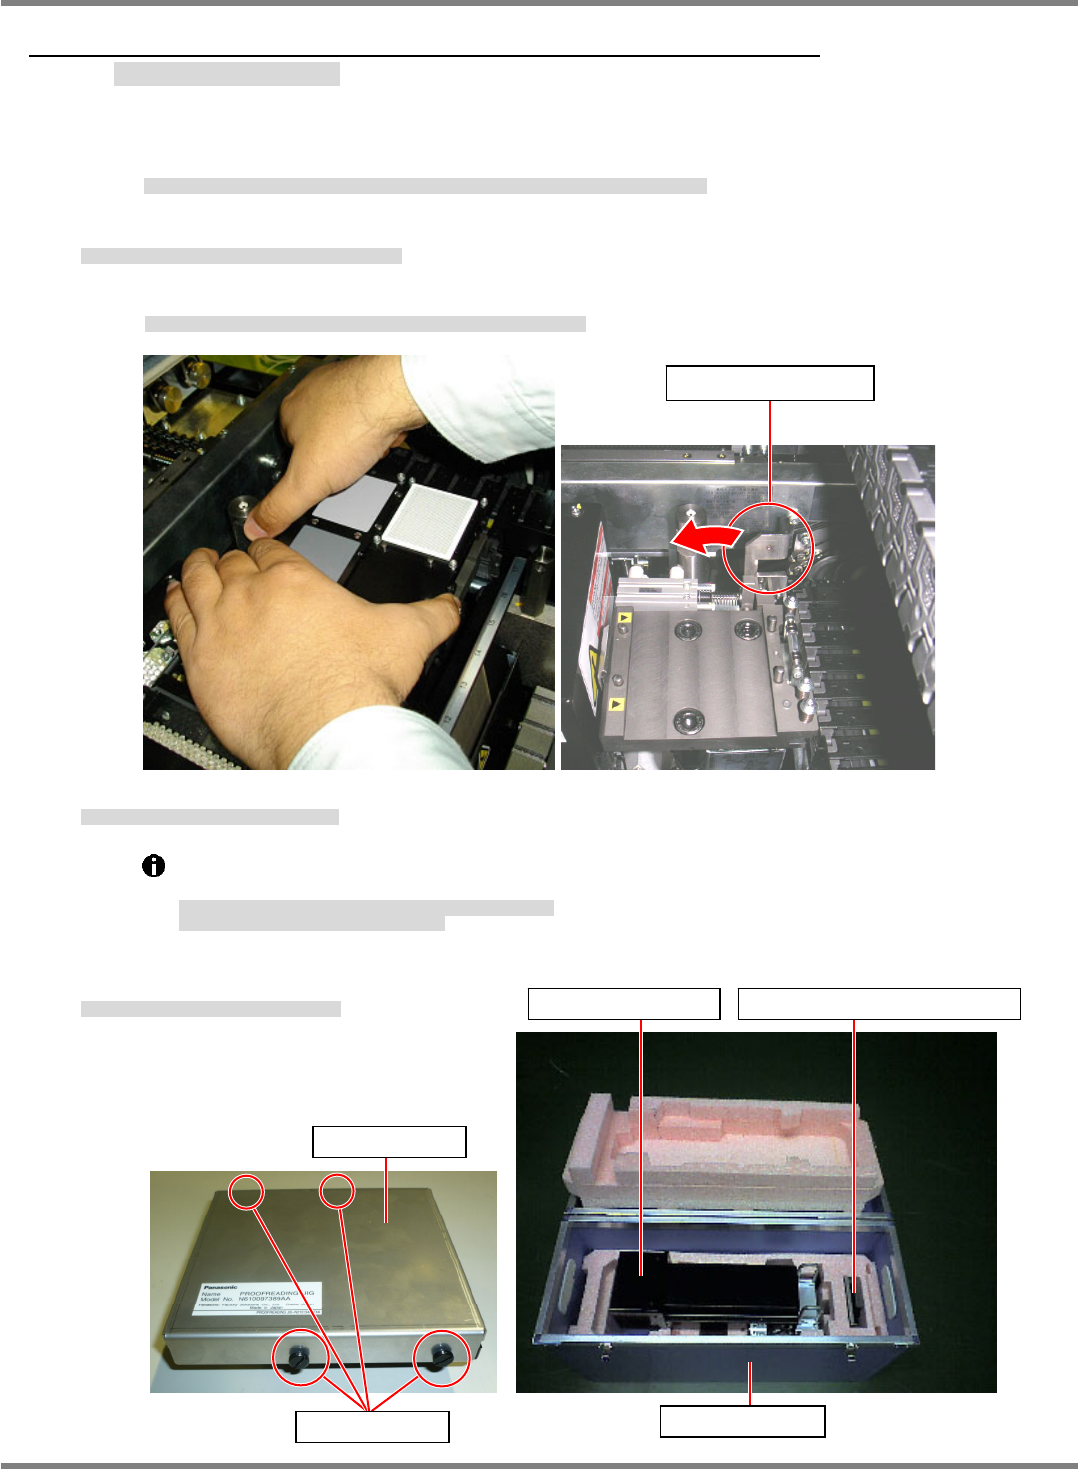
1. Remove the calibration jig for 2D inspection from the nozzle changer.
ノズルチェンジャ部からの 2D 検査用校正ジグを取り外す。
从吸嘴交换器部分拆下用于 2D 检查的校正治具。
In doing so, take care not to touch the top surface of the jig.
取り外し作業時に 2D 検査用校正ジグの上面に触れないように注意してください。
进行拆卸作业时请注意不要碰触到用于 2D 检查的校正治具的上面。
2. Set the protective cover to the jig.
2D 検査用校正ジグに保護カバーをセットする。
在用于 2D 检查的校正治具上安装保护盖。
Tighten the lock screws to secure the cover to the jig. (4 positions)
The protective cover is stored in the dedicated case A.
保護カバーを 2D 検査用ジグに固定ネジで取り付けて締める。(4 か所)
保護カバーは専用ケース A に収納されています。
用固定螺丝将保护盖装到用于 2D 检查的治具上并拧紧。(4 处)
保护盖是收纳在专用盒 A 中的。
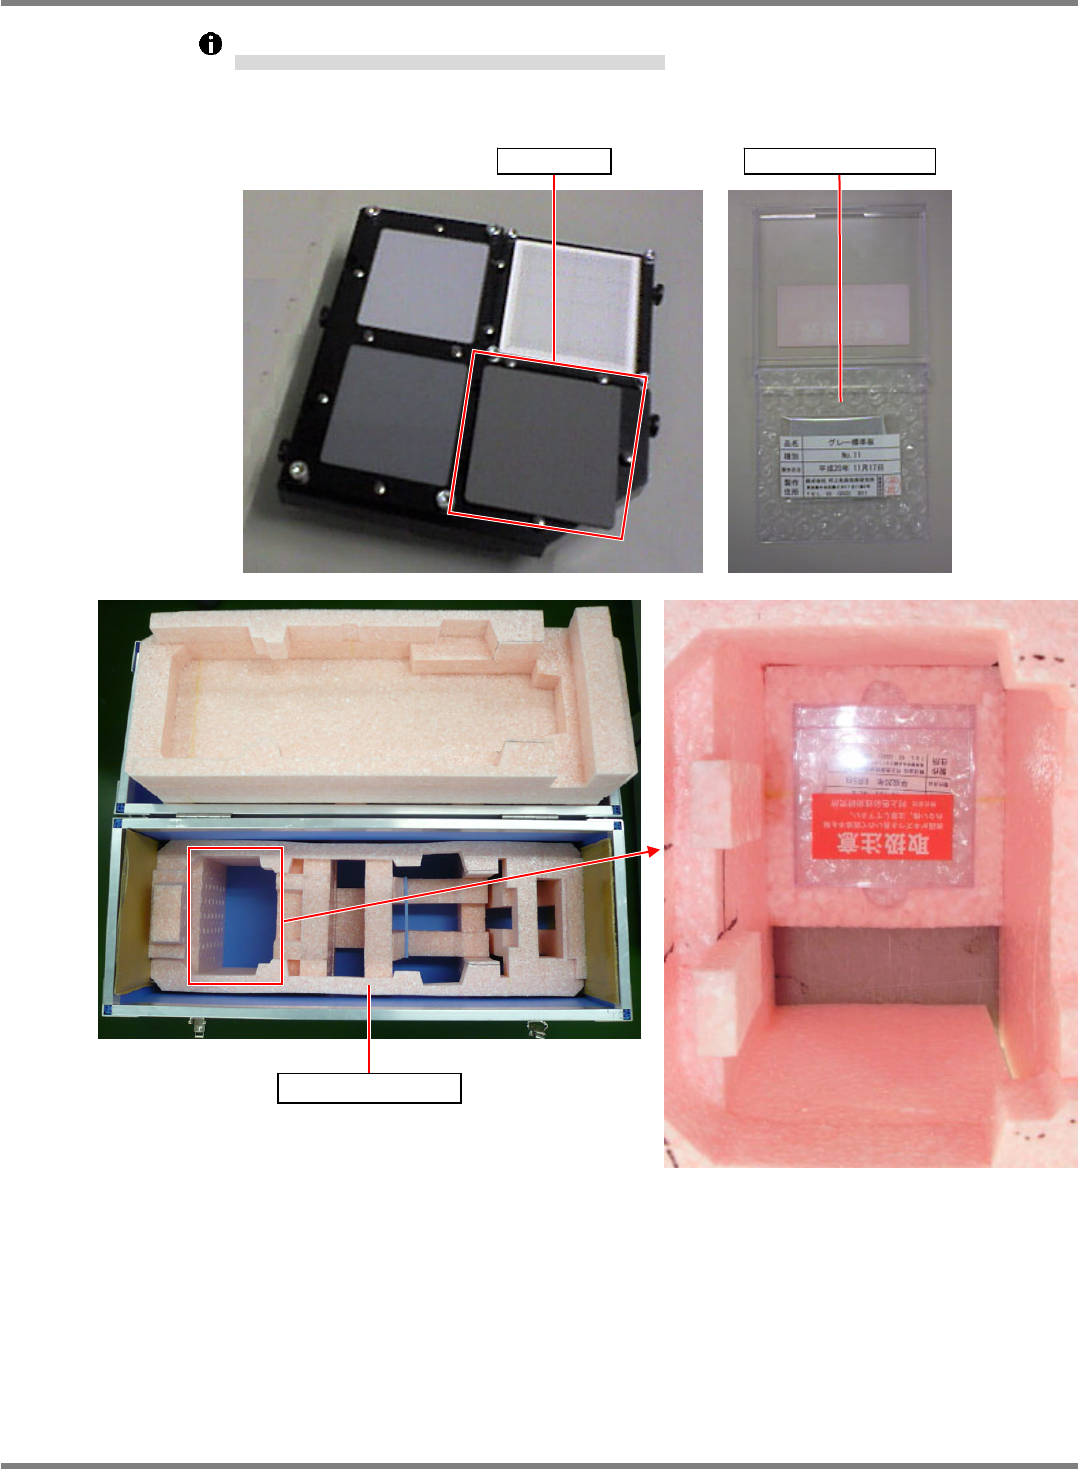
3. Store the jig in the dedicated case A.
2D 検査用校正ジグを専用ケース A に収納する。
将用于 2D 检查的校正治具收纳到专用盒 A 内。
Removal lever
2D inspection head Calibration jig for 2D inspection
Dedicated case A
Protective cover
Lock screw
NPM-D3
Service Manual
5.6 2D Inspection Head
EJM6D3-MB-05SM-00(
編集中
).DOC Page 5-77
Put the gray plate in its own case, and then store it in the dedicated case A.
グレイ板は、(グレイ板用)ケースに収納した状態で、専用ケース A に収納する。
在将灰色板收纳到(用于灰色板的)盒内的状态下,将盒收纳到专用盒 A 中。
Gray plate Case (for gray plate)
Dedicated case A
NPM-D3
Service Manual
5.6 2D Inspection Head
Page 5-78 EJM6D3-MB-05SM-00(
編集中
).DOC
5.6.5 Installing the 2D Inspection Head
2D 検査ヘッド取り付け
安装 2D 检查头
Note that there are two types of 2D inspection head: type A with a resolution of 18
m and
type B with 9
m.
2D 検査ヘッドは、分解能が 18 m (Type A)と 9m (Type B) の 2 種類あります。
2D 检查头有分辨率为 18 m (Type A)和 9m (Type B) 的 2 个种类。
Torque wrench: QL25N (TOHNICHI)
Long bit:
N510046662AA
トルクレンチ
ロングビット
扭矩扳手
长钻头
33.
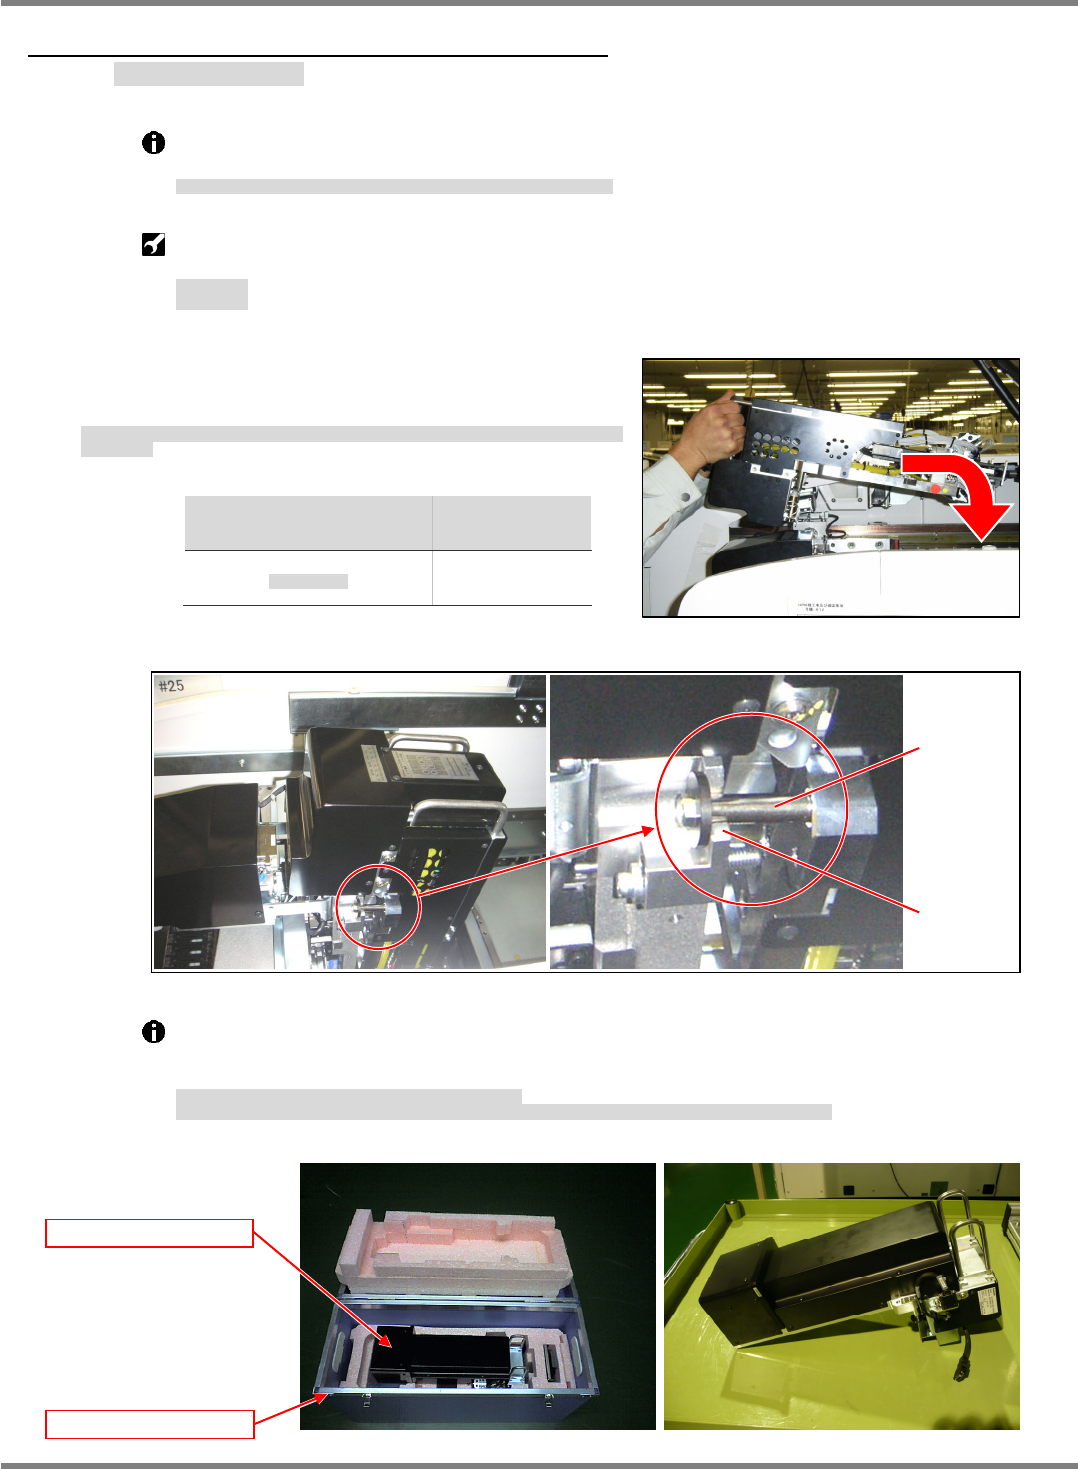
1. Hold the handles of the 2D inspection unit and engage the
spacer of the unit with the U-groove at the X-axis head
mounting position. (Figs. 1 and 2)
2D 検査ヘッドユニット上部の取手を持ち、X 軸ヘッド取り付け部の U 溝部にヘッドユニットのスペー
サを乗せる。
拿住 2D 检查头装置上部的把手,在 X 轴头安装部的 U 形槽处放上头装置的衬垫。
Head
ヘッド種類
头种类
Weight
重量
重量
2D inspection
2D
検査ヘッド
2D
检查头
5.7 k
g
Take out the 2D inspection head unit from the dedicated case A. (Fig. 3)
When setting the unit aside temporarily, place it on a flat surface with the drawer connector
facing down. (Fig. 4)
2D 検査ヘッドユニットは、専用ケース A から取り出す。(Fig. 3)
2D 検査ヘッドユニットを仮置きする場合は、平らな所にドロアコネクタが下になるようにして、置いてください。(Fig. 4)
将 2D 检查头装置从专用盒 A 中取出。(Fig. 3)
要暂时放置 2D 检查头装置时,请在平整的地方将抽屉式连接器朝下放置。(Fig. 4)
Fig. 1
Fig. 3
Dedicated case A
2D inspection head
Fig. 4
Fig. 2
U-groove
Spacer