NPM-D3维修手册.pdf - 第57页
NPM-D3 SERVICE MANUAL 4.2 XY Drive Axes EJM6D3-MB-04SM-02.DOC Page 4-19 6. Detach the cableveyor. (Fig. 4, Fig 5) ケーブルベアを外します。 (Fig. 4, Fig. 5) 卸下电缆支架。 (Fig. 4, Fig. 5) 7. Wrap new cable ties around the cable a nchor pla…

NPM-D3
SERVICE MANUAL
4.2 XY Drive Axes
Page 4-18 EJM6D3-MB-04SM-02.DOC
Y-axis Cableveyor Replacement
Y 軸ケーブルベアの交換
Y 轴电缆支架的交换
5.
1. Turn OFF the power and air.
電源・エアーを OFF にします。
将电源和空气置于 OFF。
2. Detach the side cover. (Fig. 1)
側面のカバーを外します。(Fig. 1)
拆下侧面的盖。(Fig. 1)
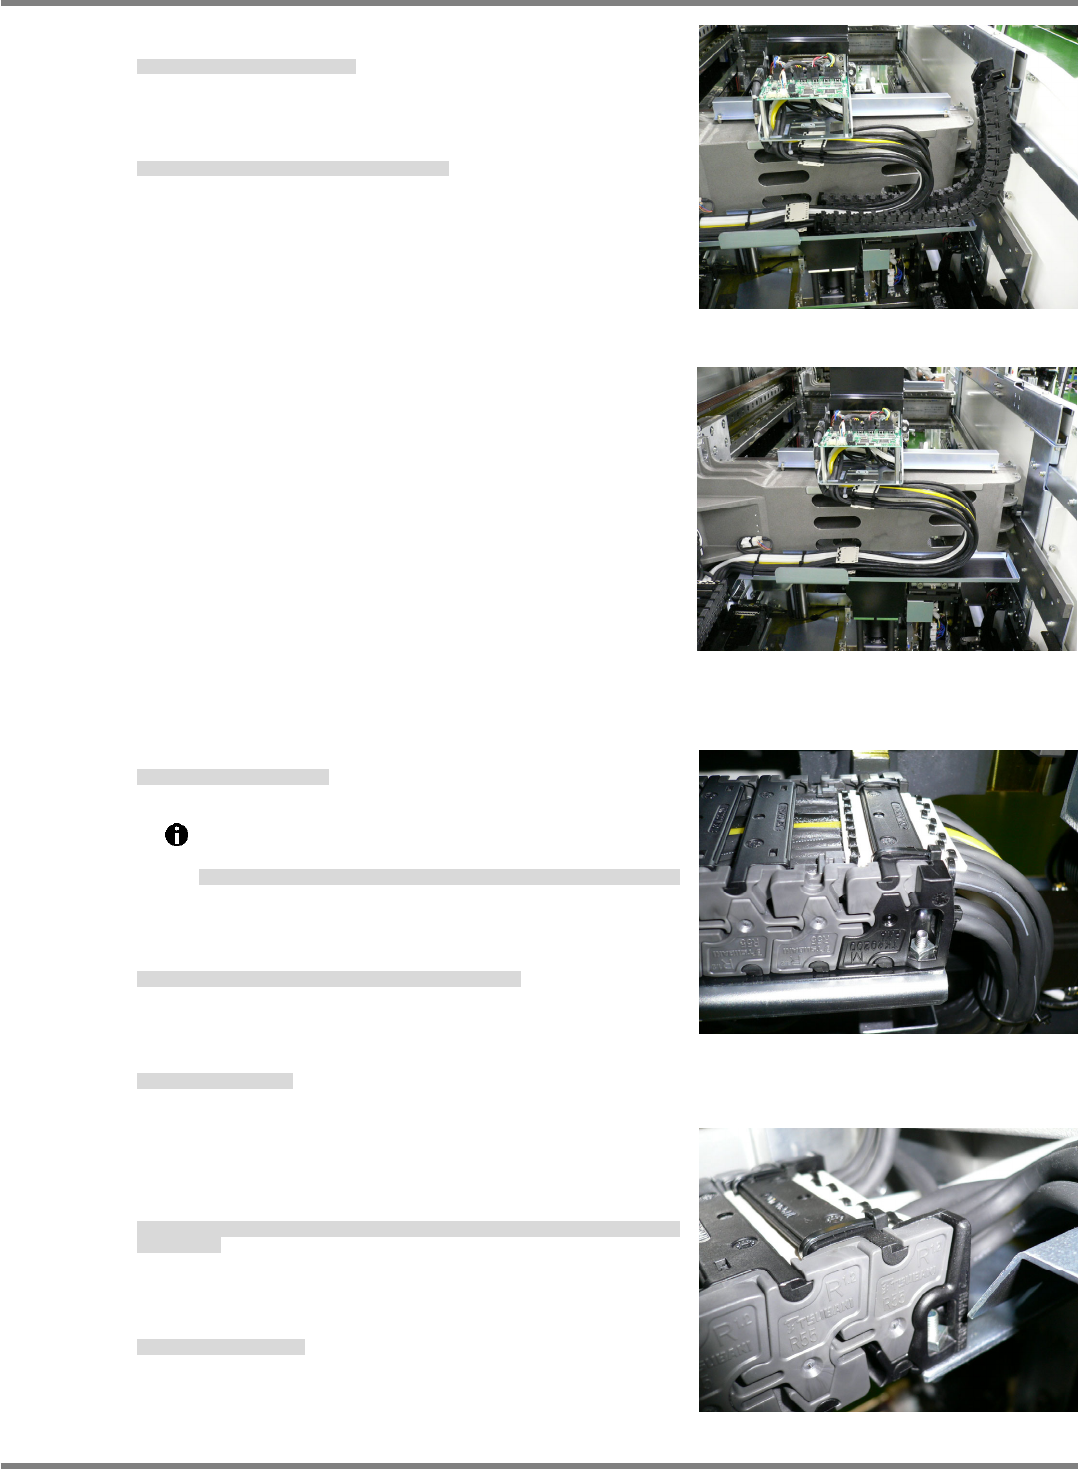
3. Detach all inside cableveyor covers. (Fig. 2)
Cut the cable ties that lock the inside cableveyor covers to the
cable anchor plate, and detach the inside cableveyor covers.
(Fig. 3)
ケーブルベアの内側の蓋を全て外します。(Fig. 2)
ケーブルベア内側蓋とケーブル固定板を止めている
インシュロックを切り、ケーブルベアの内側蓋を外します。(Fig. 3)
拆下电缆支架内侧的全部盖。(Fig. 2)
切断固定电缆支架内侧盖和电缆固定板的捆束带,拆下电缆支架内侧的盖。(Fig. 3)
4. Remove the bolts that lock down the cableveyor.
ケーブルベアの固定ボルトを外します。
卸下电缆支架的固定螺栓。
5. Cut the cable ties that lock the outside cableveyor covers and
cable anchor plate together.
ケーブルベア外側蓋とケーブル固定板を止めている
インシュロックを切ります。
切断固定电缆支架外侧盖和电缆固定板的捆束带。
(Fig. 1)
(Fig. 2)
(Fig. 3)
NPM-D3
SERVICE MANUAL
4.2 XY Drive Axes
EJM6D3-MB-04SM-02.DOC Page 4-19
6. Detach the cableveyor. (Fig. 4, Fig 5)
ケーブルベアを外します。(Fig. 4, Fig. 5)
卸下电缆支架。(Fig. 4, Fig. 5)
7. Wrap new cable ties around the cable anchor plate.
ケーブル固定板に新しいインシュロックをセットします。
在电缆固定板上设置新的捆束带。
8. Set a new cableveyor.
新しいケーブルベアセットします。
设置新的电缆支架。
Note that the cableveyor ends differ in installation
configuration. (Figs. 6 and 7)
ケーブルベア両端形状は、取り付け側により異なるので注意してください。
(Fig. 6, Fig. 7)
电缆支架两端的形状,由于安装侧有所不同,敬请注意。
(Fig. 6, Fig. 7)
9. Lock the cableveyor outside covers and the cable anchor
plate together with the cable ties.
ケーブルベア外側蓋とケーブル固定板をインシュロックで固定します。
用捆束带固定电缆支架外侧盖和电缆固定板。
10. Anchor the cableveyor.
ケーブルベアを固定します。
将电缆支架固定住。
11. Attach the inside covers to both ends of the cableveyor, lock
to the cable anchor plate using the cable ties and attach the
remaining covers.
ケーブルベア両端の内側蓋を取り付け、ケーブル固定板とインシュロックで固定し、残りの蓋を全て
取り付けます。
安装电缆支架两端的内侧盖,将其用捆束带和电缆固定板固定住后,安装剩下的全部盖。
12. Attach the side cover to the head.
側面のカバーを取り付けます。
安装侧面的盖。
Fig. 6
Chassis anchor side
Fig. 7
Beam anchor side
Fig. 4
Fig. 5
NPM-D3
SERVICE MANUAL
4.2 XY Drive Axes
Page 4-20 EJM6D3-MB-04SM-02.DOC
4.2.5 Linear Motor Replacement
リニアモータ交換
线性电机的交换
Unit No.
N610052923AA
N610052924AA
Safety
Process
4.2.5 Linear Motor Replacement
リニアモータ交換
线性电机的交换
4.2.1 Linear Scale Adjustment
リニアスケールの調整
线性刻度的调整
4.2.2 Origin Adjustment
原点調整
原点调整
X-axis Linear Motor Replacement
X 軸リニアモータ交換
X 轴线性电机的交换
6.
1. Turn OFF the power and air.
電源・エアーを OFF にします。
将电源和空气置于 OFF。
2. Detach the head.
ヘッドを外します。
卸下头。
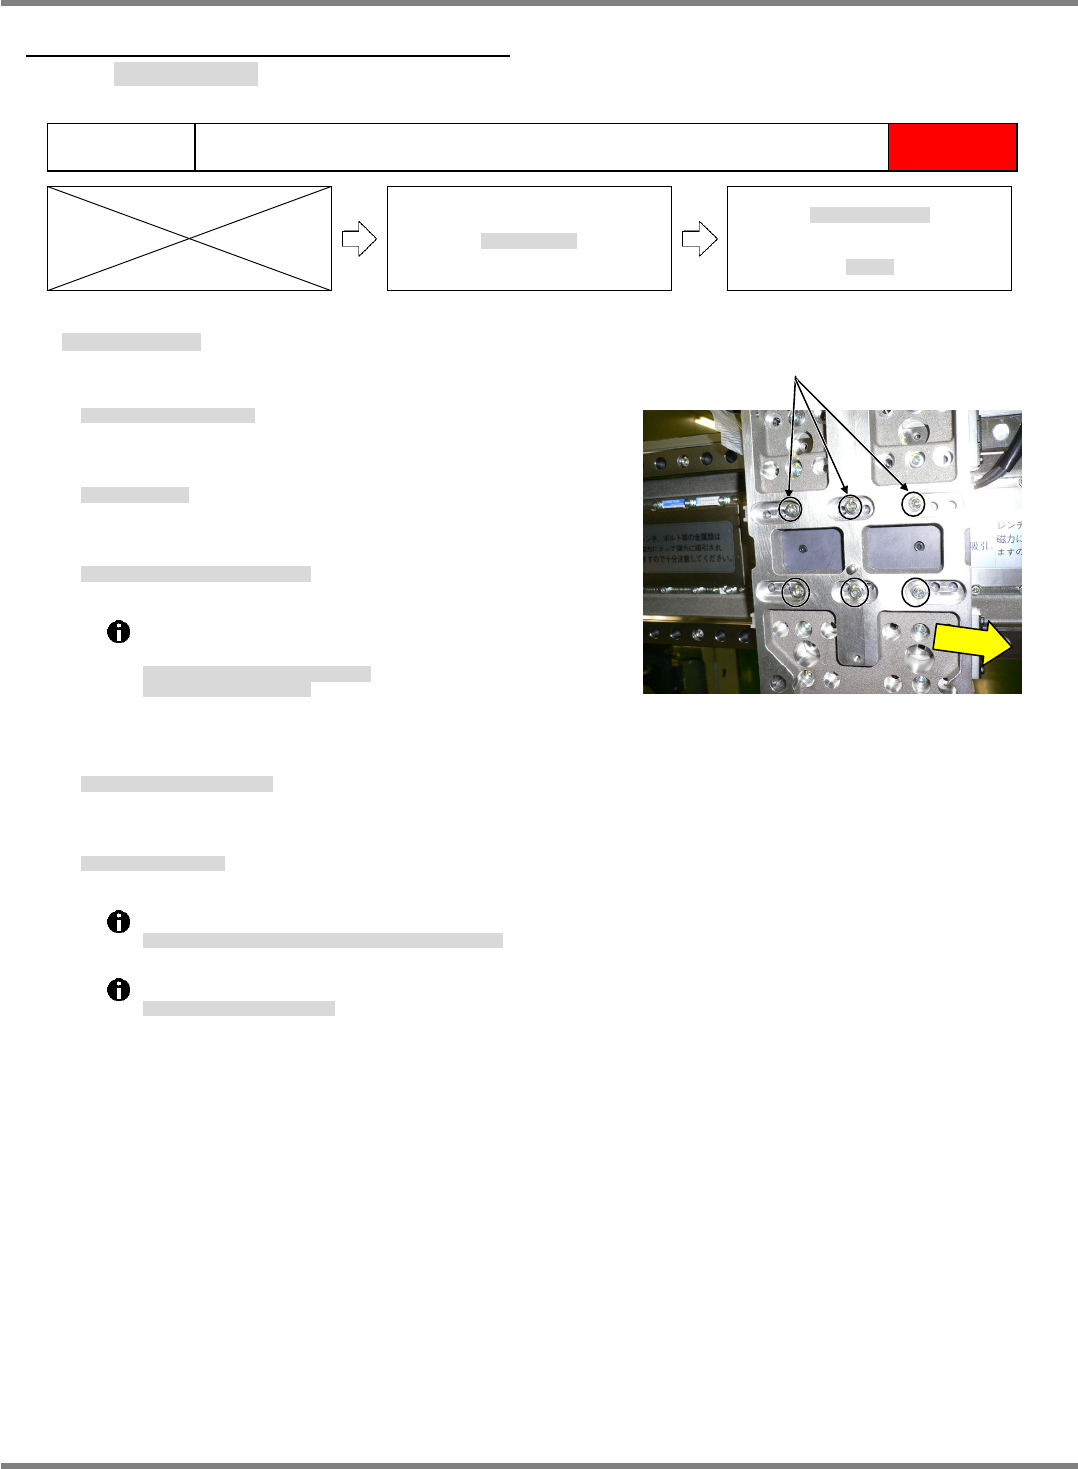
3. Detach the linear motor stators. (Fig. 1)
リニアモータの固定子を外します。(Fig. 1)
卸下线性电机的固定子。(Fig. 1)
Handle the stators with due care.
Use the stator cover.
固定子の取り扱いには充分注意すること。
固定子カバーを使用すること。
对固定子的使用处理要充分注意。
要使用固定子盖。
4. Detach the linear motor movers.
リニアモータの可動子を外します。
拆下线性电机的可动子。
5. Attach the mover.
可動子を取り付けします。
安装可动子。
Insert a 1 mm thickness gauge at the lower part.
取り付け下部に
1 mm
のシクネスゲージをはさんで、取り付ける。
在安装的下部夹入
1 mm
的间隙规后进行安装。
Be careful not to tilt it.
傾かないように注意してください。
请注意不要倾斜。
Fig. 1
Bolt