AG900+ and AG900+S Applicators Customer Product Manual.pdf - 第27页
AG − 900+ and AG900+S Applicators 23 2009 Nordson Corporation Part 1098464A AG900+/ Modules a. See Figure 9. Loosen jam nut (3) on piston shaft and back nut up until against piston shaft shoulder (4). 2 1 3 4 Figure 9:…
AG−900+ and AG900+S Applicators
22
Part 1098464A
2009 Nordson Corporation
Disassembly (contd)
4. Remove the existing nozzle from the AG900+/AG900+S module by removing the 4
socket head screws (1) from the nozzle flange (6) (the nozzle will remain attached to the
flange).
5. Remove (unscrew) old nozzle (7) from nozzle flange(6).
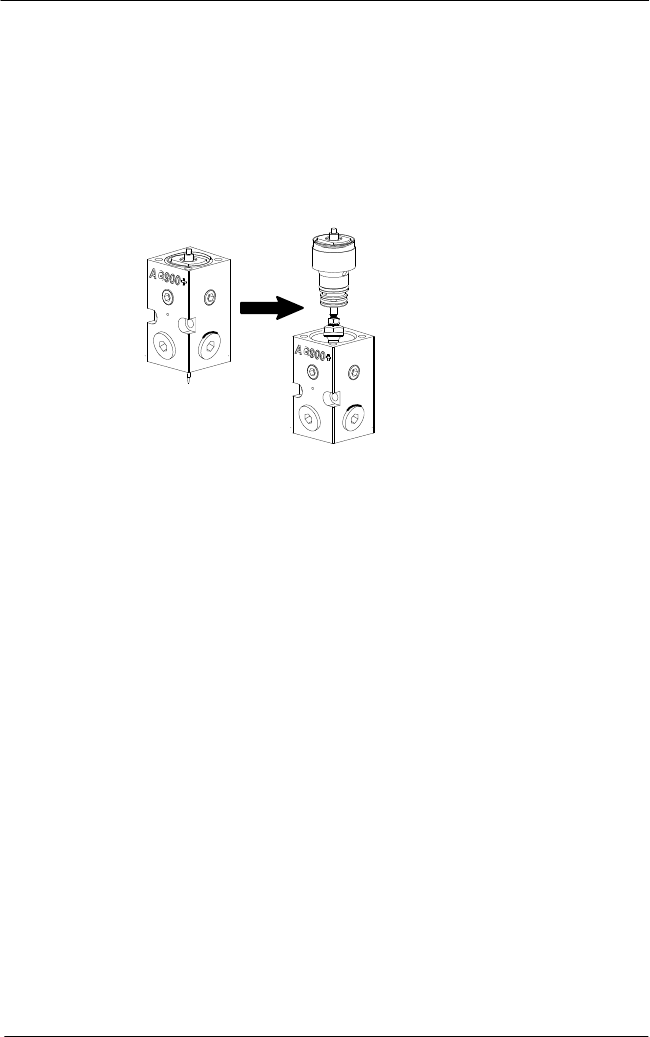
6. Push the piston/cartridge assembly and needle assembly (located inside of applicator
module body) out of the top of the module by pressing tip of needle assembly against a
soft surface (i.e. piece of wood or wood work surface).
Module
Body
Piston/Cartridge
Assembly with
Needle Assembly
Figure 8: Removing Piston/Cartridge and Needle Assembly from Module Body
7. Remove large o-ring (9) from top of piston/cartridge assembly.
AG−900+ and AG900+S Applicators
23
2009 Nordson Corporation
Part 1098464A
AG900+/ Modules
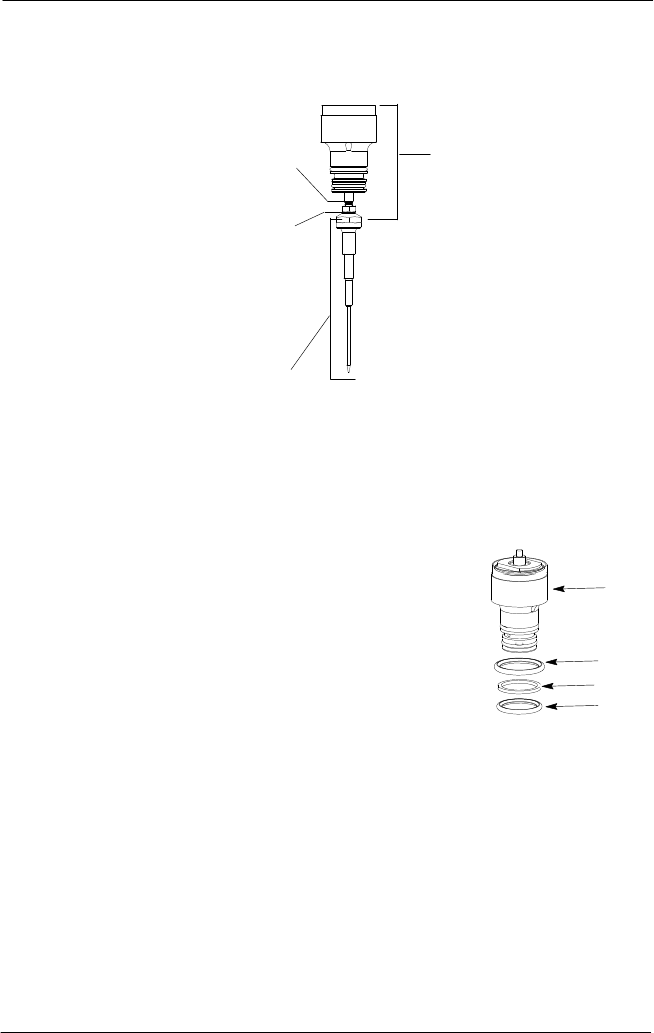
a. See Figure 9. Loosen jam nut (3) on piston shaft and back nut up until against piston
shaft shoulder (4).
2
1
3
4
Figure 9: Piston/Cartridge Assembly and Needle Assembly
1. Piston/cartridge assembly
2. Needle assembly
3. Jam nut
4. Piston shaft shoulder
b. Unscrew old needle assembly from the piston/cartridge assembly.
NOTE: If piston assembly spins − put wrench on
wrench flats on top of piston.
c. See Figure 10. Remove o-rings and back-up ring from
piston/cartridge assembly.
Figure 10: Piston/Cartridge
Assembly and Needle
Assembly
1. Piston/Cartridge Assembly
2. Larger o-ring
3. Back-up ring
4. o-ring
1
2
4
3
AG−900+ and AG900+S Applicators
24
Part 1098464A
2009 Nordson Corporation
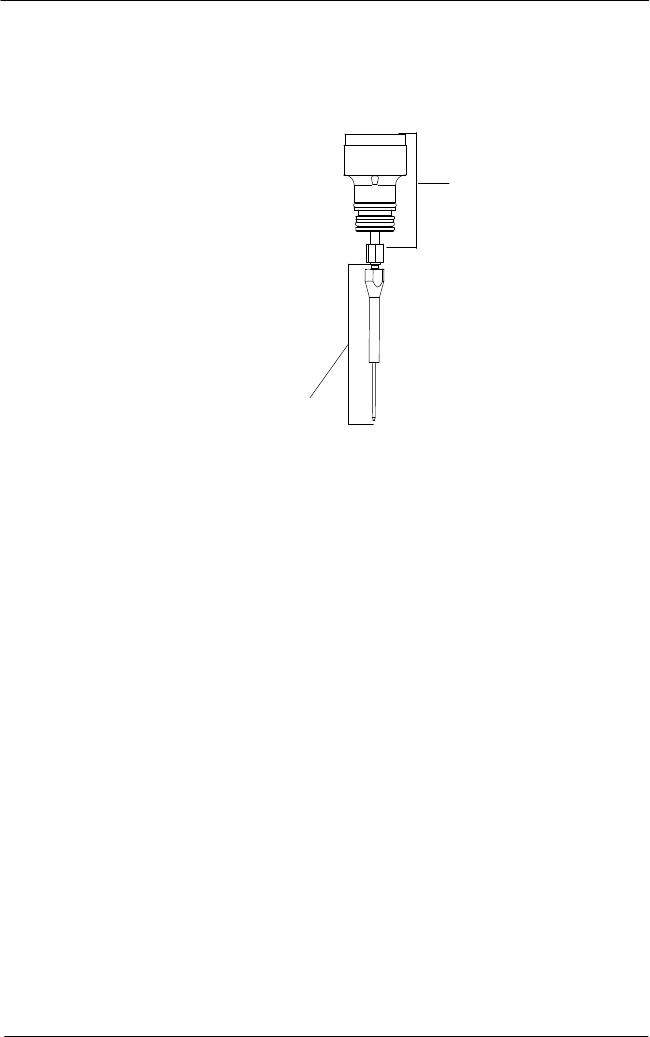
AG900+S Modules
a. See Figure 11.Using two
5
/
16
in. open wrenches, loosen the needle from the cartridge
rod.
2
1
Figure 11: Piston/Cartridge Assembly and Needle Assembly
1. Piston/cartridge assembly 2. Needle assembly
b. See Figure 10. Remove o-rings and back-up ring from piston/cartridge assembly.