TRS Advanced WB Intel Issue 02.pdf - 第26页
TRS Advanced Maintenance 26 Issue 2, Nov 14 NOTES:
Issue 2, Nov 14
TRS Advanced Maintenance
25
Replacement:
8. Place a loose spring (212100) over each of the partial interlock assemblies. Insert the
assembly and spring into the empty bore. Confirm that the cap and pin slide freely in
their respective bores.
9. Push in the caps and confirm the springs push them back out again.
10. Hold in the caps. Push in the pins and confirm the springs push them back out again.
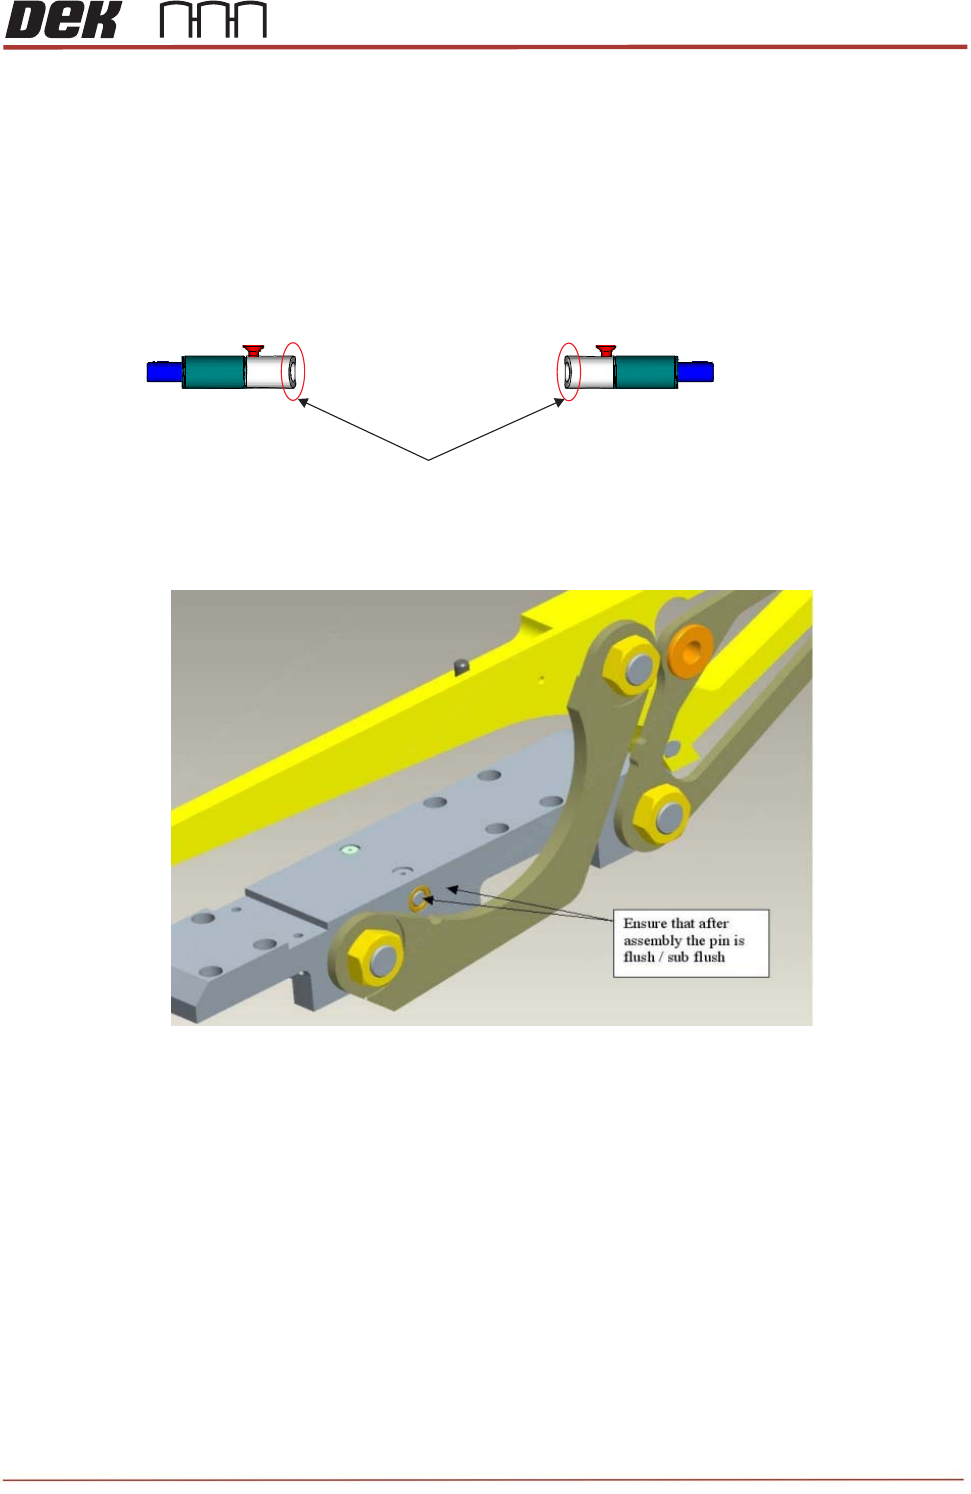
11. Orient the caps so that the chamfered edge is nearest the front of the machine.
12. Check that after assembly the pin is flush with the edge of sliding body.
13. Secure the caps with the two small countersunk screws (212408). Apply a small
amount of Pink Loctite 222 (113275) and allow some time to dry.
14. Confirm free motion of the caps and springs with the screws in place.
15. Re-mount the front access panel, close cover and initialize machine.
16. Drive TRA to over rails position and load a TRP.
17. Drive to pressure and vision height.
18. Home the TRP and observe its motion. If the TRP lifts unevenly or to more than
10mm, there may be an outstanding problem with the interlock function. Re-check for
free movement of the caps and pins.
Chamfered edge is facing the front of the machine

TRS Advanced Maintenance
26
Issue 2, Nov 14
NOTES:
Issue 2, Nov 14
TRS Advanced Maintenance
27
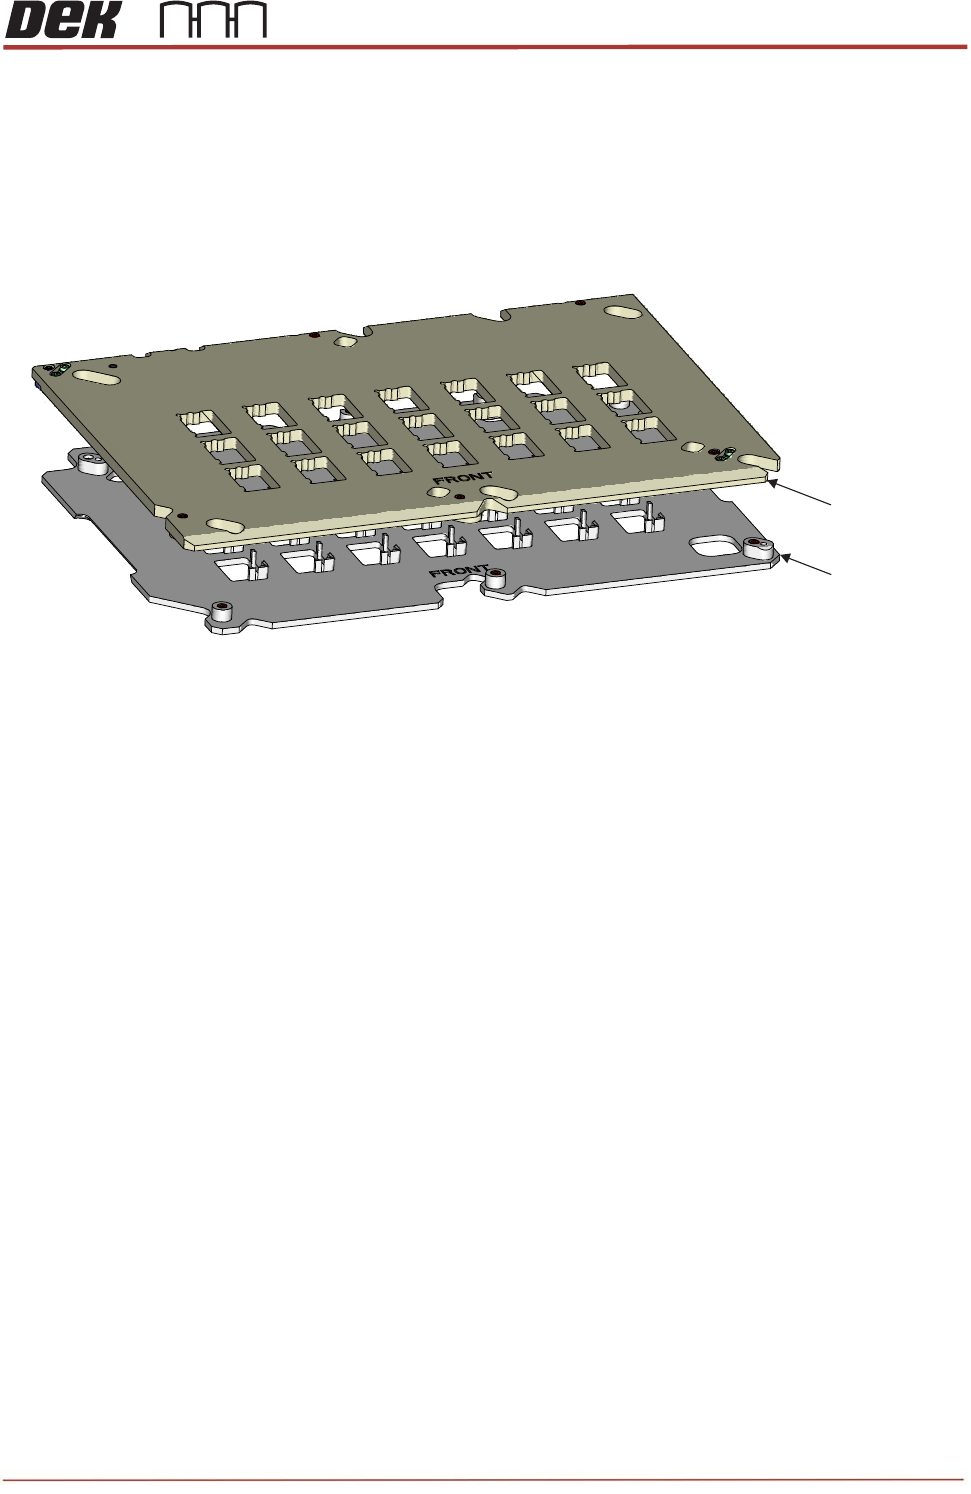
Objective12: Remove and Replace Active Surround Plates
The Active Surround assembly is a set of two plates which are mounted to the bearings on
the Rail Cap. The Active Surround is operated by a pneumatic actuator to move the plates
45
o
to each other, this action will reference the substrates to one corner and will also hold the
substrates in position during printing.
Remove / Refit the Active Surround to the Rail Cap
Ensure the Pneumatic Actuator operates the Active Surround
Ensure the Active Surround holds substrates across all apertures.
Question:
What torque values are the Active Surround mounting screws tightened to..?__________
NOTES:
Upper Plate
Lower Plate
View on Active Surround Plate Assembly