TR7600 SIII_Operation_en_v_2_0_2.pdf - 第16页
Test Research, Inc. 8 TR7600 SIII Se ries User G uide – Op eration 2.4 Start to Ins pec t 1) Click on “In spection Mode” button to proceed. Figure 12: Inspection Mode 2) Press “Start” button to initiate the inspection. F…
Test Research, Inc.
TR7600 SIII Series User Guide – Operation 7
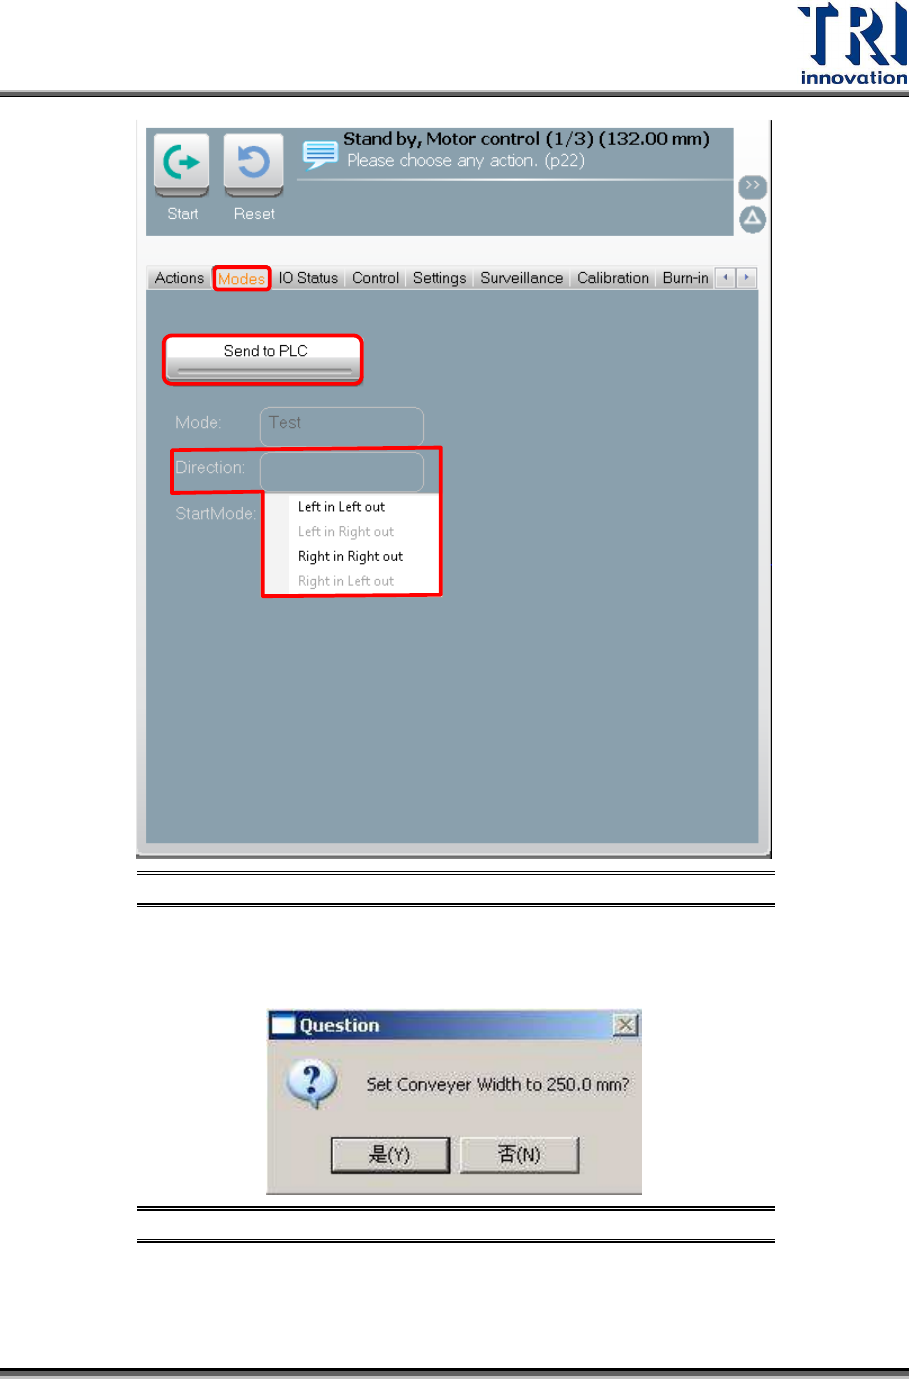
Figure 10: VPLC Board In/Out Direction
6) Check the board direction if it matches with program setup. (If the Automatic Width
window pops up, press “Yes” so the conveyor will move to the width according to the
setup.)
Figure 11: Set Conveyor Width
Test Research, Inc.
8 TR7600 SIII Series User Guide – Operation
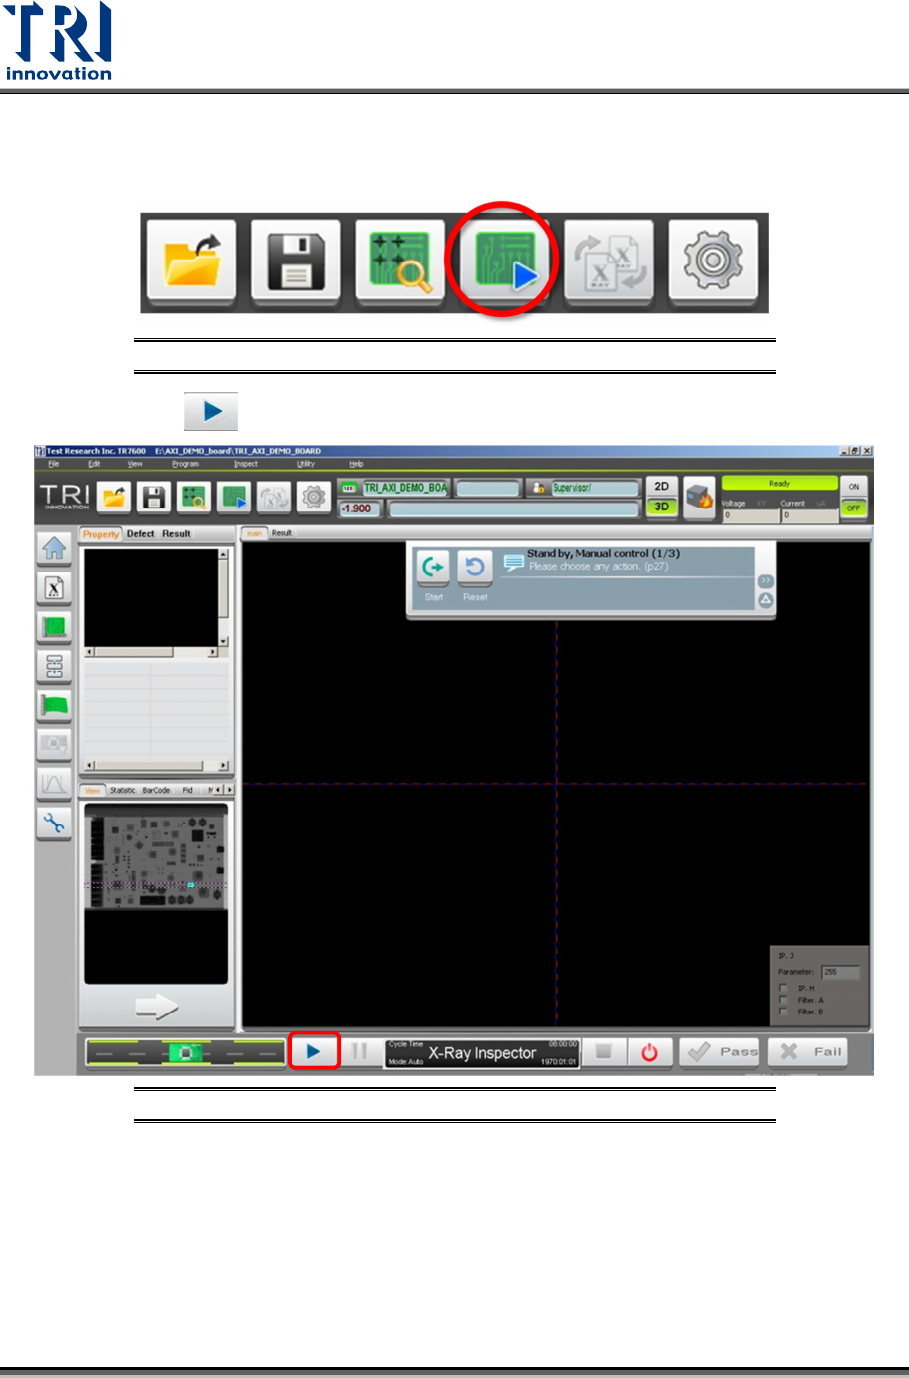
2.4 Start to Inspect
1) Click on “Inspection Mode” button to proceed.
Figure 12: Inspection Mode
2) Press “Start” button to initiate the inspection.
Figure 13: “Start” Button
Test Research, Inc.
TR7600 SIII Series User Guide – Operation 9
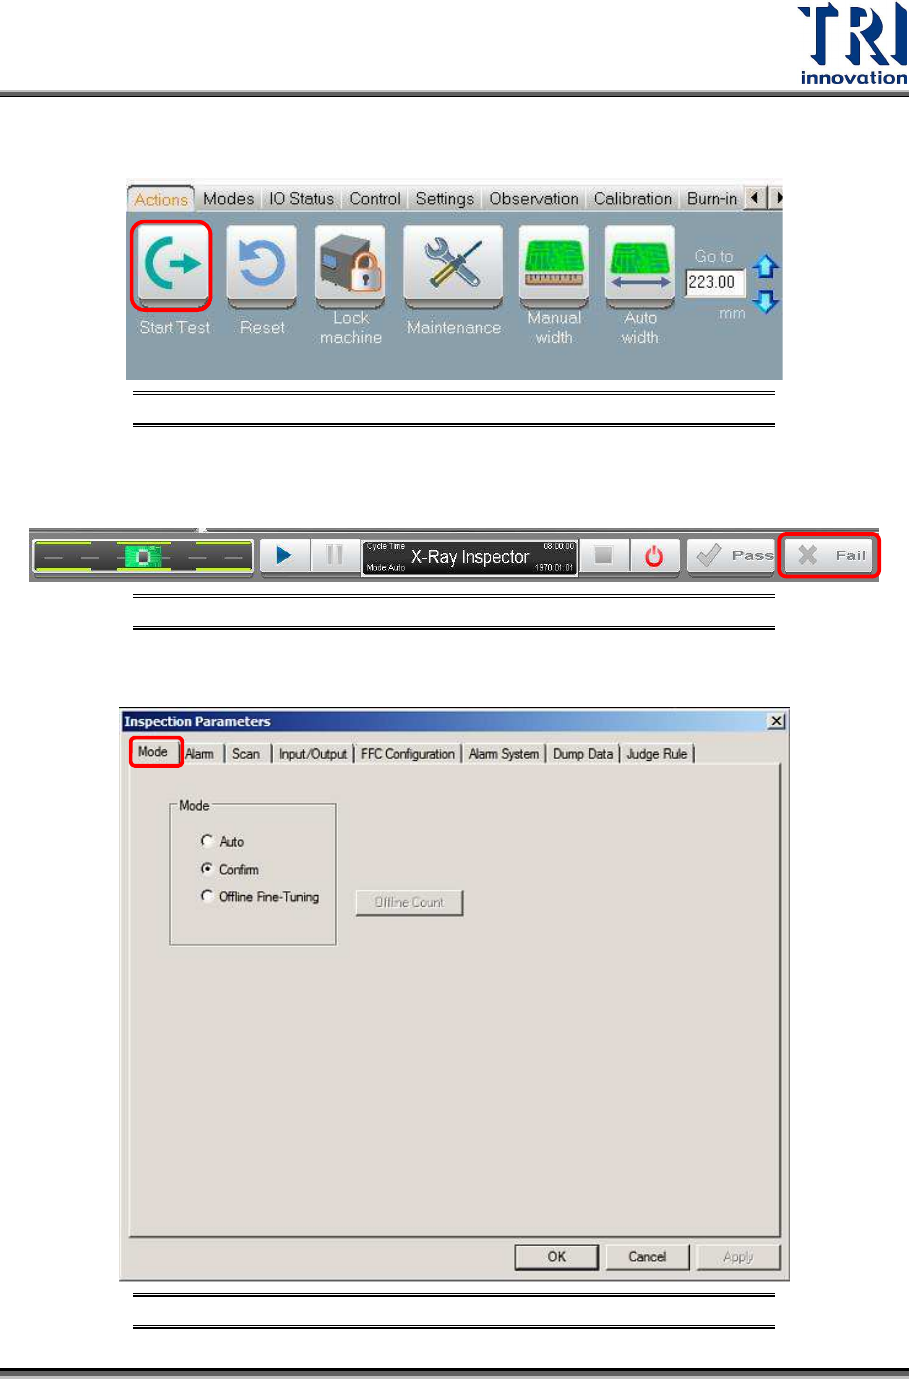
3) Press the “Start Test” button on the VPLC panel so the conveyor will load the board into
the machine with subsequent scanning process.
Figure 14: “Start Test” Button
4) When the scan is complete, the inspection result will be sent to the repair station
automatically in “Auto Mode”. Otherwise, user will need to press the “Fail” button
manually in order to proceed.
Figure 15: “Fail” Button
5) You could enable Auto or Manual mode confirmation by through Inspect -> Parameters.
Under “Mode” tab, you could select Auto, Confirm or Offline Fine Tuning.
Figure 16: Auto, Confirm or Offline Fine Tuning Modes