TR7600 SIII_Operation_en_v_2_0_2.pdf - 第23页
Test Research, Inc. TR 7 600 SIII Serie s User G uide – Oper ation 15 3 R EP A IR S TATION C ONFIRM A TION 3.1 Confirm Inspec tion Data 1) Open TRI AXI Repair Station progra m . Figure 21: TRI A XI Repair Station 2) Ente…

Test Research, Inc.
14 TR7600 SIII Series User Guide – Operation
2) Set [Utility/System Configuration/Repair/Path] to [\\RepairPC\tester_data] and ensure the
network has been linked properly.
Figure 20: Set Repair Station Path
Test Research, Inc.
TR7600 SIII Series User Guide – Operation 15
3 R
EPAIR
S
TATION
C
ONFIRMATION
3.1 Confirm Inspection Data
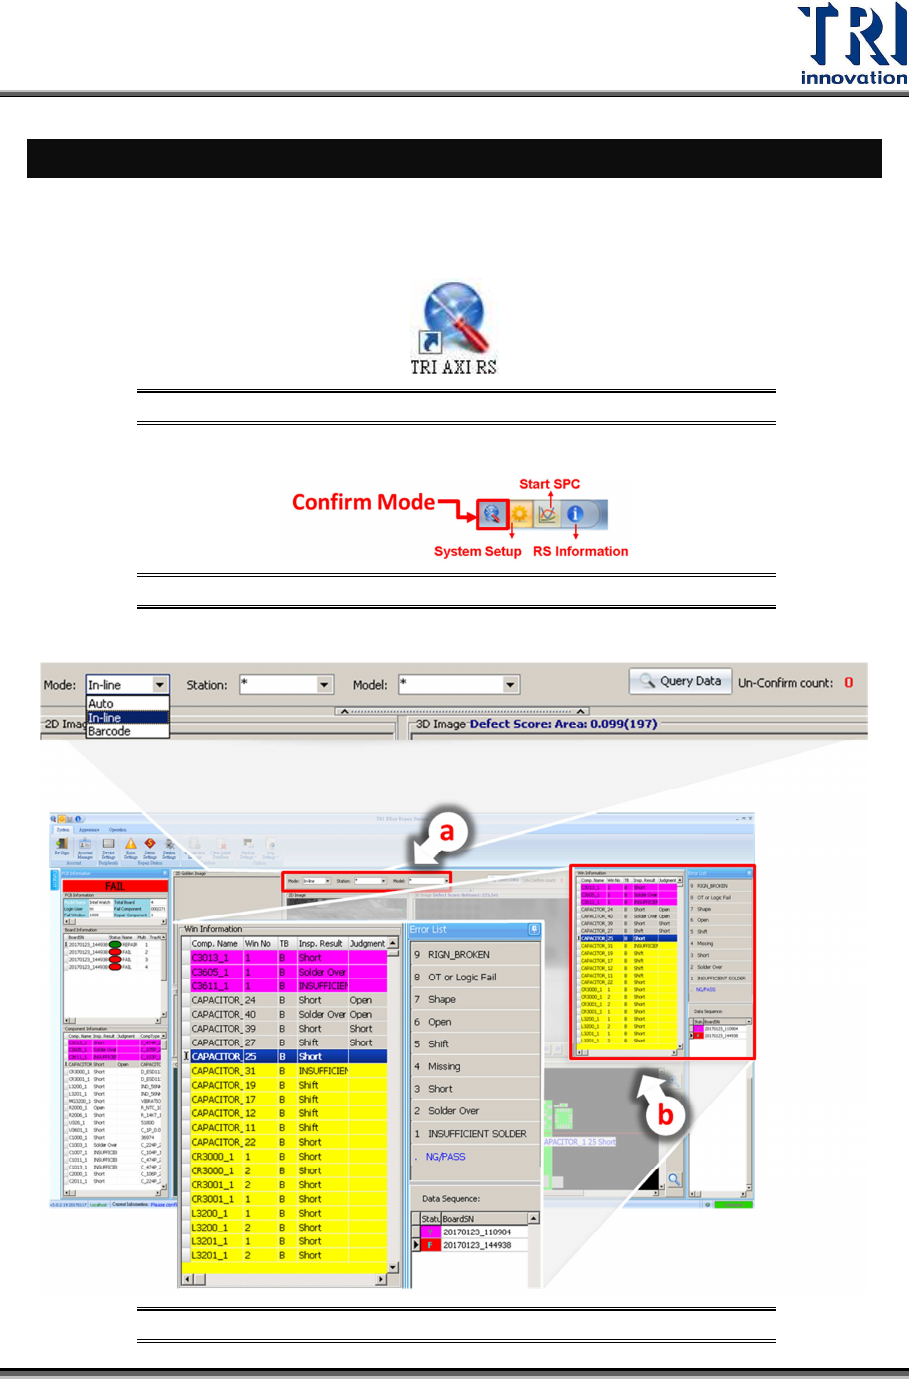
1) Open TRI AXI Repair Station program.
Figure 21: TRI AXI Repair Station
2) Enter Confirm Mode.
Figure 22: Confirm Mode
3) Start to confirm by query the inspection data based on Auto, In-line or Barcode mode.
Figure 23: Query Data by Auto, In-line or Barcode
Test Research, Inc.
16 TR7600 SIII Series User Guide – Operation
a) Query by Auto mode, in-line mode or barcode mode. Number displayed on the right
hand side is the number of un-confirmed units.
b) Check the defect images and use the keyboard or mouse to confirm the image defect
type displayed at the right side of the window.
c) Press [Enter] button to send out the data.
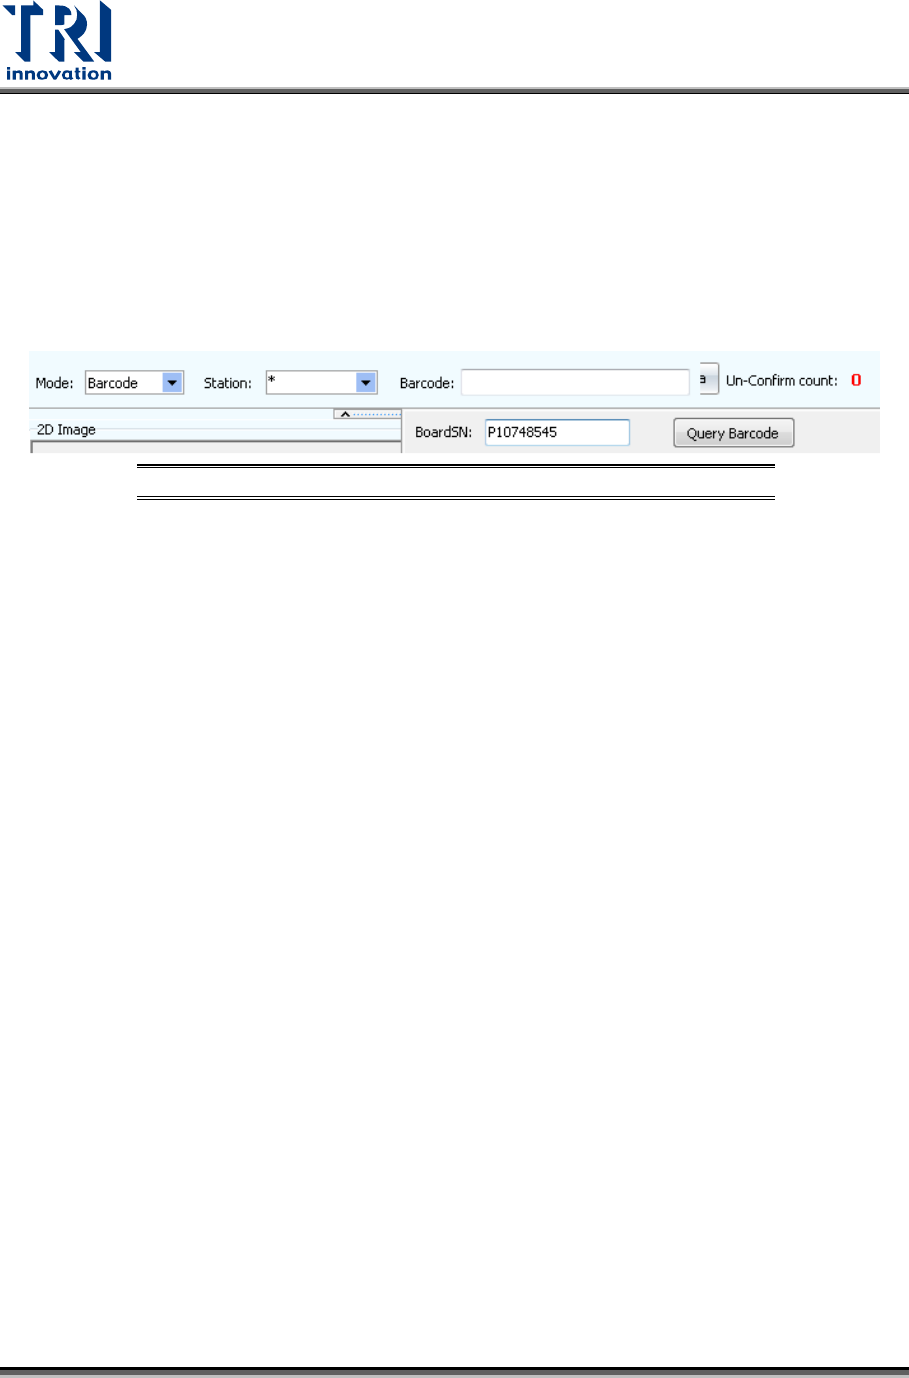
4) In Offline mode, type in the barcode manually or using barcode scanner, and then click
“Query” to retrieve the board data.
Figure 24: Query Data by Offline Mode