YSi-V_Ope_E.pdf - 第93页
4-29 4 Maintenance 9.2 Replacing the UPS (uninterr uptible power supply) batter y T he UPS battery used in this equipment will wear down, reaching the end of its service life. T he battery service life and replacement in…
4-28
4
Maintenance
6
Detach the belt from the conveyor.
7
Clean the conveyor rail.
Use a fine brush or cleaning cloth to clean
the gap between the conveyor rail and
board guide.
8
Attach a new belt.
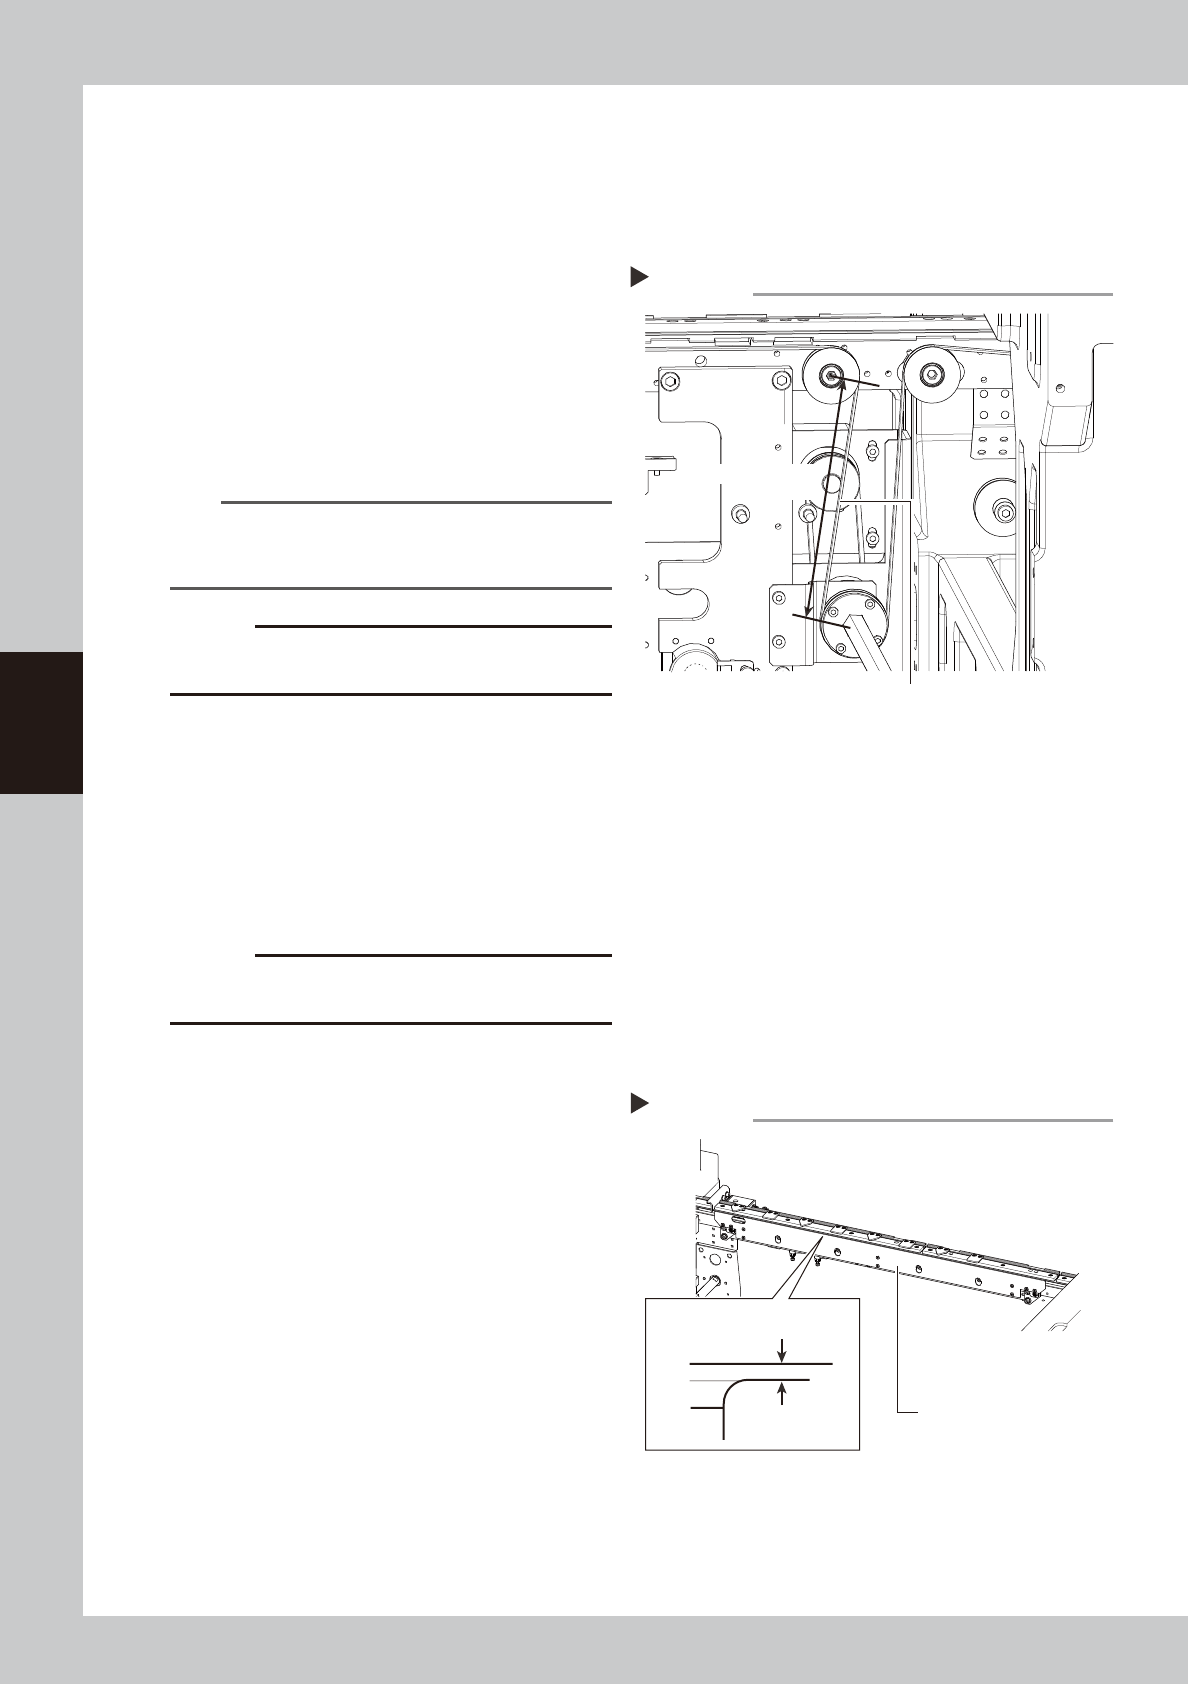
1. Temporarily fit a new belt onto the pulley.
2. Reconnect the shaft to the pulley and
tighten the bolt.
3. Tighten the belt tensioner bolt while
applying a proper tension to the belt by
moving the belt tensioner bolt.
53447-M9-00
TIP
Proper belt tension and pulley pitch are as follows:
Tension 150 to 180Hz
Span length 138mm
c
CAUTION
The tightening torque for the tension pulley must be set
to 5.5N·m.
9
Reattach the board clamp board.
1. Fit the board clamp board to its original
position and secure it temporarily with
the clamp bolts.
2. On the [Unit] – [Conveyor] tab, press the
[Board Clamp] button to raise the board
clamp assembly and tighten the bolts
securely.
c
CAUTION
During adjustment, compressed air must be supplied
and the board clamp raised.
0
Check the belt rotating condition.
1. Open the [Unit]-[Conveyor] tab, and
press the [Board Clamp] button again to
unclamp. At this point, make sure that
the top of the board clamp assembly is
0.5mm lower than the upper surface of
the belt.
2. On the [Unit]-[Conveyor] tab, press the
[Conveyor In] button or [Conveyor Out]
button to turn on the conveyor motor
and check the belt rotation.
3. If the rotation speed fluctuates or there is
slack in the belt, adjust the position of
the tensioner bolt and then check the
rotation again.
53445-M9-00
Attaching a new belt
Step 8
Tension measurement location
138 mm
Span length
Checking the belt rotating condition
Step 10
Board clamp board
0.5 mm
Board clamp
Belt upper surface

4-29
4
Maintenance
9.2 Replacing the UPS (uninterruptible power supply) battery
The UPS battery used in this equipment will wear down, reaching the end of its service life. The battery service
life and replacement interval differ depending on the usage environment (ambient temperature, etc.).
For detailed information on how to replace the UPS battery, see the user's manual that comes with the UPS.
n
NOTE
When you have replaced the UPS battery, write the replacement date on the label affixed to the UPS unit and the left
side of the main switch.
