CP12 & 6 Head Part Exchange - Z-Axis Motor en.pdf - 第10页
E-by SIPLACE CP12 & CP6 Removing the Head Front Part Part Exchange 2/2 CAUTION! Refer to safety inst ructions in user manual before wo rking on the machine. ESD guidelines are to be followed Tool: Wear Part: Consum a…
E-by SIPLACE CP12 & CP6 Removing the Head Front Part
Part Exchange
1/2
CAUTION! Refer to safety instructions in user manual before working on the machine.
ESD guidelines are to be followed
Tool: Wear Part: Consumables:
1. Remove the compressed air hose for the
blast air.
2. Disconnect the connection cable plug off
the gantry board.
3. Unplug the connection cable from sockets
in the base adapter and vision digital.
4. Carefully hold the DLM head and loosen the
four screws fastening the front part of the
head.
5. Put the front part of the C&P head on a
clean, soft and ESD material-proof surface.
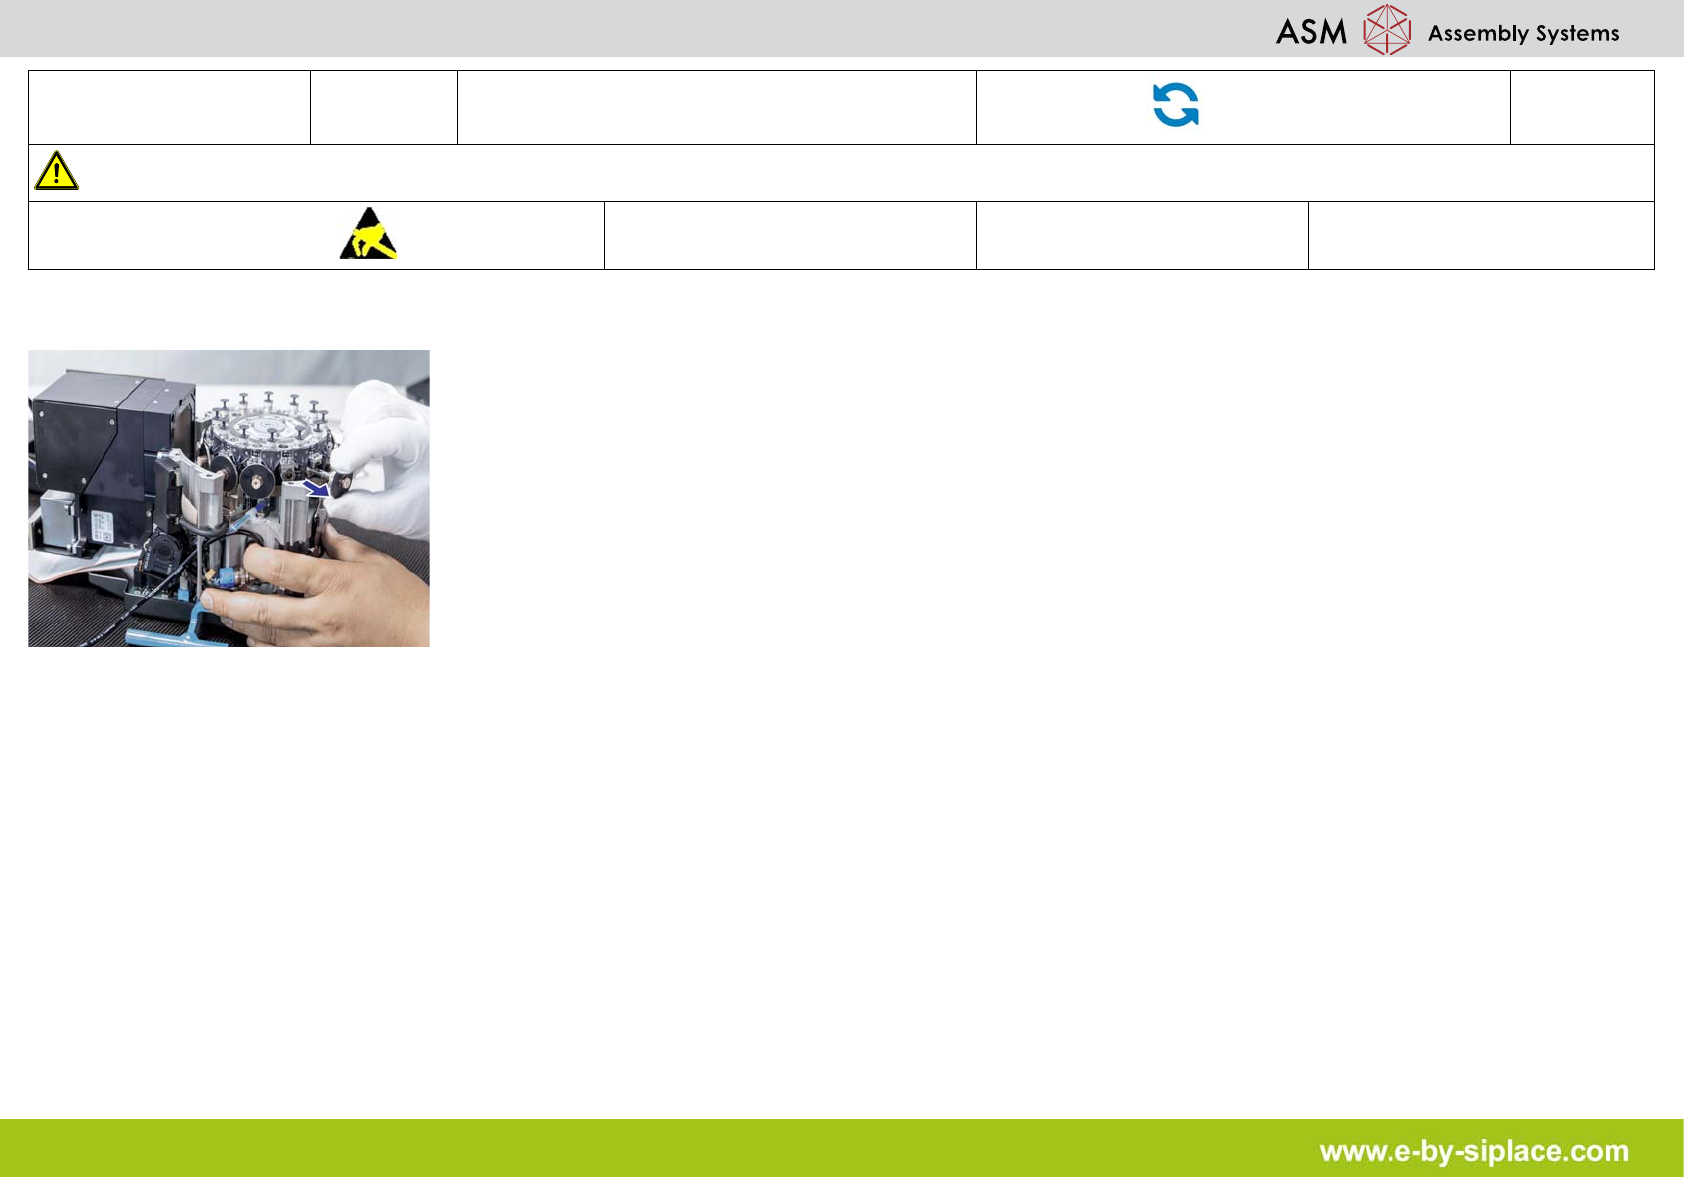
6. Remove all the plungers and store properly.
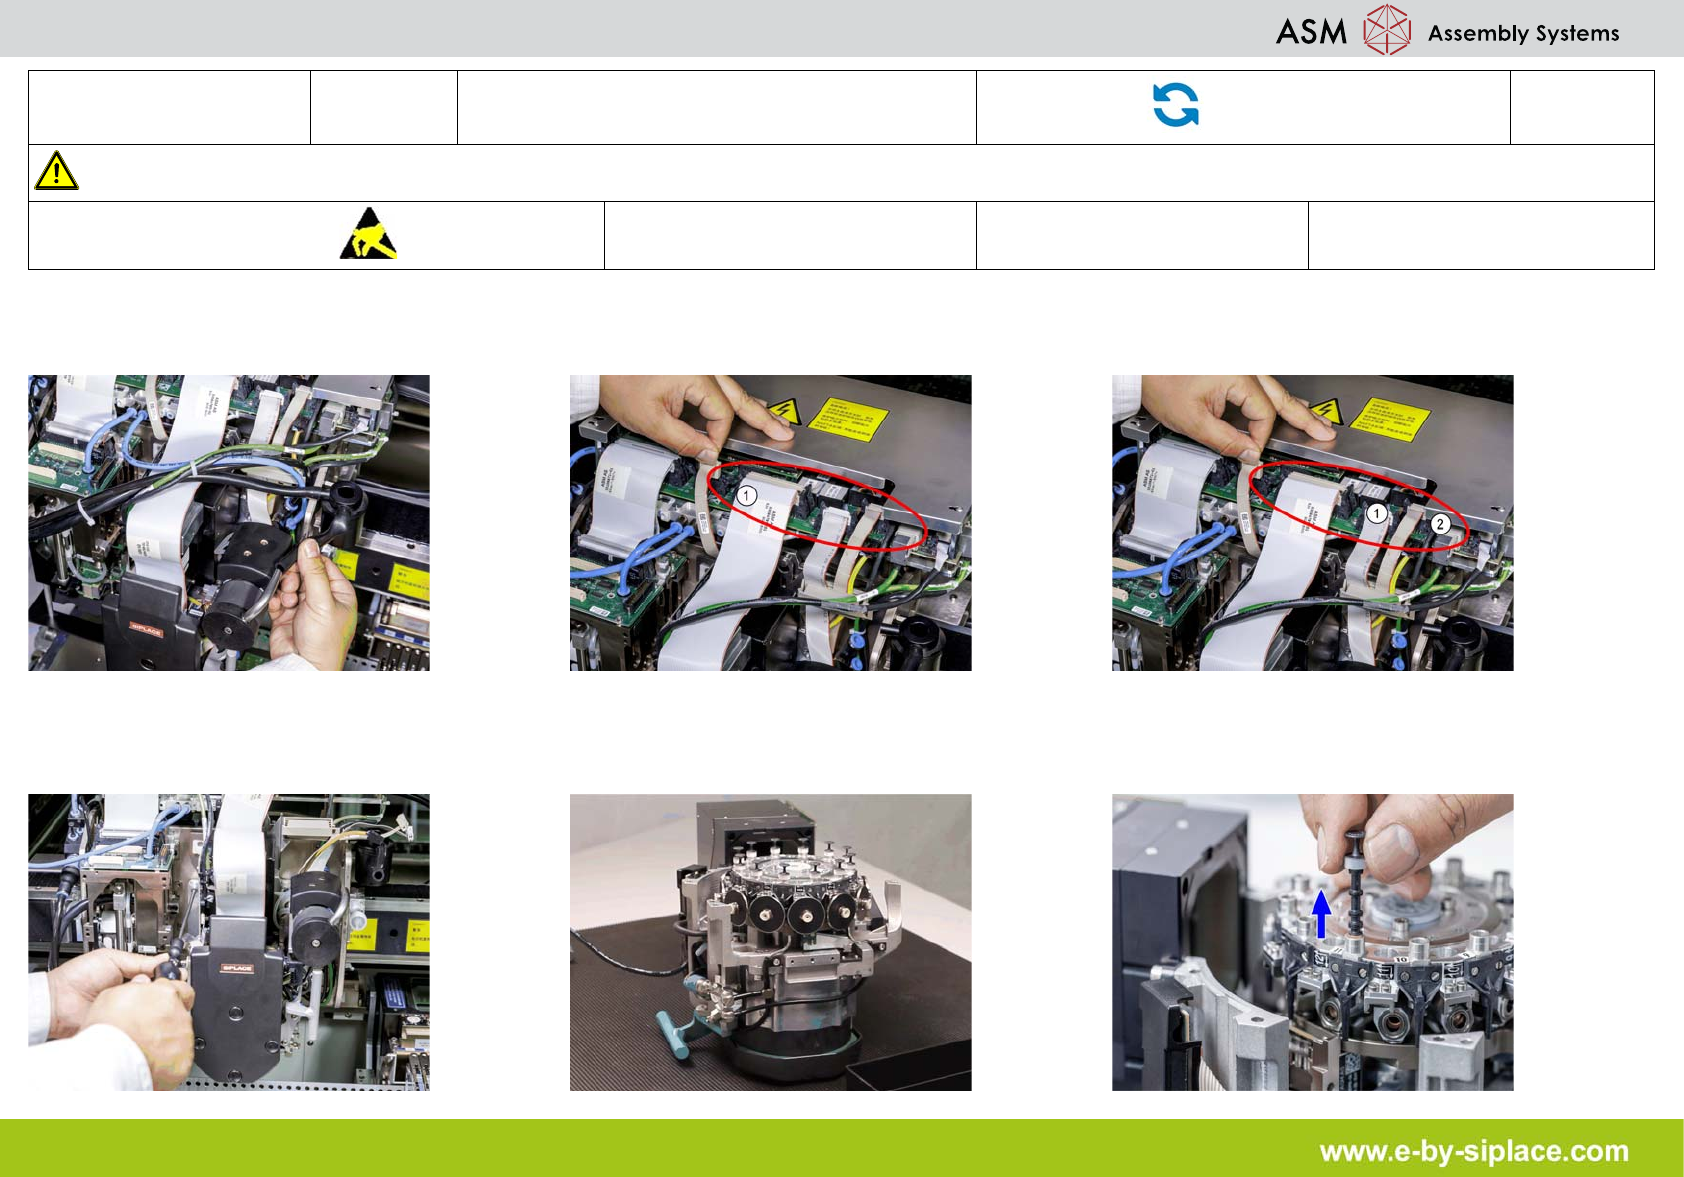
E-by SIPLACE CP12 & CP6 Removing the Head Front Part
Part Exchange
2/2
CAUTION! Refer to safety instructions in user manual before working on the machine.
ESD guidelines are to be followed
Tool: Wear Part: Consumables:
7. Remove all the sleeves and store properly.
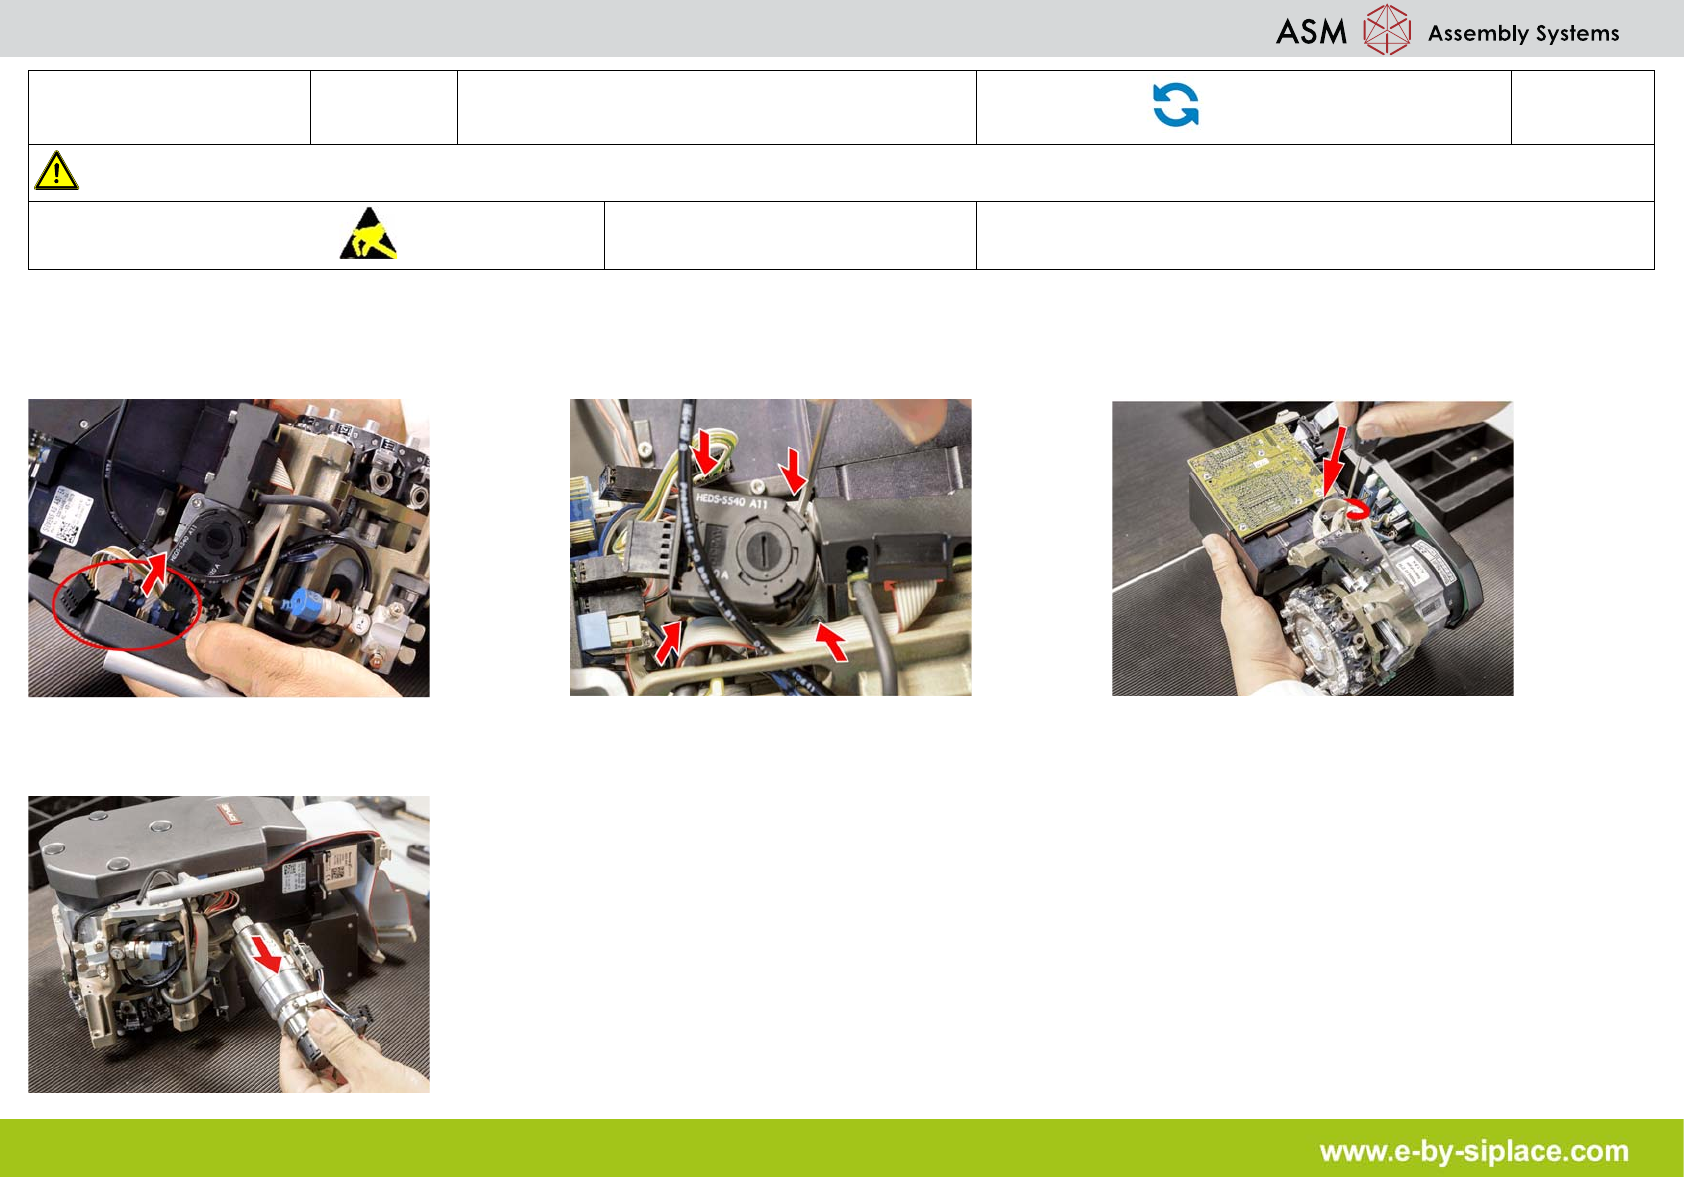
E-by SIPLACE CP12 & CP6 Removal of the Z-Axis motor
Part Exchange
1/1
CAUTION! Refer to safety instructions in user manual before working on the machine.
ESD guidelines are to be followed
Tool: PN: 03083864
1. Remove the plugs (motor tacho and incre-
mental encoder) from the sockets on interme-
diate distributor.
2. Loosen the upper M2.5x12 hexagon sock-
et-head screw of the motor clamp fitting, then
the lower one.
3. Loosen the two M3x14 hexagon socket-
head screws on the motor clamp fitting.
4. Remove the Z-Axis motor together with the
cables.