CP12 & 6 Head Part Exchange - Z-Axis Motor en.pdf - 第16页
E-by SIPLACE CP12 & CP6 Adjust the Z-Axis Belt Tension Part Exchange 2/3 CAUTION! Refer to safety inst ructions in user manual before working on the machine. ESD guidelines are to be followed Tool: Wear Part: Consum …
E-by SIPLACE CP12 & CP6 Adjust the Z-Axis Belt Tension
Part Exchange
1/3
CAUTION! Refer to safety instructions in user manual before working on the machine.
ESD guidelines are to be followed
Tool: Wear Part: Consumables:
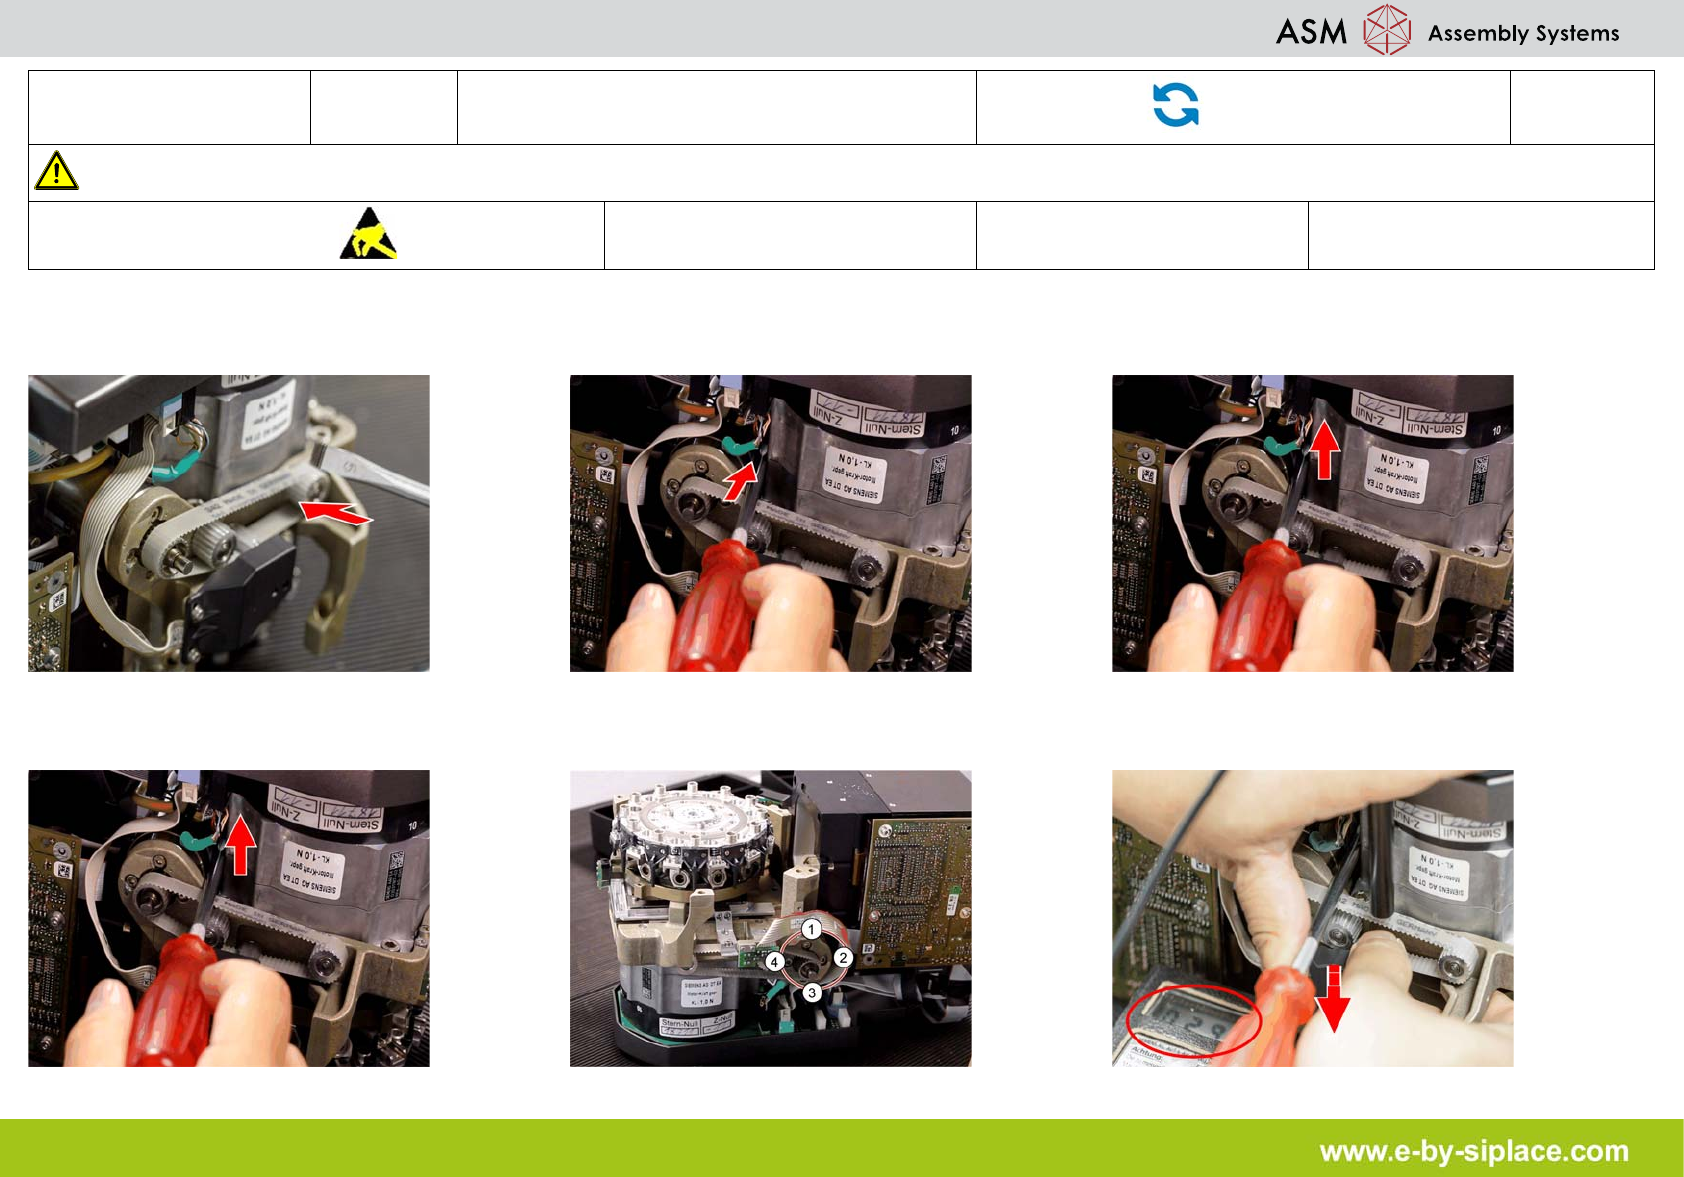
1. Several attempt to adjust the belt tension
may be required!
2. Insert the screw driver in between the Z-
Axis motor and star motor.
3. WARNING! Do not apply excessive force to
push the Z-Axis motor upward.
4. Use the screw driver to push the Z-Axis mo-
tor upward.
5. Tighten the four M3x5 hexagon socket-
head screws.
6. Use the belt tension meter to check the belt
tension of the Z-Axis belt.
E-by SIPLACE CP12 & CP6 Adjust the Z-Axis Belt Tension
Part Exchange
2/3
CAUTION! Refer to safety instructions in user manual before working on the machine.
ESD guidelines are to be followed
Tool: Wear Part: Consumables:
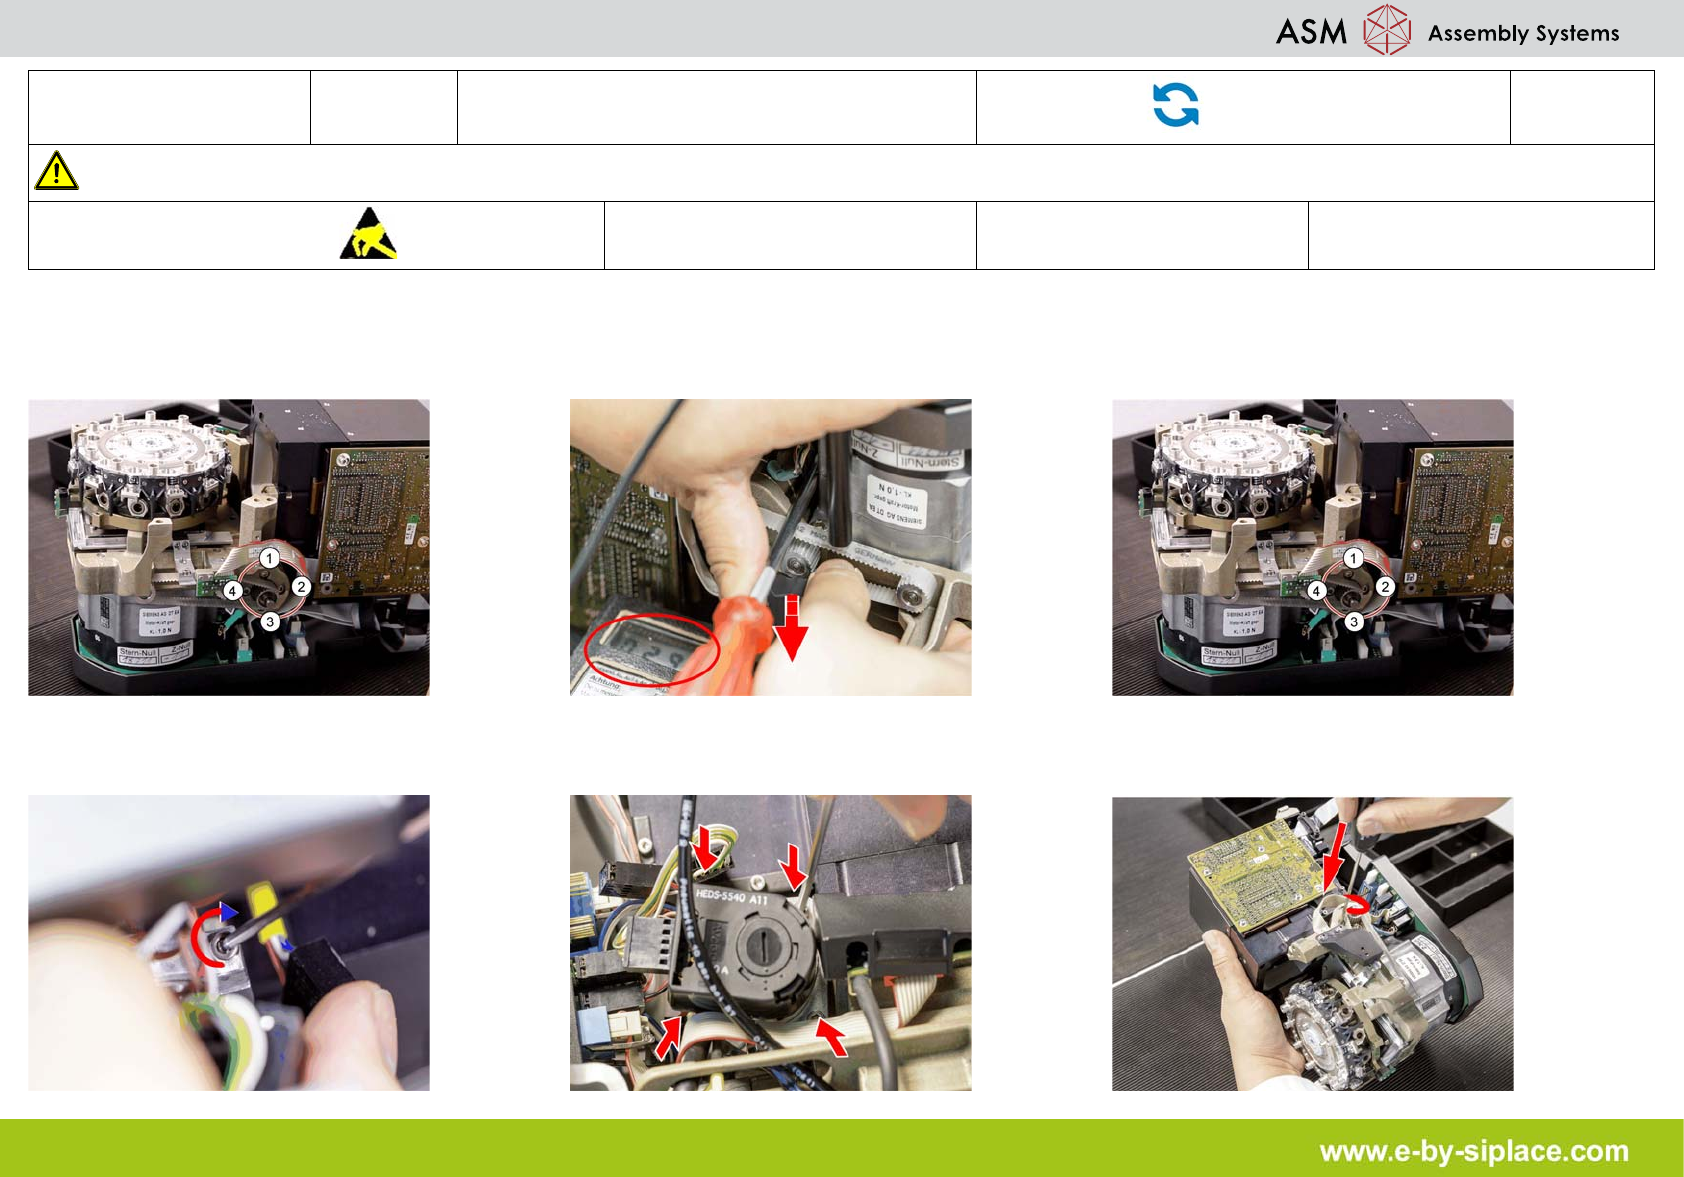
7. Loosen the screws individually (if neces-
sary) to reduce the belt tension of the Z-Axis
motor.
8. Check the belt tension again and adjust if
necessary (280HZ +/-10).
9. Check the four M3x5 hexagon socket-head
screws are secure properly.
10. Tighten the two M3x14 hexagon socket-
head screws to fix the motor clamp.
11. Fix the motor clamp upper part with the
two M2.5x12 hexagon socket-head screws.
12. Tighten the hexagon socket-head screws
on the Z-Axis drive unit and the motor clamp.
E-by SIPLACE CP12 & CP6 Adjust the Z-Axis Belt Tension
Part Exchange
3/3
CAUTION! Refer to safety instructions in user manual before working on the machine.
ESD guidelines are to be followed
Tool: Wear Part: Consumables:
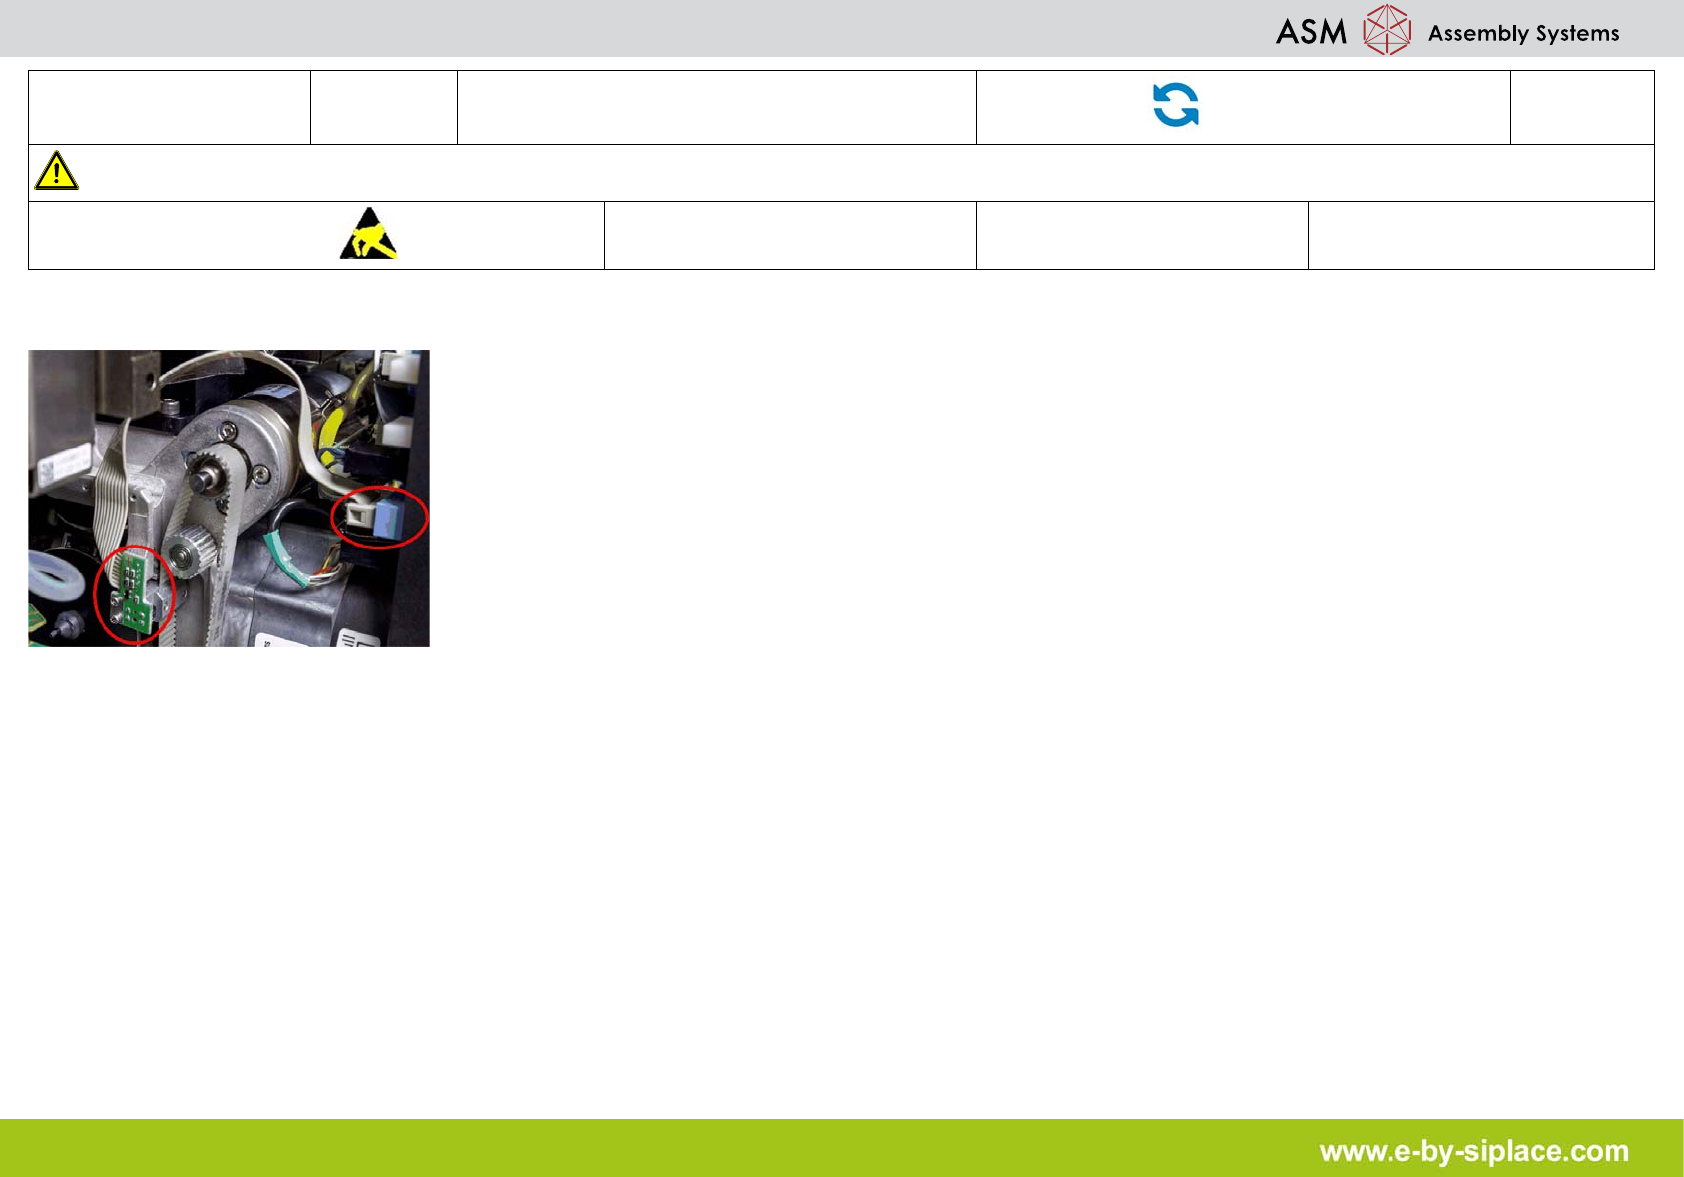
13. Reconnect cable.