MUMA-Hardware-manual-20120717.pdf - 第5页
- 5 - 2.4 Back View 1: S tand Co lumn 2: Machine B ase 3&4: Machi ne feet * Note: When move machine, please hand on st and colum n and machine base, not hand on others. 2.5 T op View 1: X axis scal e ruler 2: X axis …
- 4 -
2. MUMA200 Instruction
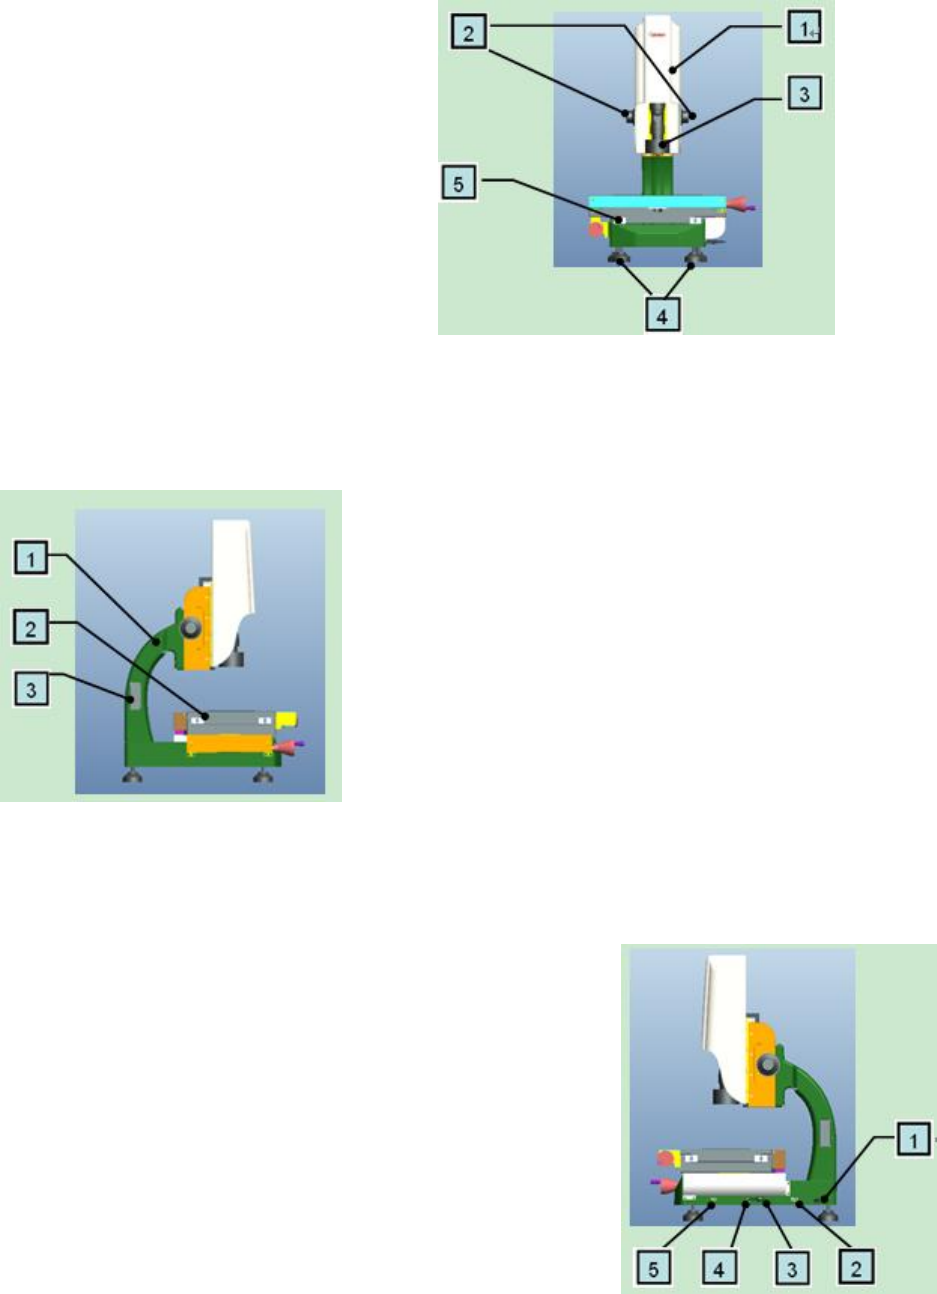
2.1 Front View
1: MUMA200 cover
2: Z axis fine-turning
3: Lens
4: Machine feet
5: Machine guide rail lock
* Note: before using machine, please release guide rail lock firstly.
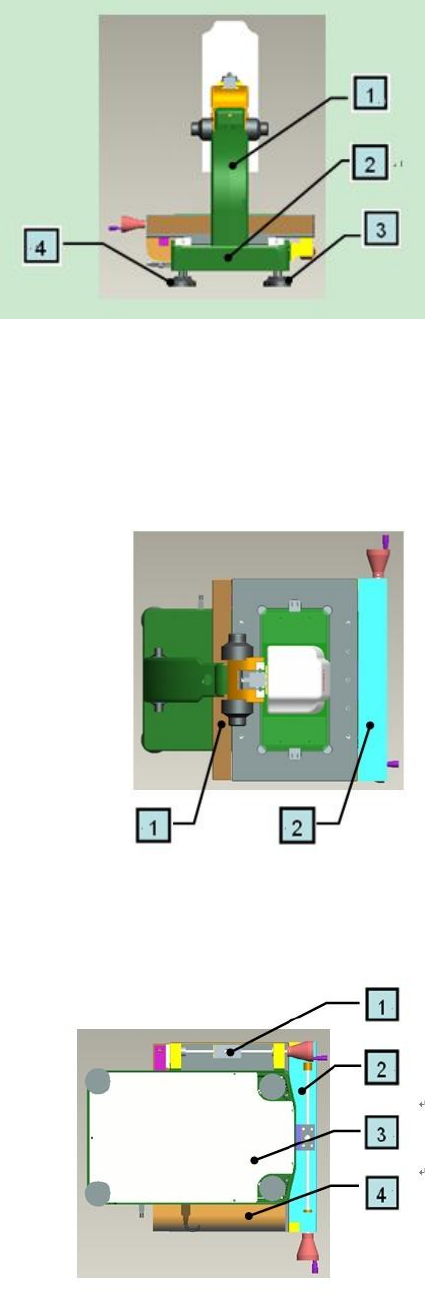
2.2 Left View
1: Stand Column
2: Workstage
3: Stand column hole cover
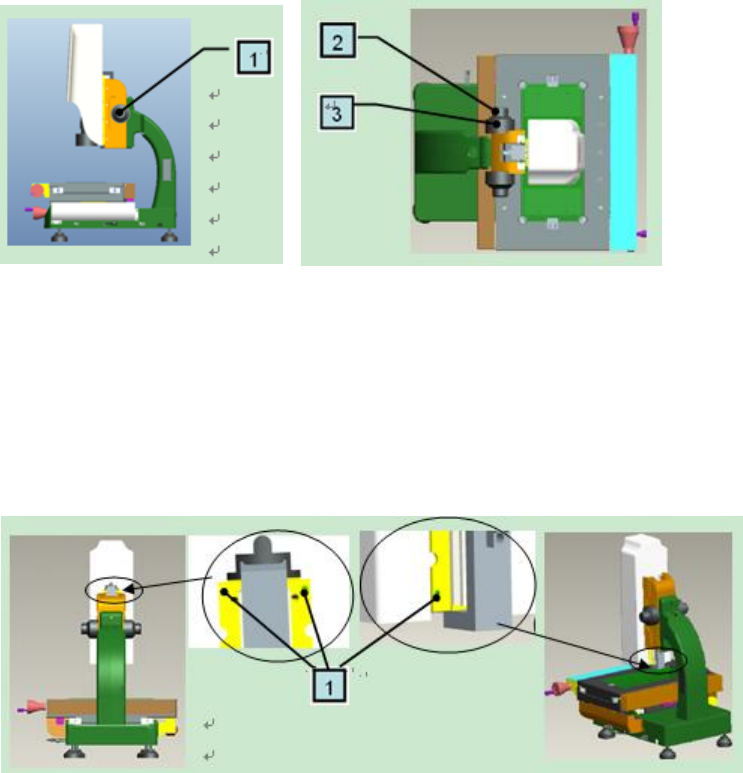
2.3 Right View
1: Linear scale ruler wire enter
2:USB light signal connection: connect USB integration by
USB signal cable
3:USB camera signal connection: connect USB integration by
USB power cable
4:External power connection: to use 12V power adapter to
connect external power for machine.
5:USB counter card signal connection: to connect USB
integration.
- 5 -
2.4 Back View
1: Stand Column
2: Machine Base
3&4: Machine feet
* Note: When move machine, please hand on stand column and machine base, not hand on
others.
2.5 Top View
1: X axis scale ruler
2: X axis transmission
2.6 Bottom View
1: Y axis transmission
2: X axis transmission
3: Machine base cover
4: Y axis scale ruler
* Note:Machine base cover cannot be under great pressure, please handle with care.
- 6 -
2.7 Roughly and Fine turning
1: Turn it to move Z axis up and down, divide into roughly and fine
2: Fine turning: move Z axis to reach a clear image which you expect
3: Roughly turning: move Z axis up and down quickly, handle slightly
2.8 Cover
1: 4 grub screws: fasten cover
Note: When remove cover, move Z axis up by roughly turning and loosen the two upper screws by
spanner, as the left picture. Then, move Z axis down and loosen the two lower screws by spanner, as
the right picture. All these done, remove the cover up slightly.
When replace the cover, aim at the cover groove and put it back slightly. Then tighten 4 grub screws.
Suggestion:If not necessary, please don’t remove the cover.