SOM-1623-002.pdf - 第10页
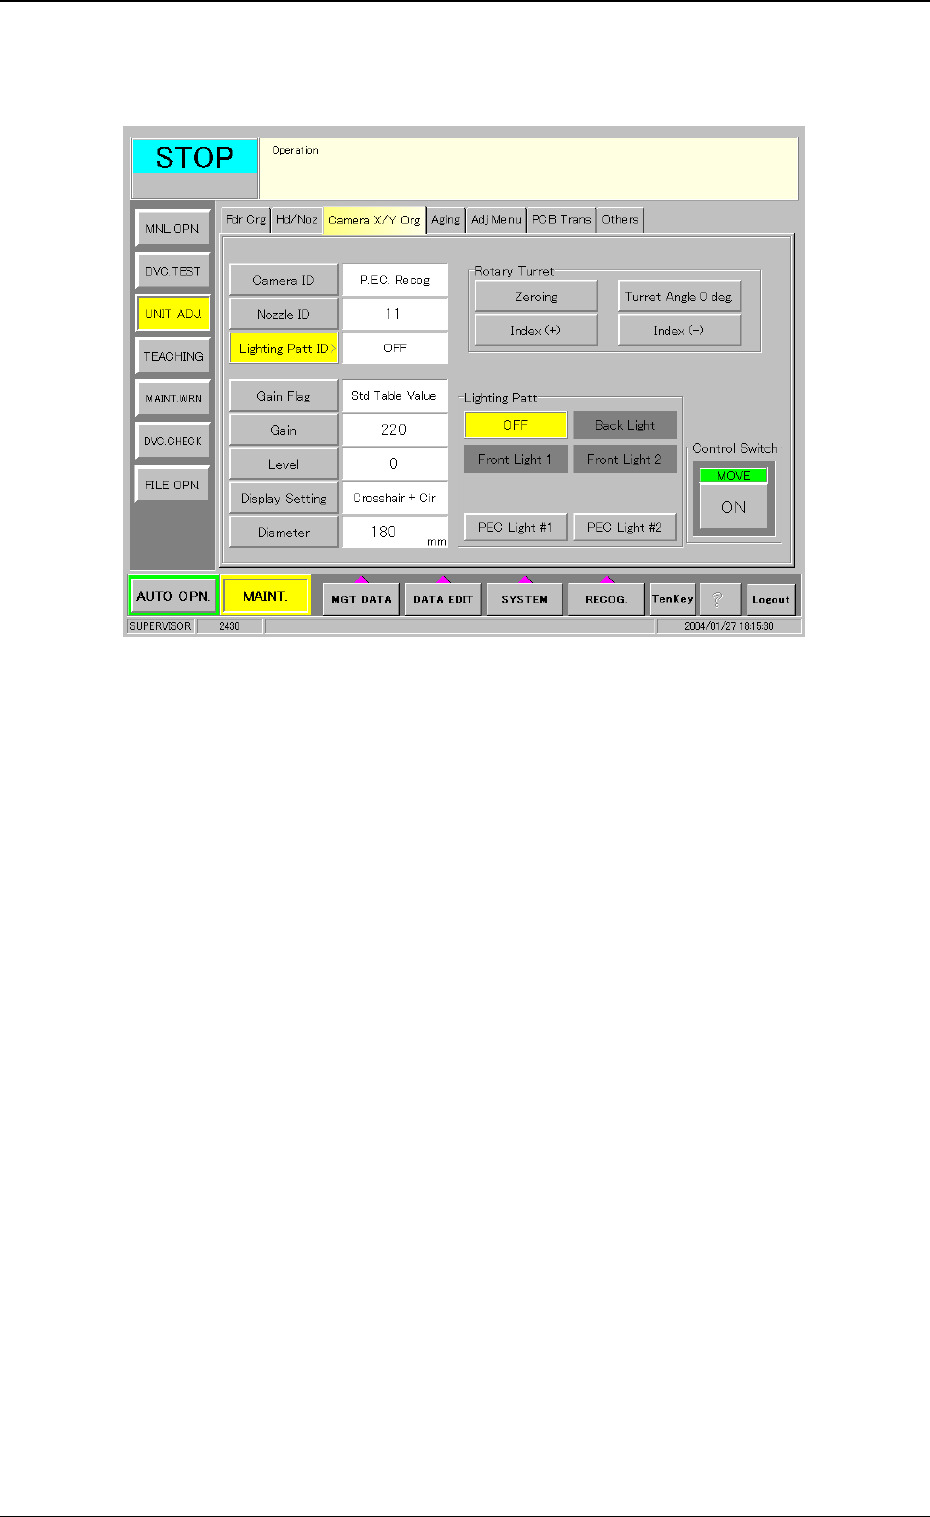
Tg0594-PM-SO (3) Press the [Lighting Patt ID] button and then press the [PEC Light #2] for adjustment setting. Fig. 6 (4) After pressing the [ON] button for control switch operation, when the [ENABLE] button on the opera…
Tg0594-PM-SO
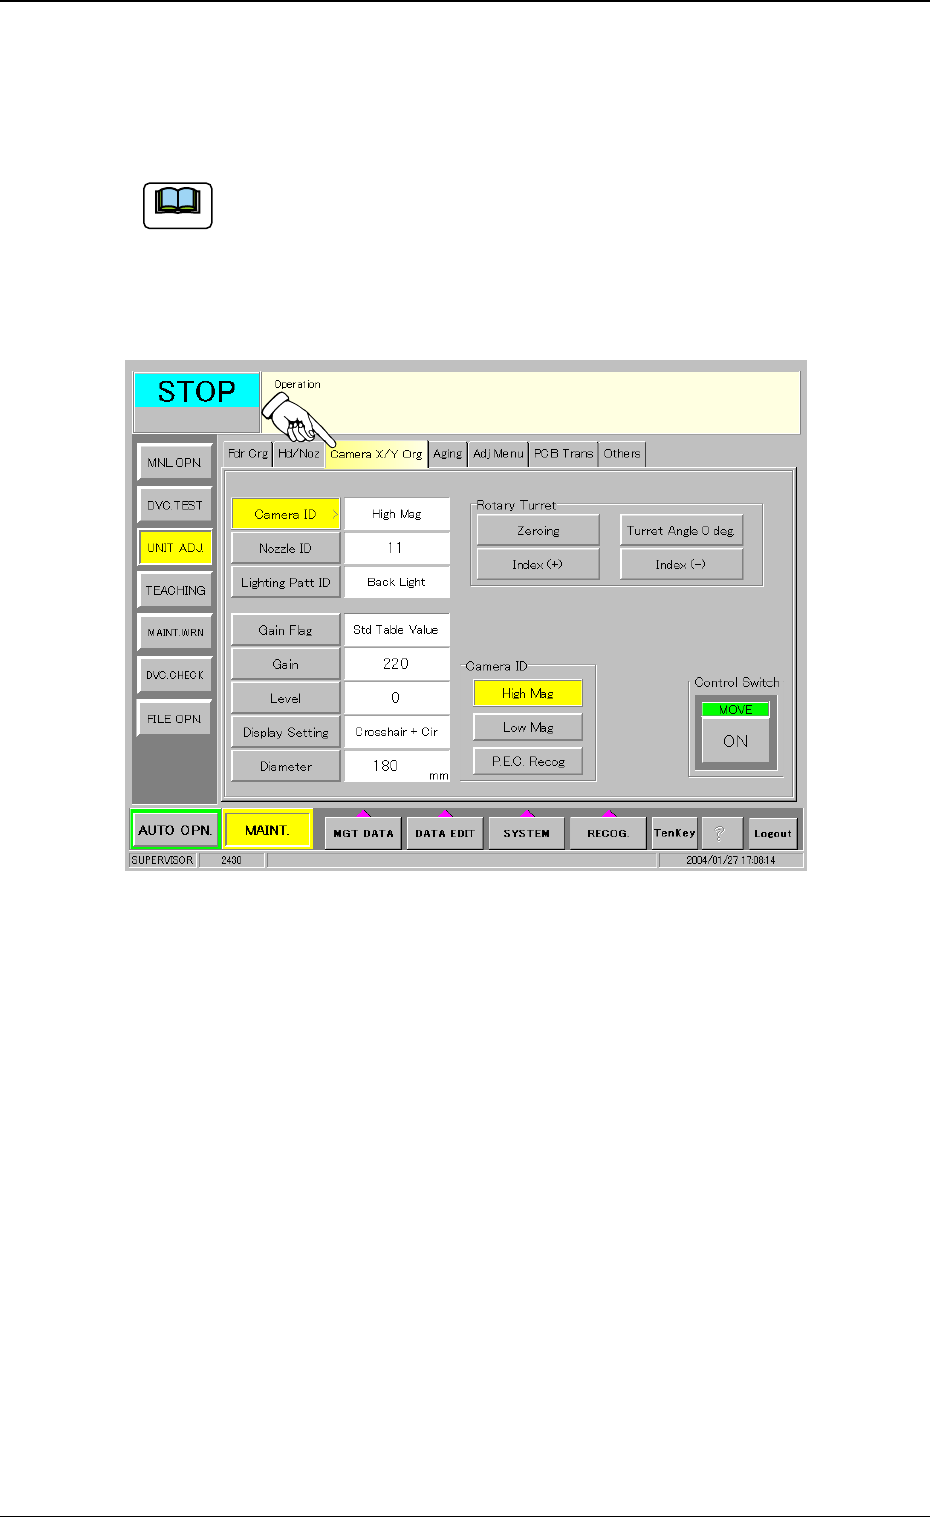
5. “Camera X/Y Origin” Tab
Using this tab, the P.C.B. recognition camera position adjustment and
focus adjustment are performed.
This tab sheet is for service personnel.
(1) When the [Camera X/Y Origin] tab is pressed at the “UNIT ADJ.”
sub menu window, the following tab sheet appears.
Fig. 5
(2) Press the [Camera ID] button and then press the [P.E.C. Recog]
button for adjustment setting.
5. “Camera X/Y Origin” Tab
0402-002 7
Note
Tg0594-PM-SO
(3) Press the [Lighting Patt ID] button and then press the [PEC Light
#2] for adjustment setting.
Fig. 6
(4) After pressing the [ON] button for control switch operation, when
the [ENABLE] button on the operation panel is pressed within 2
seconds, the lighting for black light is turned on and the image
from the P.C.B. recognition camera appears.
When the [Lighting Patt ID] is set to [PEC Light #1], the standard
lighting is turned on and the image from the P.C.B. recognition
camera appears.
5. “Camera X/Y Origin” Tab
0402-002 8
Tg0594-PM-SO
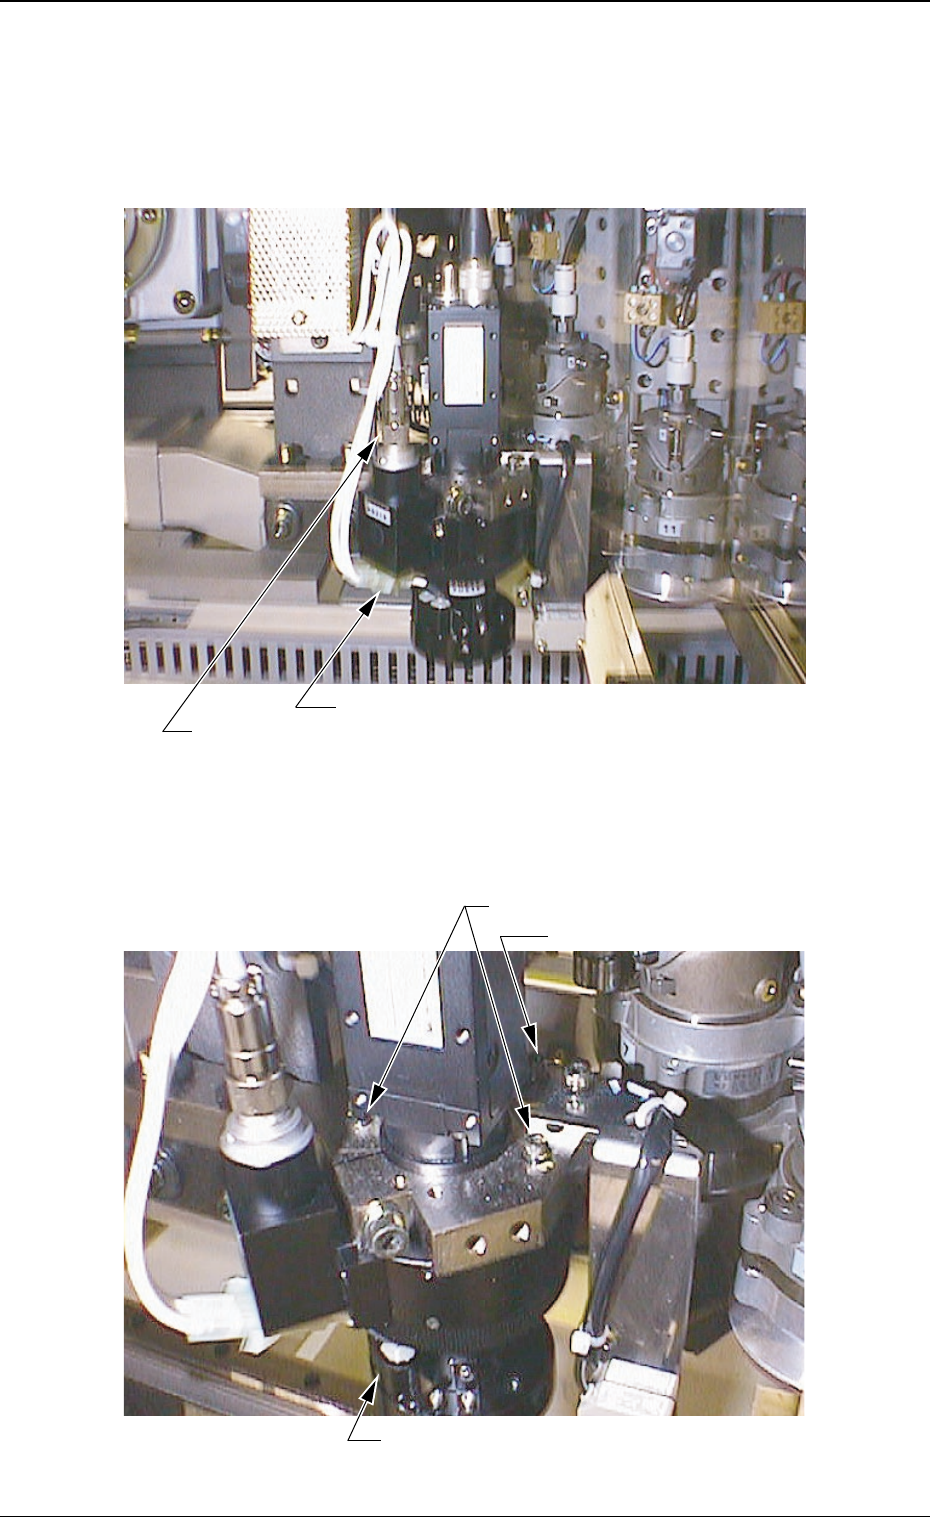
6. Procedure for Black Light Replacement
(1) Shut off the power to the machine and disconnect the connector
for ring lighting and the nylon connector for black light.
Fig. 7
(2) Loosen three setscrews fastening the lighting unit and detach the
unit.
Fig. 8
6. Procedure for Black Light Replacement
0402-002 9
Setscrew (2 places)
Lighting Unit
Setscrew (Rear Side)
Connector for Ring Lighting
Nylon Connectors for Black Light