SOM-1623-002.pdf - 第13页
Tg0594-PM-SO (5) Replace the black light with a new one. Fig. 1 1 (6) Attach the lighting unit, following the reverse order ((5) → (4) → (3) → (2) → (1)) of the detachment procedure. Now , the replacement is completed. (…
Tg0594-PM-SO
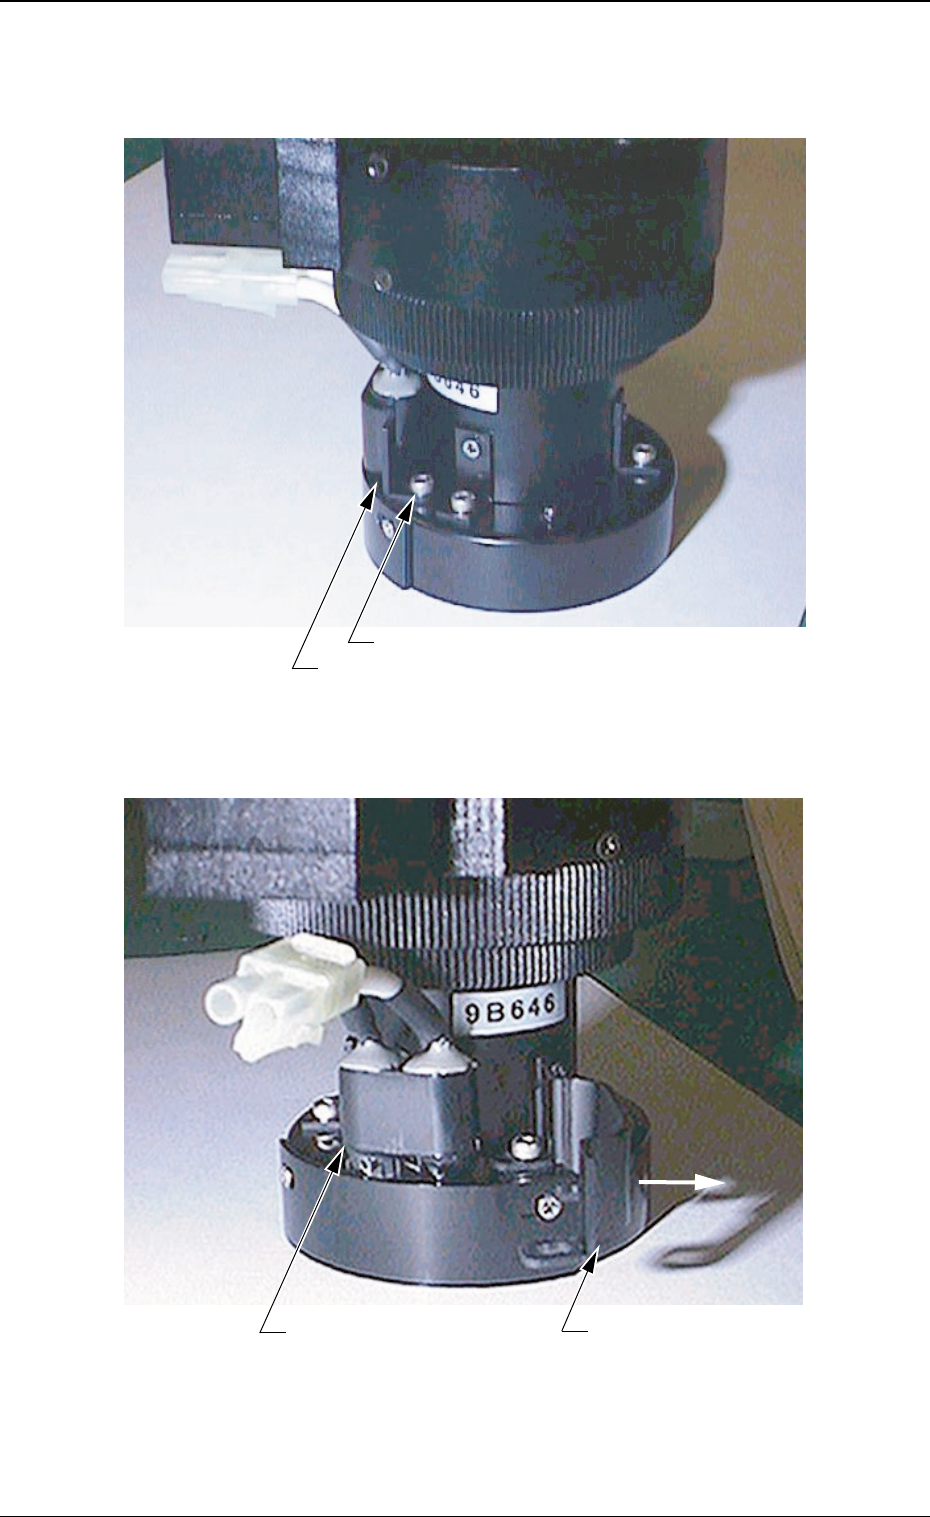
(3) Remove one of the two screws of the metal fixture fastening the
black light and loosen the other one such that the metal fixture
can be moved.
Fig. 9
(4) Shift the metal fixture for black light.
Fig. 10
6. Procedure for Black Light Replacement
0402-002 10
Screw
Metal Fixture for Black Light
Black Light Fluorescent LampBlack Light
Metal Fixture for
Black Light
Tg0594-PM-SO
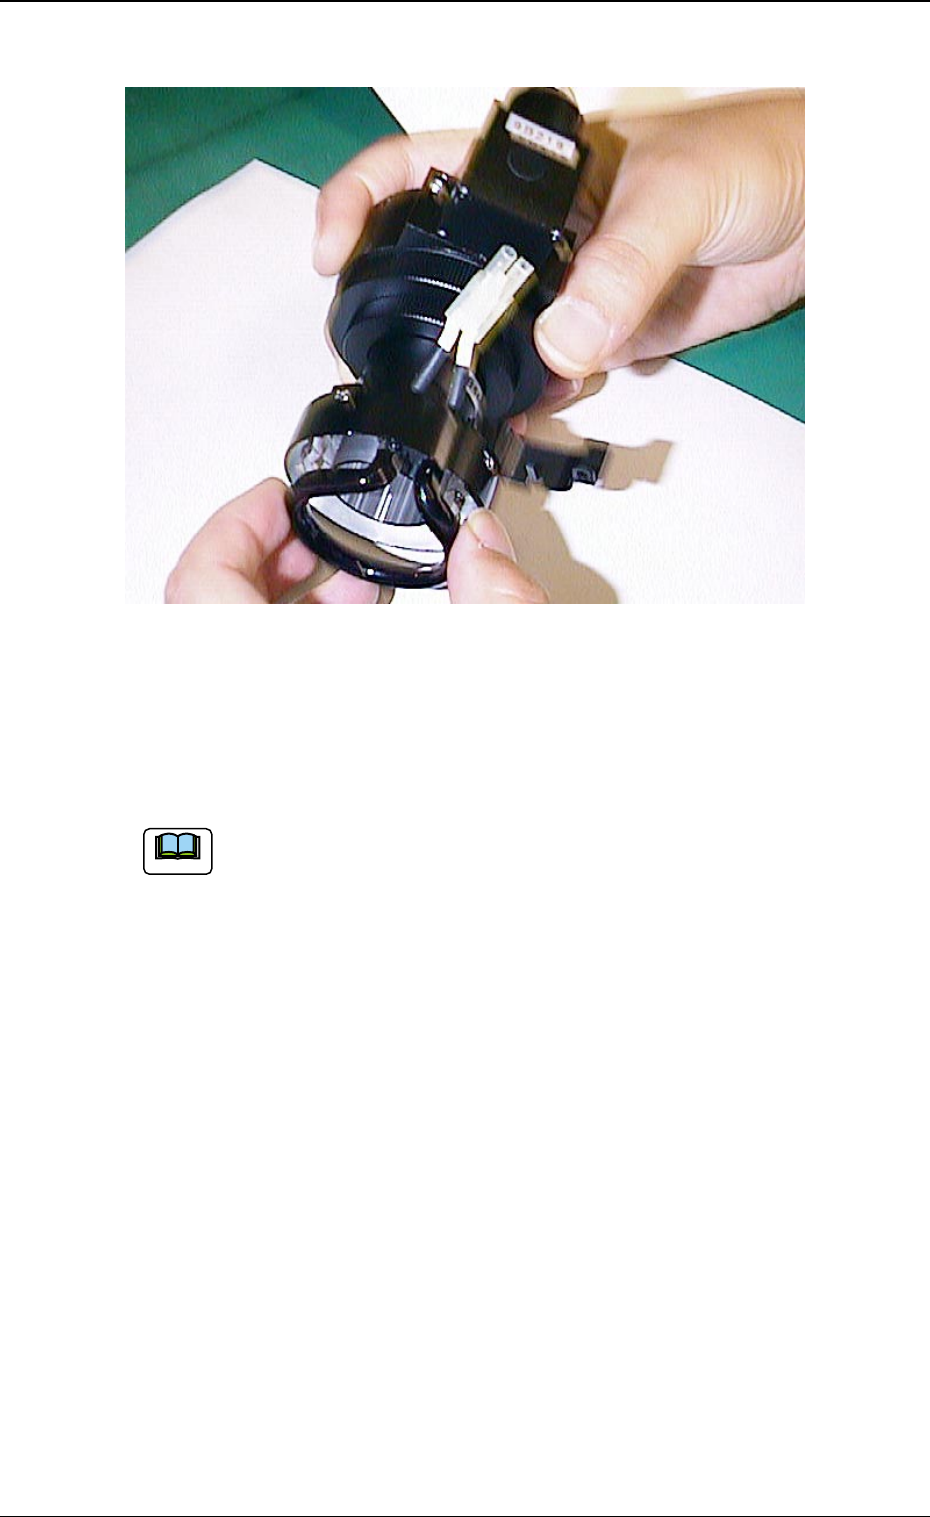
(5) Replace the black light with a new one.
Fig. 11
(6) Attach the lighting unit, following the reverse order
((5)→(4)→(3)→(2)→(1)) of the detachment procedure. Now, the
replacement is completed.
(a) Carefully handle the black light because it is fragile.
(b) When the lighting unit should be attached after lamp
replacement, be sure to tighten the screws securely.
6. Procedure for Black Light Replacement
0402-002 11
Note
Tg0594-PM-SO
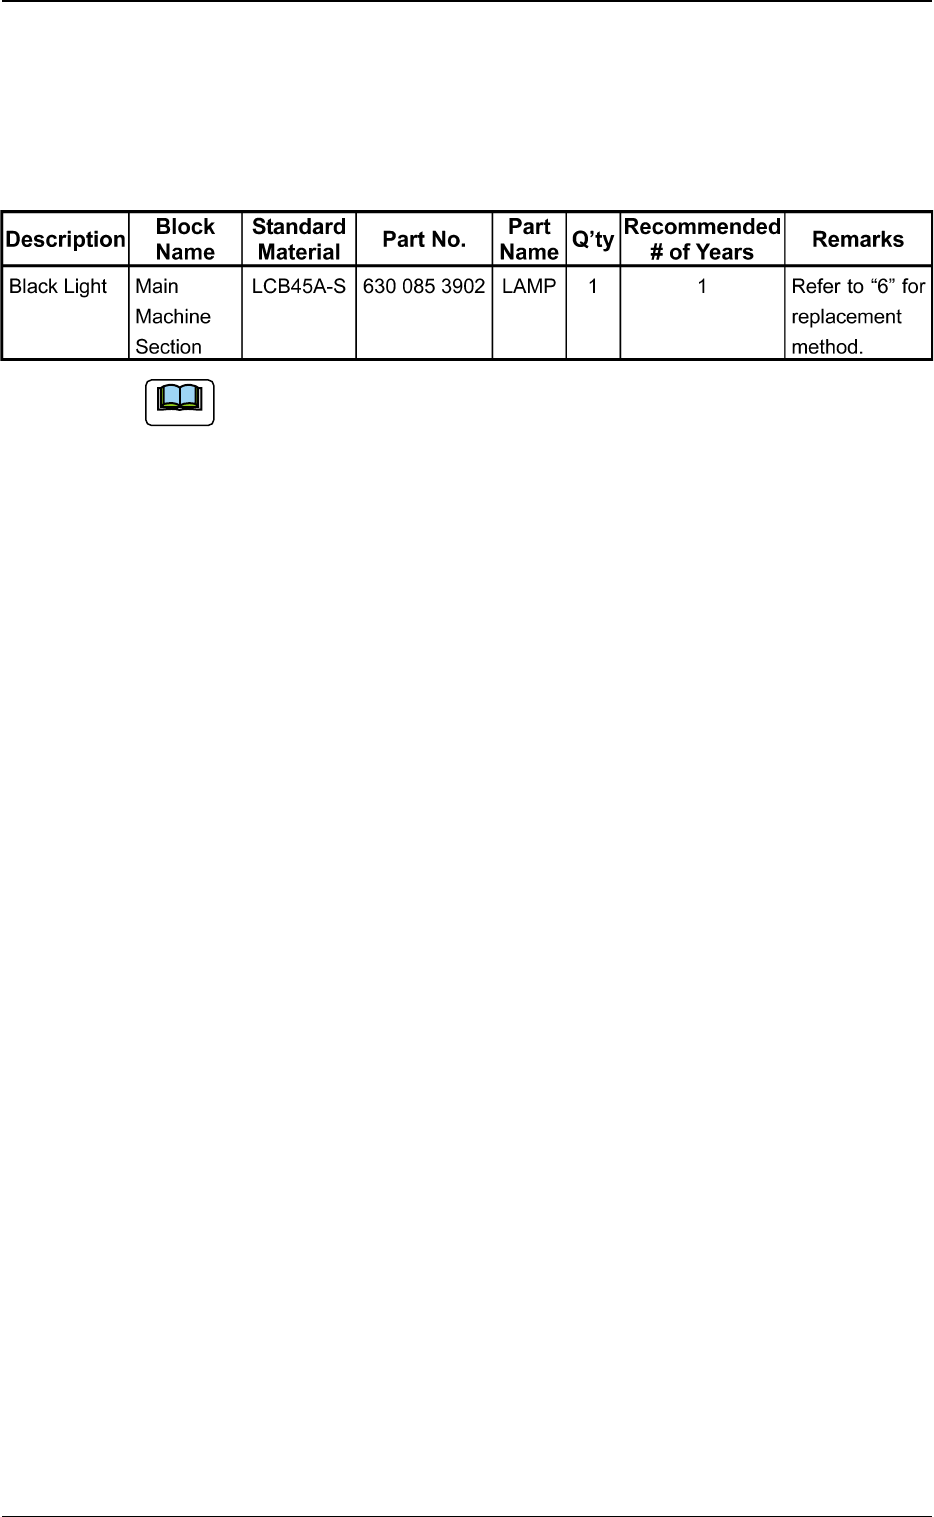
7. Accessory Parts List
These parts might be totally consumed in about one year.
When you purchase them contact our Customer Service Department.
The black light is near ultraviolet rays, which are almost
invisible. When a P.C.B. recognition error occurs and the
lighting check for the black light is performed, insert a sheet
of white paper under the black light. When violet light is seen
on the paper, the black light is OK.
7. Accessory Parts List
0402-002 12
Table 1
Note