A000062-datasheet.pdf - 第23页
8 Mechanical Information The Arduino Due is a micr ocontroller boar d measuring 101.52 mm x 53.3 mm, featuring two USB-B connectors and a big quantity of GPIO pins headers. 8.1 Board Dimensions The Arduino Due boar d out…
7 Device Operation
7.1 Getting Started - IDE
If you want to program your Arduino Due while offline you need to install the Arduino® Desktop IDE [1]. To connect
the Arduino Due to your computer, you will need a USB Type-B cable, which can also provide power to the board, as
indicated by the LED (DL1).
7.2 Getting Started - Arduino Cloud Editor
All Arduino boards, including this one, work out-of-the-box on the Arduino® Cloud Editor [2], by just installing a
simple plugin.
The Arduino Cloud Editor is hosted online, therefore it will always be up-to-date with the latest features and support
for all boards. Follow [3] to start coding on the browser and upload your sketches onto your board.
7.3 Getting Started - Arduino Cloud
All Arduino IoT enabled products are supported on Arduino Cloud which allows you to log, graph and analyze
sensor data, trigger events, and automate your home or business.
7.4 Online Resources
Now that you have gone through the basics of what you can do with the board you can explore the endless
possibilities it provides by checking exciting projects on ProjectHub [4], the Arduino Library Reference [5], and the
online store [6]; where you will be able to complement your board with sensors, actuators and more.
7.5 Board Recovery
All Arduino boards have a built-in bootloader which allows flashing the board via USB. In case a sketch locks up the
processor and the board is not reachable anymore via USB, it is possible to enter bootloader mode by double-
tapping the reset button right after the power-up.
Arduino® Due
22 / 50 Arduino® Due Modified: 15/09/2026
8 Mechanical Information
The Arduino Due is a microcontroller board measuring 101.52 mm x 53.3 mm, featuring two USB-B connectors and
a big quantity of GPIO pins headers.
8.1 Board Dimensions
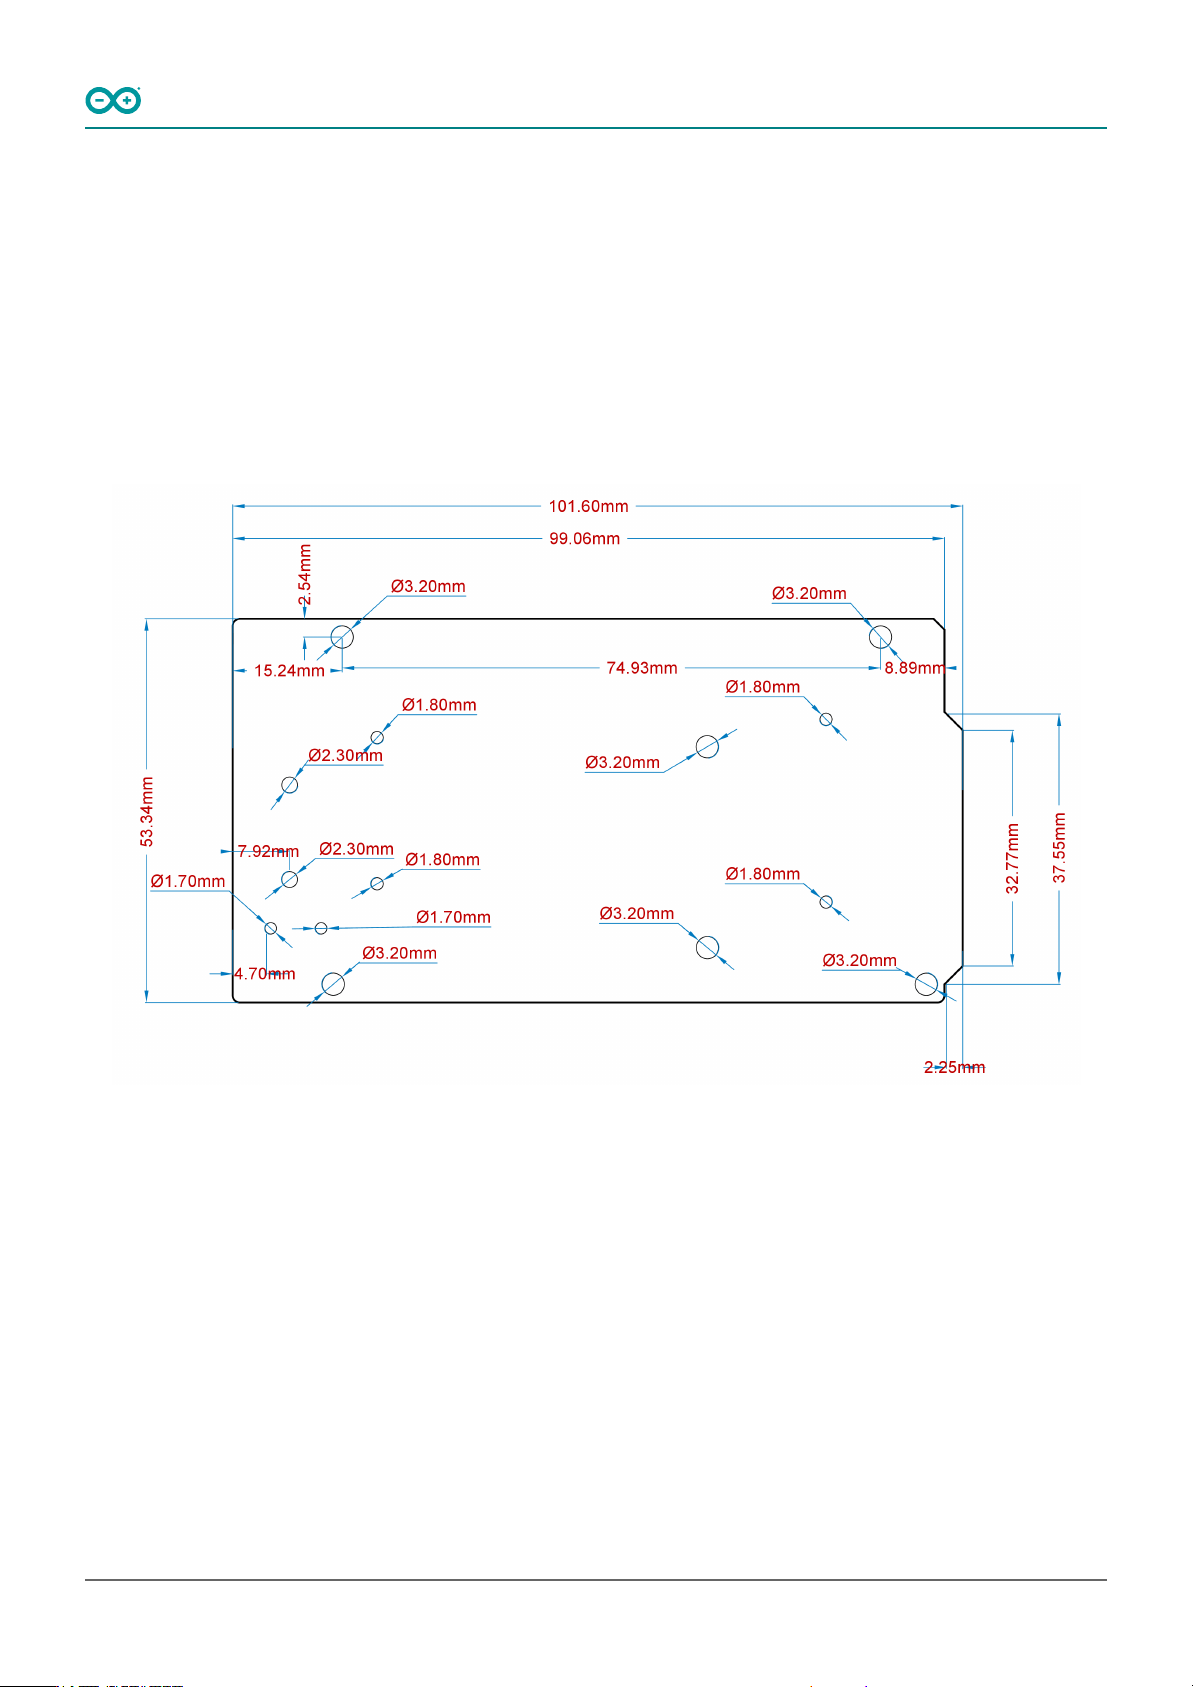
The Arduino Due board outline and mounting holes dimensions are shown in the figure below; all the dimensions
are in mm.
Arduino Due Mounting Holes And Board Outline
Arduino® Due
23 / 50 Arduino® Due Modified: 15/09/2026
8.2 Board Connectors
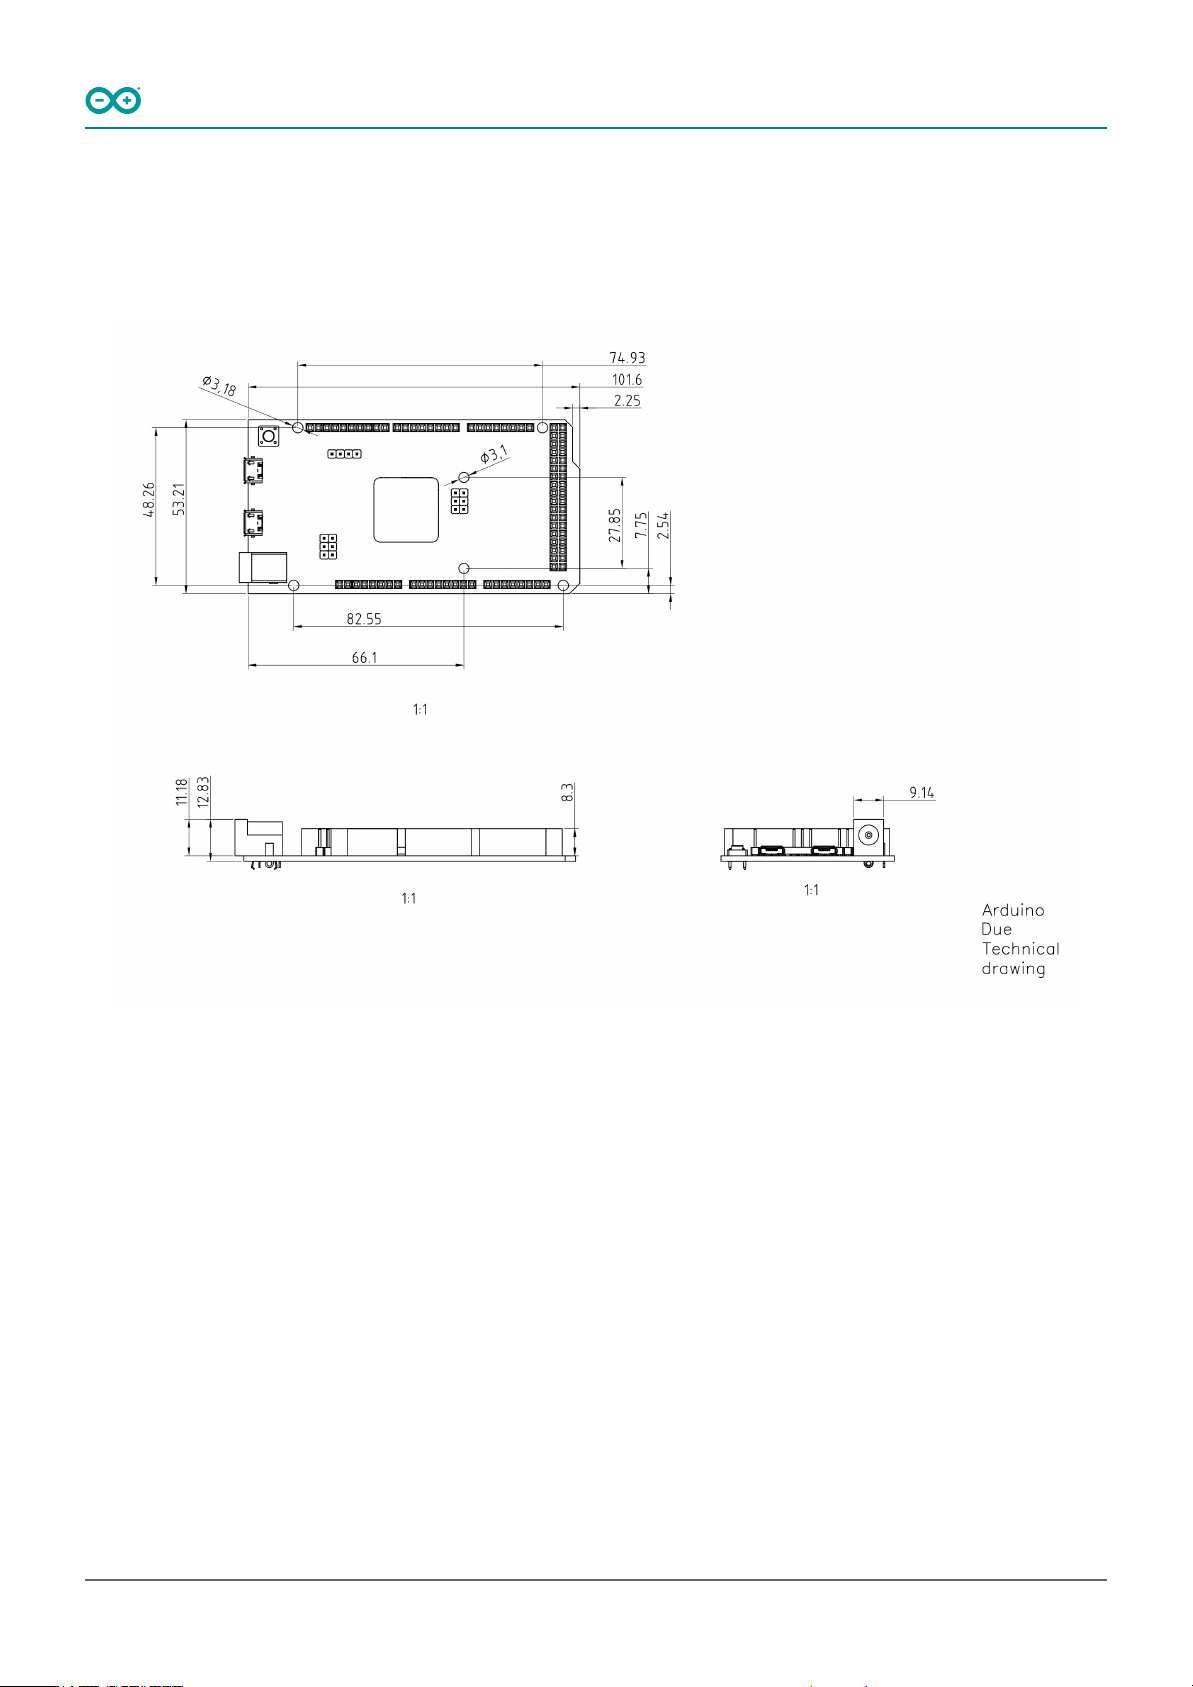
Connectors of the Arduino Due are placed on the left side of the board; their placement is shown in the figure
below. All the dimensions are in mm.
Arduino Due Technical drawing
Arduino® Due
24 / 50 Arduino® Due Modified: 15/09/2026