FUJI CP6 Bulk F3.0 Feeder手册.pdf.pdf - 第18页
Reassembl y • Follow the instructions below to replace the parts that were removed during the foregoing cleaning procedure. • Perform the following procedure exactly as described to prevent unintended alteration of the f…
2. Clean the outer pipe.
• Remove the bolt (B) from the rear surface of the feeder, then remove the lever and
pull the outer pipe upward to remove it. (Be careful not to lose the spring or bend
the small inner pipe when performing this operation.)
• Apply fine compound (#240 or higher) to a cotton swab and carefully remove any
black metal particles.
3. Clean the inner pipe.
• Loosen the two bolts (C), remove the pipe retainer, and pull the inner pipe up to
remove it.
• Apply fine compound (#240 or higher) to a cloth and carefully wipe off any black
metal particles that have accumulated in the area (about 5 mm) around the end of
the pipe. The pipe is fragile, and should be handled with care. The bulk feeder will
no longer be able to supply chips if the inner pipe is bent or the pipe end is
otherwise damaged. Check to make sure the pipe has not been damaged when
cleaning is complete.
4. Clean the pipe retainer.
• Use a neutral cleaning fluid to remove any dust or grease from the pipe retainer
that was removed in the preceding step.
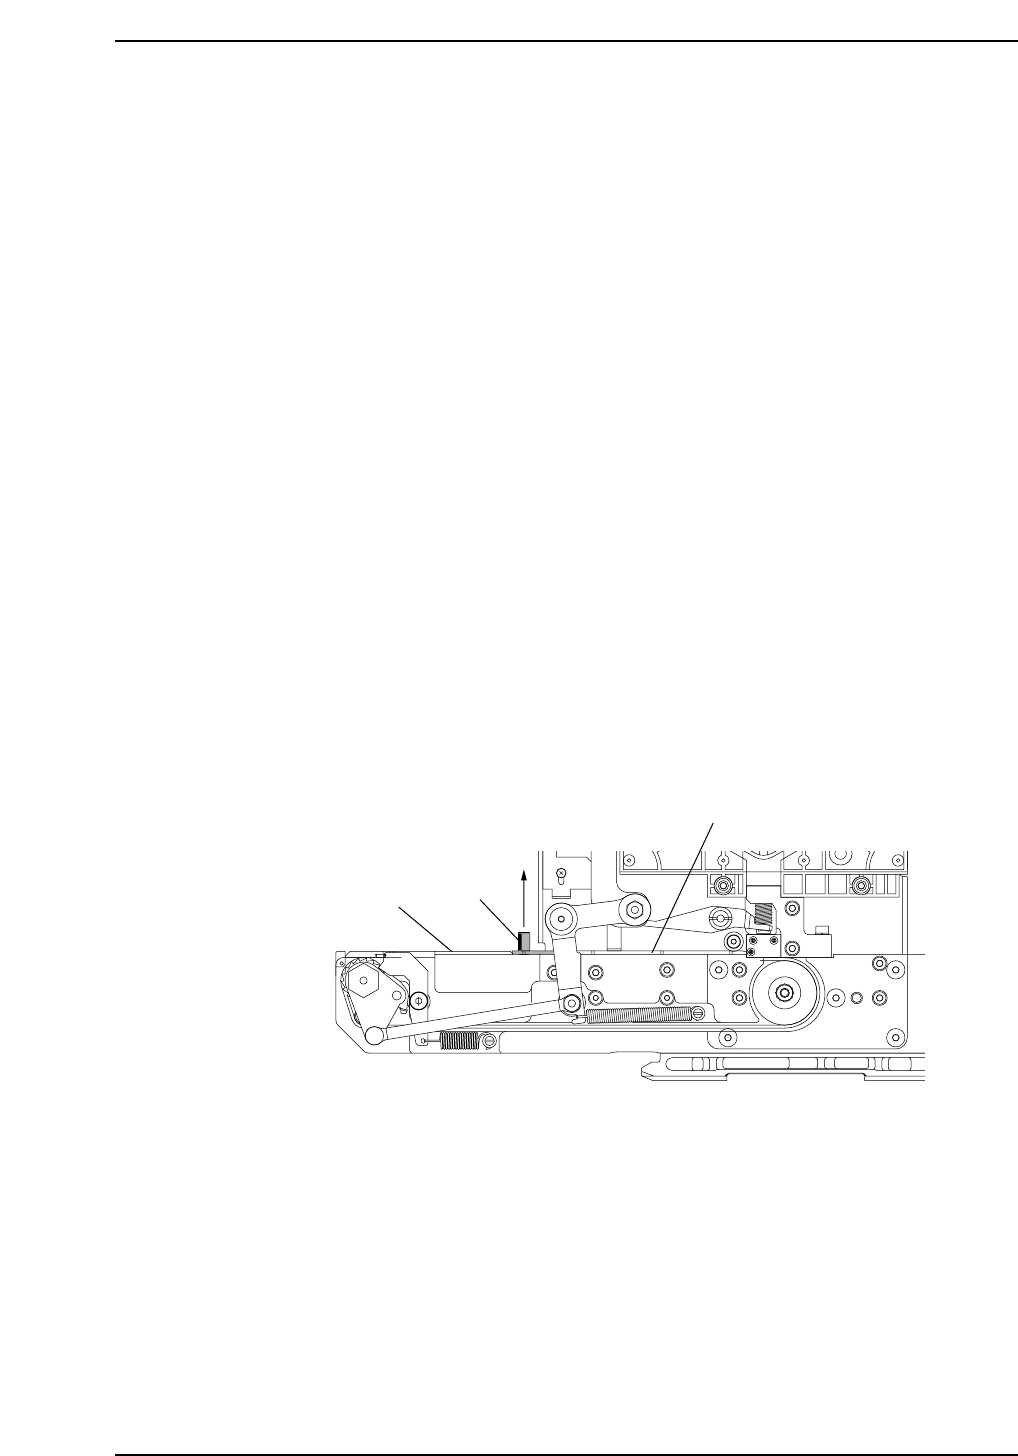
5. Clean the belt covers.
• Manually loosen the bolt (D) that secures the front cover, then pull the bolt
upward to remove front cover.
• Remove the three bolts that secure the rear cover, then remove the cover.
• Use a neutral cleaning fluid to remove any dust or foreign matter from the channel
on the lower surface of each cover. Also, check those surfaces for scratches.
Bolt D
Guide
Belt cover (rear)
Belt cover (front)
Lift to remove.
BF007
Cleaning and Lubrication
Version 3.0 5 CP-6 Bulk Feeder Instruction

Reassembly
• Follow the instructions below to replace the parts that were removed during the
foregoing cleaning procedure.
• Perform the following procedure exactly as described to prevent unintended
alteration of the feeder’s pickup position.
1. Reattach the inner pipe.
• Replace the inner pipe if it has been removed, taking care to orient it correctly. The
pipe end with the larger inner diameter should be on top, so it can be connected to
the hopper; the end with the smaller inner diameter connects to the chute channel.
Insert the pipe all the way, leaving no gap between the inner pipe and the chute
channel.
2. Reattach the pipe retainer.
• Attach the pipe retainer so that it is flush against the reference surface and the
bottom edge is flush with the bottom edge of the feeder.
BF009
Flush with bottom edge of feeder.
Flush against reference surface.
Pipe retainer
Large inner diameter
Small inner diameter
Upper end
Lower end
CORRECT
PIPE
ORIENTATION
BF008
Chute channel
Inner pipe
Insert until flush
Connects to hopper
Cleaning and Lubrication
Version 3.0 6 CP-6 Bulk Feeder Instruction
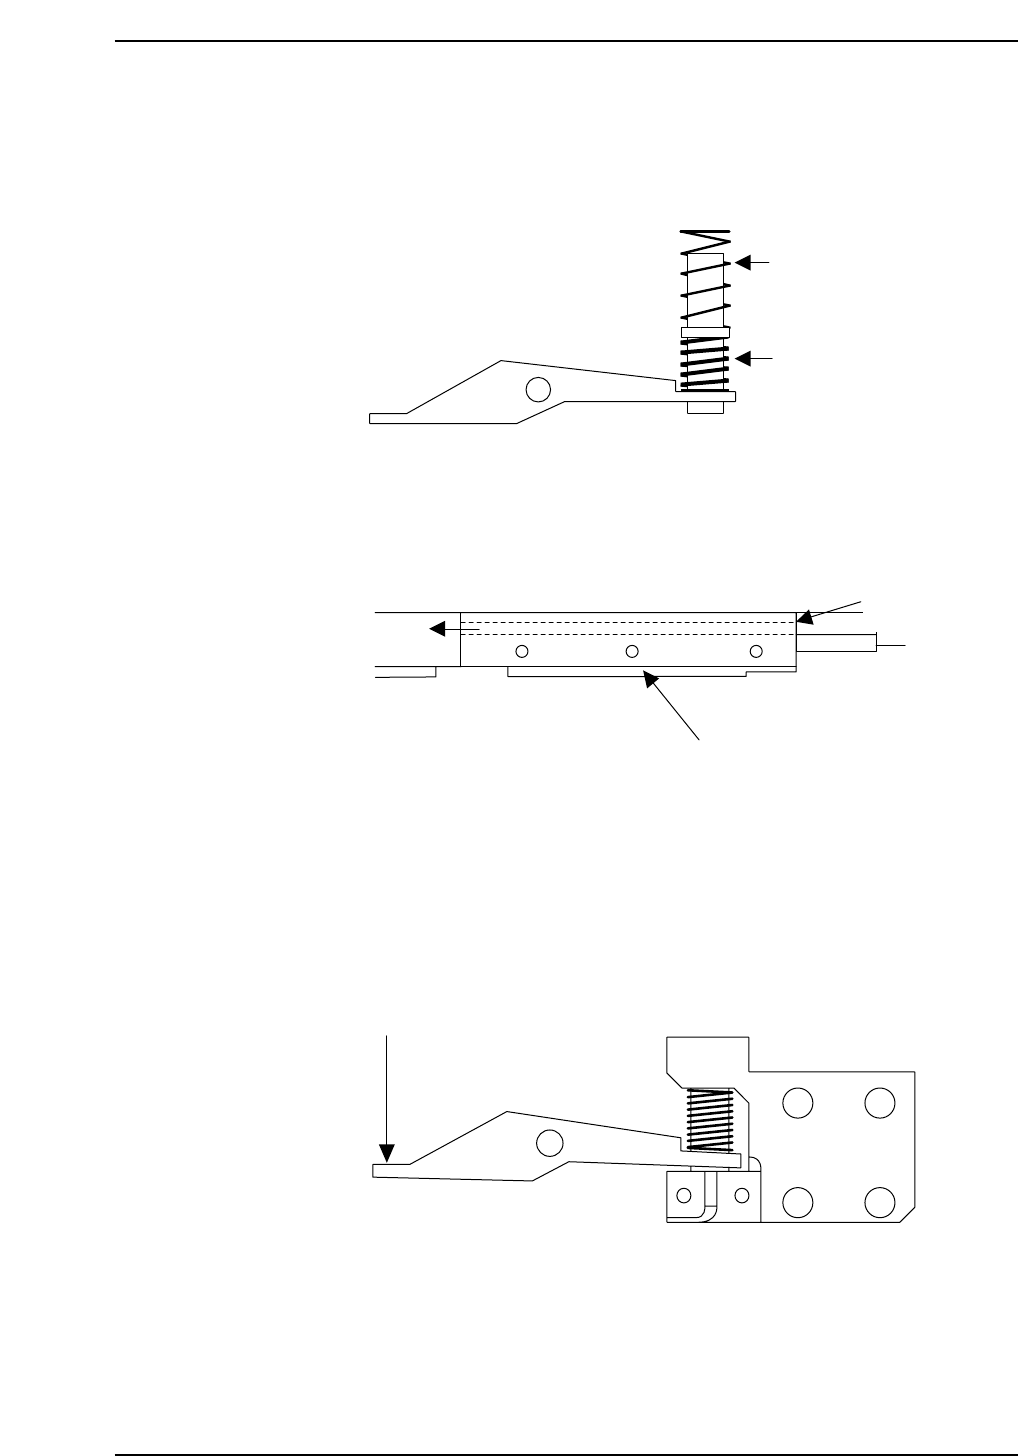
3. Reattach the outer pipe.
• Attach the outer pipe, taking care that the springs are attached at the correct
positions. As shown in the following figure, the spring with the denser pitch
should be attached at the lower end of the pipe, and the spring with the wider
pitch at the upper end.
4. Reattach the rear belt cover.
• Attach the rear belt cover, making sure it is flush against both the protruding edge
on the feeder arm and the front of the chute block.
5. Reattach the hopper.
• Reinsert the bushing in the bottom of the hopper, then attach the hopper to the
feeder by fitting the bushing over the outer pipe.
• Adjust the position of the hopper so it sits squarely on the feeder.
• After attaching the hopper, make sure the outer pipe rises and falls smoothly
when the lever is operated.
Operate lever manually and make sure
the outer pipe rises and falls smoothly.
BF012
Chip feeder direction
Flush against protruding edge.
BF01
Flush against chute bloc
Wider pitch
Denser pitch
BF010
Cleaning and Lubrication
Version 3.0 7 CP-6 Bulk Feeder Instruction